
One of the most highly misunderstood concepts in Photoshop is alpha channels. What are they for and why do we use them? Today we will discuss everything you need to know about Alpha Channels and how useful they are in Photoshop.
Table of Contents
What are alpha channels?
One of the most common uses of photoshop is compositing. Compositing, in turn, is the process of overlaying one image on top of another to create a new image from the stack of individual image elements. When you put one image on top of another, one important factor you need to take into account is the transparency of each pixels.
Alpha Channel contains the transparency value for each pixels and it’s stored alongside the regular RGB channels. You use it to save selections in Photoshop. Black corresponds to what’s 100% transparent, and white 100% visible.
In the example above, the image of the sliced apple would surely have been cut out from its background before being placed onto the final image. This is easy enough to do for one image that is used once.
However, let us consider another example.
Imagine you are a graphic designer or photoshop artist. You pay a monthly fee for stock images that you use in your work. Since the images you use are royalty-free stock, you might reuse a single image across different projects.
However, in this case, it would be both times consuming and data-destructive for you to cut out the background of your image for each individual project. Additionally, should you need to perhaps collaborate with another designer, it would be impractical to share cut-outs– they’re simply too messy.
So what is the solution? Answer: alpha channels.
Typical raster images used on the internet are RGB. That means that the images are composed of three individual images containing information for each primary color channel.

Alpha channels are the fourth category of channels.
They are named after a process called alpha compositing. This technique is used to composite a partially transparent image with another image and is used frequently in the film industry for VFX and fake backgrounds. The precise shape of the transparent region and each pixels’ transparency level is stored in the alpha channel.
This technology is so powerful because it gives you the ability to save selections.
You might already know that the process of creating selections can be very time-consuming. And since clients can be prone to frequently changing their minds — ”Put the object in front of this background, and maybe alter the sky color too”— the ability to save selections to be able to alter them later is extremely useful.
When using alpha channels, the image becomes RGB-A, and the –A channel behaves like a mask: wherever the mask is black, the image is 100% opaque, and wherever the mask is white, the image is 100% transparent.
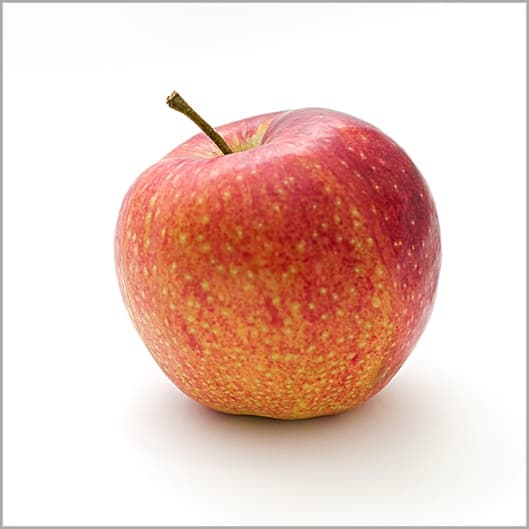
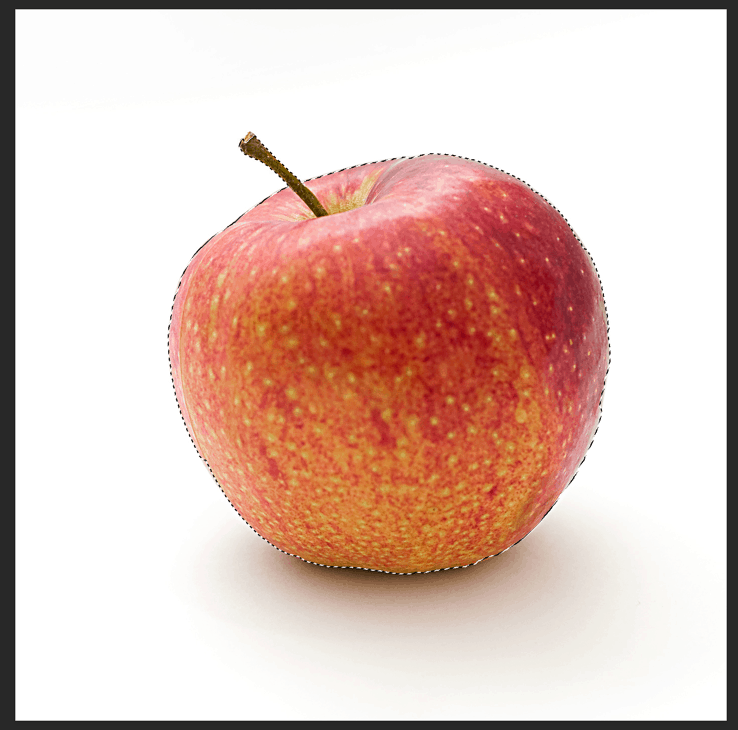
Let us consider the image of the apple again.
Now, let us apply to this image the following alpha channel:

Doing so, the original image now renders like this:
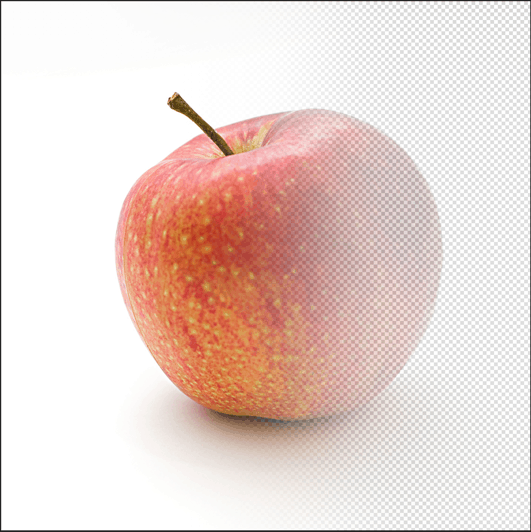
If we add a background, it looks like this:
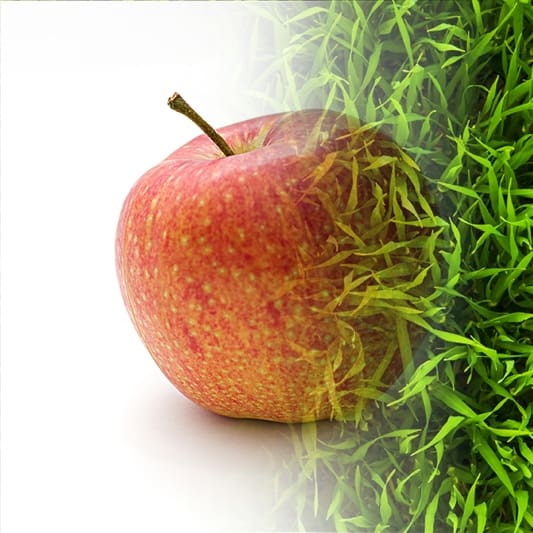
As you can see, using this technique we did not need to perform ANY edits to the picture of the apple and simply left it as it was. With just the application of the alpha channel, we were able to perform a composite of the image with a background of our choice.
This method is extremely useful when working on a large collaborative project wherein you are using the same files as many other people, and any edit to the original would cause a significant disruption in everybody’s workflow. Therefore, creating an alpha channel and sharing it with your collaborators allows them to simply insert it into their project files in a non-destructive fashion.
Let us now take a look at how to create alpha channels inside Photoshop.
How to create an Alpha Channel in Photoshop
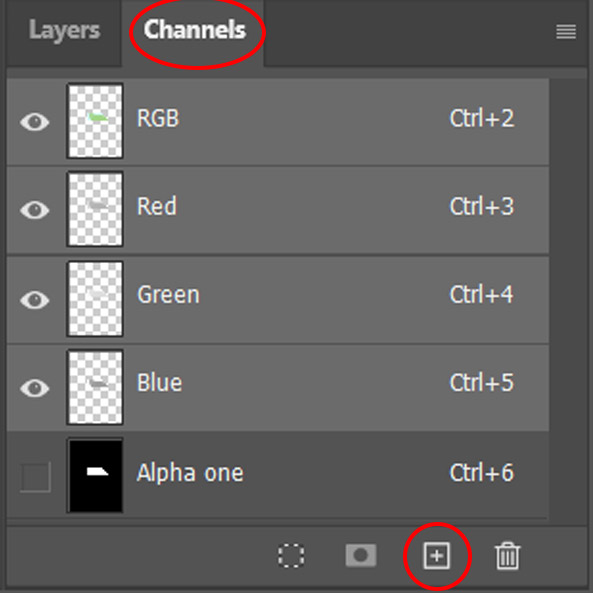
If you want to create a complete new Alpha Channel in Photoshop you need to go to your Channels window and click the “+” icon to add a new channel.
We’re going to continue with the picture of the apple which you can find here to better understand the use of Alpha Channels.
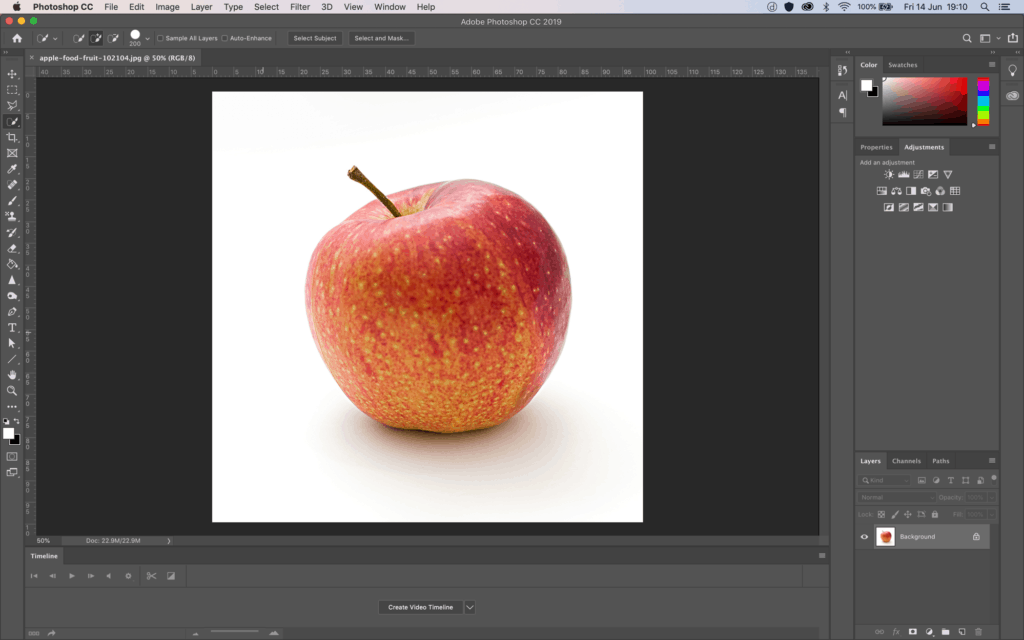
Before we begin you need to have your file open in Photoshop. If you don’t know how to do that, you can find it here.
Step 1: Select The Object you want to Select with Alpha Channel
In the tools palette on the left, select the Quick Selection Tool. You can also select it with the W key.

Now, using the Quick Selection Tool, click on the foreground. A portion of the foreground object will be selected.
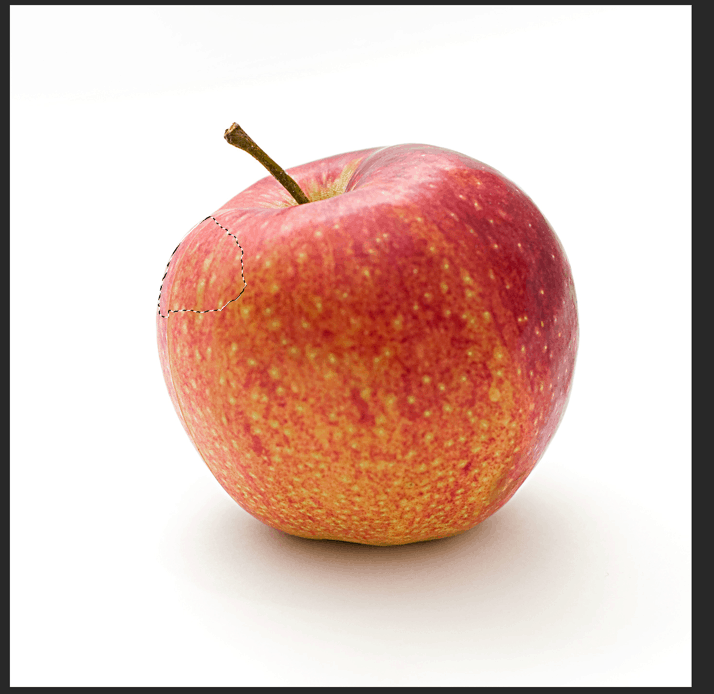
Now, click and drag the mouse cursor across the entire foreground to select it in its entirety. Use [ or ] to change the brush size.
Step 2: Refine Your Selection
Now, hold down the Shift key and in the menu, go to Select > Select and Mask.
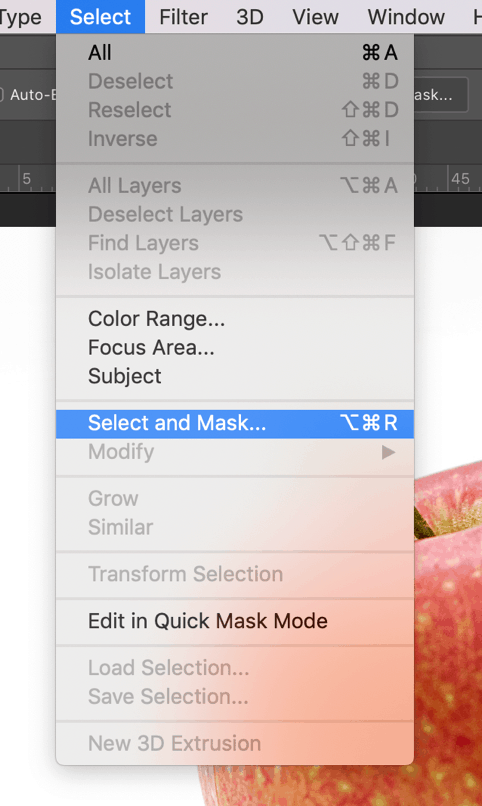
This will open up the Refine Edge tool.

Make sure Smart Radius is checked. Now, increase the Radius, Smooth, and Feather values. You will need to experiment with these values until your selection appears smooth and seamless.
Now click OK.
Fun Fact: The Refine Edge tool creates and performs edits to an intermediary alpha channel for use just inside your project. Who knew?!
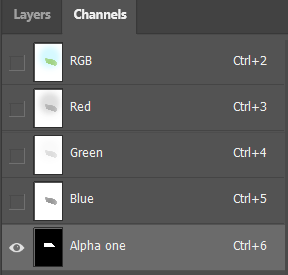
Step 3: Create The Alpha Channel in Photoshop
On the bottom right of your screen is the Layer Mixer panel. Situated just beside it is the Channel Mixer panel. To get to it, click on the tab that says “Channels”.
You will see that the three Red, Green, and Blue channels show up, plus a combined RGB Channel.
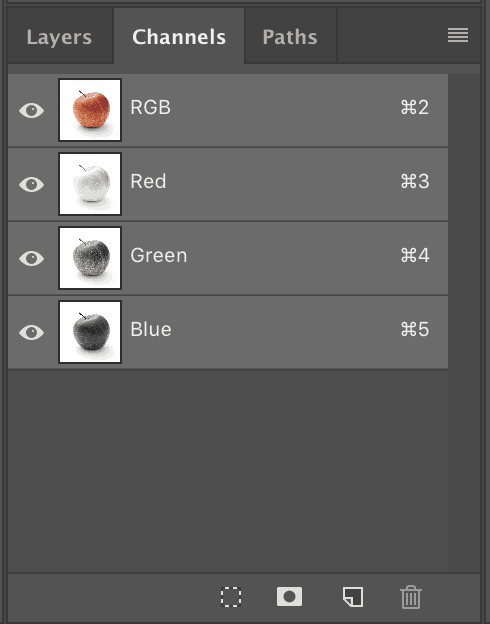
On the bottom right of the Channel Mixer panel, click on Save Selection As Channel while the foreground selection is still active.

Voila! Your alpha channel is now ready! All you need to do to use it is to make sure your image is saved as a PSD, TIFF, PDF, PICT, Pixar, or RAW file as these are the only file types that are able to support alpha channels.
JPEG, BMP, or PNG filed do not support alpha channels as they are usually compressed file types designed to save storage space. Also, note that a single image can have no more than 24 channels.
Hey, I'm a Professional Retoucher making $10k a month thanks to Photoshop.Register to my newsletter to get freelancing tips and a FREE Brush Pack in Bonus! My Newsletter

