Knowing how to navigate a document that you are working on is one of the most important skills to have when it comes to using Photoshop. Zooming in on, scrolling across, or panning along a document is extremely useful, particularly when you want to look closely at smaller details.
In this article, we will take a look at the many methods you can use to zoom in or out of and navigate an image in Photoshop, allowing you to significantly speed up your workflow. Here is an overview of what will be covered:
Table of Contents
- Zooming in Or Out of an Image
- Viewing the Current Zoom Level
- Changing the Zoom Level by Typing
- Using the Scrubby Slider to Zoom
- Using the Options in the View Menu to Zoom
- Using the Zoom Tool
- Using Scrubby Zoom
- Temporarily Accessing the Zoom Tool Using a Keyboard Shortcut
- Using the Scroller Wheel on Your Mouse to Zoom
- Continuous Zoom
- Selecting a Specific Area with the Zoom Tool
- The ‘100%’ View Mode
- The ‘Fit on Screen’ Zoom Mode
- Panning and Scrolling Across an Image
- Photoshop Zoom Shortcuts
There is a video at the end of this article explaining everything step by step, click here to jump directly to it.
If you would like to follow along, all you will need to do is open any image in Photoshop by launching the program and heading to File > Open at the top of the screen.
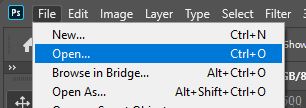
In the window that appears, select any image and open it. For this tutorial, we opened a photo by Mati Mango from Pexels.
Zooming in Or Out of an Image
To begin with, let’s discuss the various ways in which you can zoom in or out of an image in Photoshop. Zooming into an image can let you view it close up, letting you examine the finer details within it. By contrast, zooming out causes the document to become smaller, as if you are viewing it from a position further away.
Viewing the Current Zoom Level
Before we begin thinking about changing the zoom level within our document, we should first discuss the places in which you can see the current zoom level (that is, the percentage that indicates how far ‘zoomed into’ your document you are).
This value is displayed in two different places on your screen: to the right of your file name in the document tab near the top of the screen, and in the bottom left corner of your screen. The two locations are shown below:

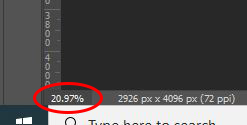
The values are shown as percentages. For instance, you can see that in our example, our zoom level is around 21%.
Changing the Zoom Level by Typing
The zoom level can be changed in many ways, but let’s first discuss how you can change it in the second place we referred to previously- where the current zoom level is displayed.
Let’s head over to the bottom left of the screen and locate the zoom value, as shown below.

Once you have found it, double-click on the number to highlight it.

Then simply type in a new value to indicate the new level to which you would like to zoom. Note that when typing in this value, you do not need to type in a percentage symbol (%) after it, as Photoshop will add this in by default.
After this, go ahead and hit the Enter [Win] / Return [Mac] key on your keyboard to accept the value. You should notice that Photoshop jumps to this new value that you specified straight away. In our case, we changed the value to 10%, so Photoshop zoomed out of the image.
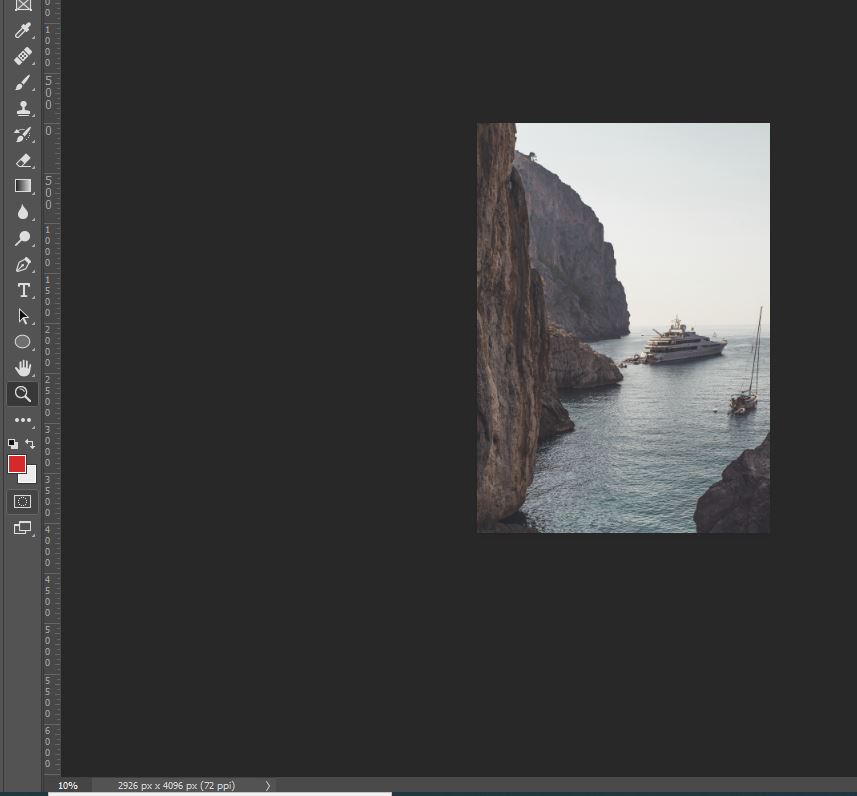
Whilst this method of changing the zoom level in your document is quick and effective, it can start to become inefficient when you want to keep experimenting with a range of values.
Since it requires you to type in a specific value with no preview, this tool can be very inconvenient if you want to test out lots of values, as it would require you to keep repeating the process of clicking on the current value, typing in a new one and accepting it.
Luckily, there is a handy trick to increase the efficiency with which you can work with this tool in these situations.
Click on the zoom value at the bottom of the screen, type in a new one, then press and hold the Shift key on your keyboard whilst hitting the Enter [Win] / Return [Mac] key to accept the new value but keep the zoom level highlighted to try out different values afterwards without having to keep re-selecting the value each time.
Using the Scrubby Slider to Zoom
Before we move on to discuss other locations in which you can change the zoom level within your document, let’s first look at another technique you can use to change the zoom value that’s displayed at the bottom left of the screen.
Whereas before we clicked on the number shown, this time we are going to just hover the mouse cursor over it then press and hold Ctrl [Win] / Cmd [Mac]. You will notice that the cursor icon turns into the ‘scrubby slider’ icon- a hand with an arrow pointing to the left and to the right.
Once this new cursor has appeared, click on the number and hold the mouse key down whilst dragging your mouse to the right or left to increase or decrease the zoom level, respectively.

The value will be changed in 1% increments, which is great for fine-tuning the zoom level within your document and finding the exact value that suits your needs.
However, if you would like to change the value by a larger amount more quickly, then you can press and hold Shift + Ctrl [Win] / Shift + Cmd [Mac] whilst clicking and dragging to change the value in 10% increments.
Using the Options in the View Menu to Zoom
So, let’s now move on and explore other ways by which you can zoom in and out of your document. Another popular method amongst beginners is using the Zoom In and Zoom Out commands in the View Menu.
These can be found by heading along the top of the screen to View > Zoom In or View > Zoom Out.

You can choose either option (in or out) to zoom in or out by specific values up to 3200%- the maximum zoom value that Photoshop allows. The specific zoom levels that Photoshop works through are 25%, 33.3%, 50%, 66.7%, 100% etc, all the way up to the maximum value.
Therefore, clicking the command once will cause Photoshop to change the zoom level to the next specific value as specified above. Each time you choose the option, the zoom level will be changed to the next specific value.
For this reason, this technique can be fairly inefficient when you want to zoom in or out by a significant amount. To avoid having to repeatedly navigate up to the menu bar and choose View > Zoom (In or Out), you can use a keyboard shortcut instead.
Keyboard shortcuts are really useful when working in Photoshop, as they let you complete a command that would usually be carried out by clicking on on-screen elements by simply hitting one key, or a combination of keys, on your keyboard. They are a great way of speeding up your workflow.
You can zoom in quickly by hitting the Ctrl [Win] / Cmd [Mac] key and the Plus (+) key simultaneously, and you can zoom out by pressing the Ctrl [Win] / Cmd [Mac] key and the Minus (-) key.
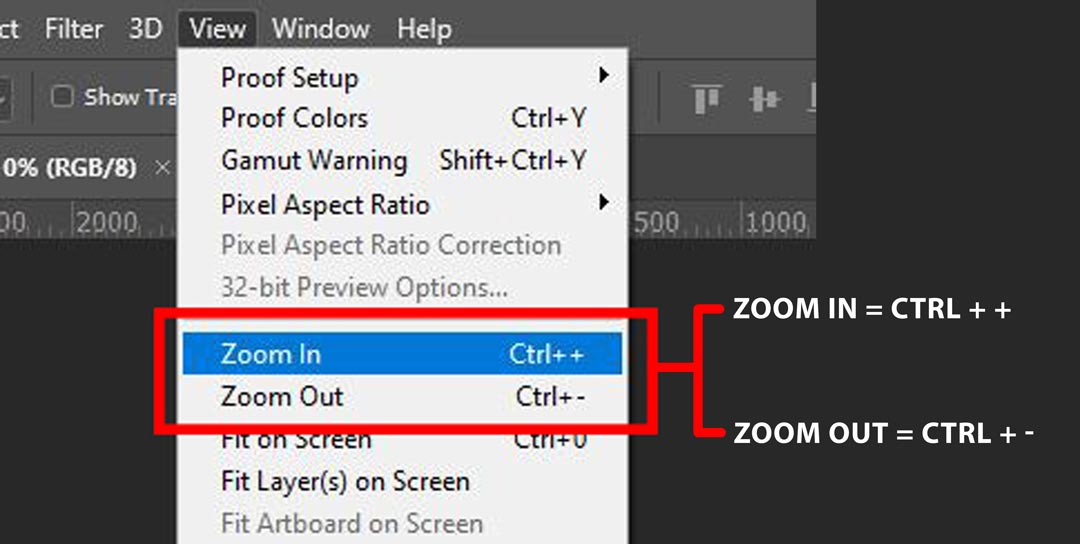
If you forget these shortcuts, they are written to the right of the respective commands in the View panel, as demonstrated below.

Using the Zoom Tool
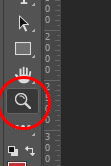
Aside from the aforementioned options that allow you to zoom into or out of a document in Photoshop, there is also a dedicated tool. Photoshop’s Zoom Tool can be selected from the toolbar down the left side of the screen and is represented by the icon shown below (resembling a magnifying glass).
What’s so great about using this tool to zoom rather than the previous methods is that it gives you the control to determine which part of the image we zoom in on. Whilst the previous options have automatically used the center of the image as the anchor point that is zoomed in on, the zoom tool lets you click on any area of the document and zoom into that location rather than the default center.
So, how can we use it? Well, go ahead and select it from the toolbar by clicking on the magnifying glass icon shown above or by hitting the ‘Z’ key on your keyboard.
If you then move your cursor over to the document, you will notice that it changes into a magnifying glass with a plus sign in the middle.
This indicates that the Zoom Tool is active, and that currently, when used, the tool will cause Photoshop to zoom in on any area that you click. It goes to ‘Zoom In’ mode by default.
To use the Zoom Tool to zoom in on an area of the image, therefore, simply position your cursor over the area that you want to zoom in on and click once to just zoom in slightly, or repeatedly to zoom in by a larger amount.
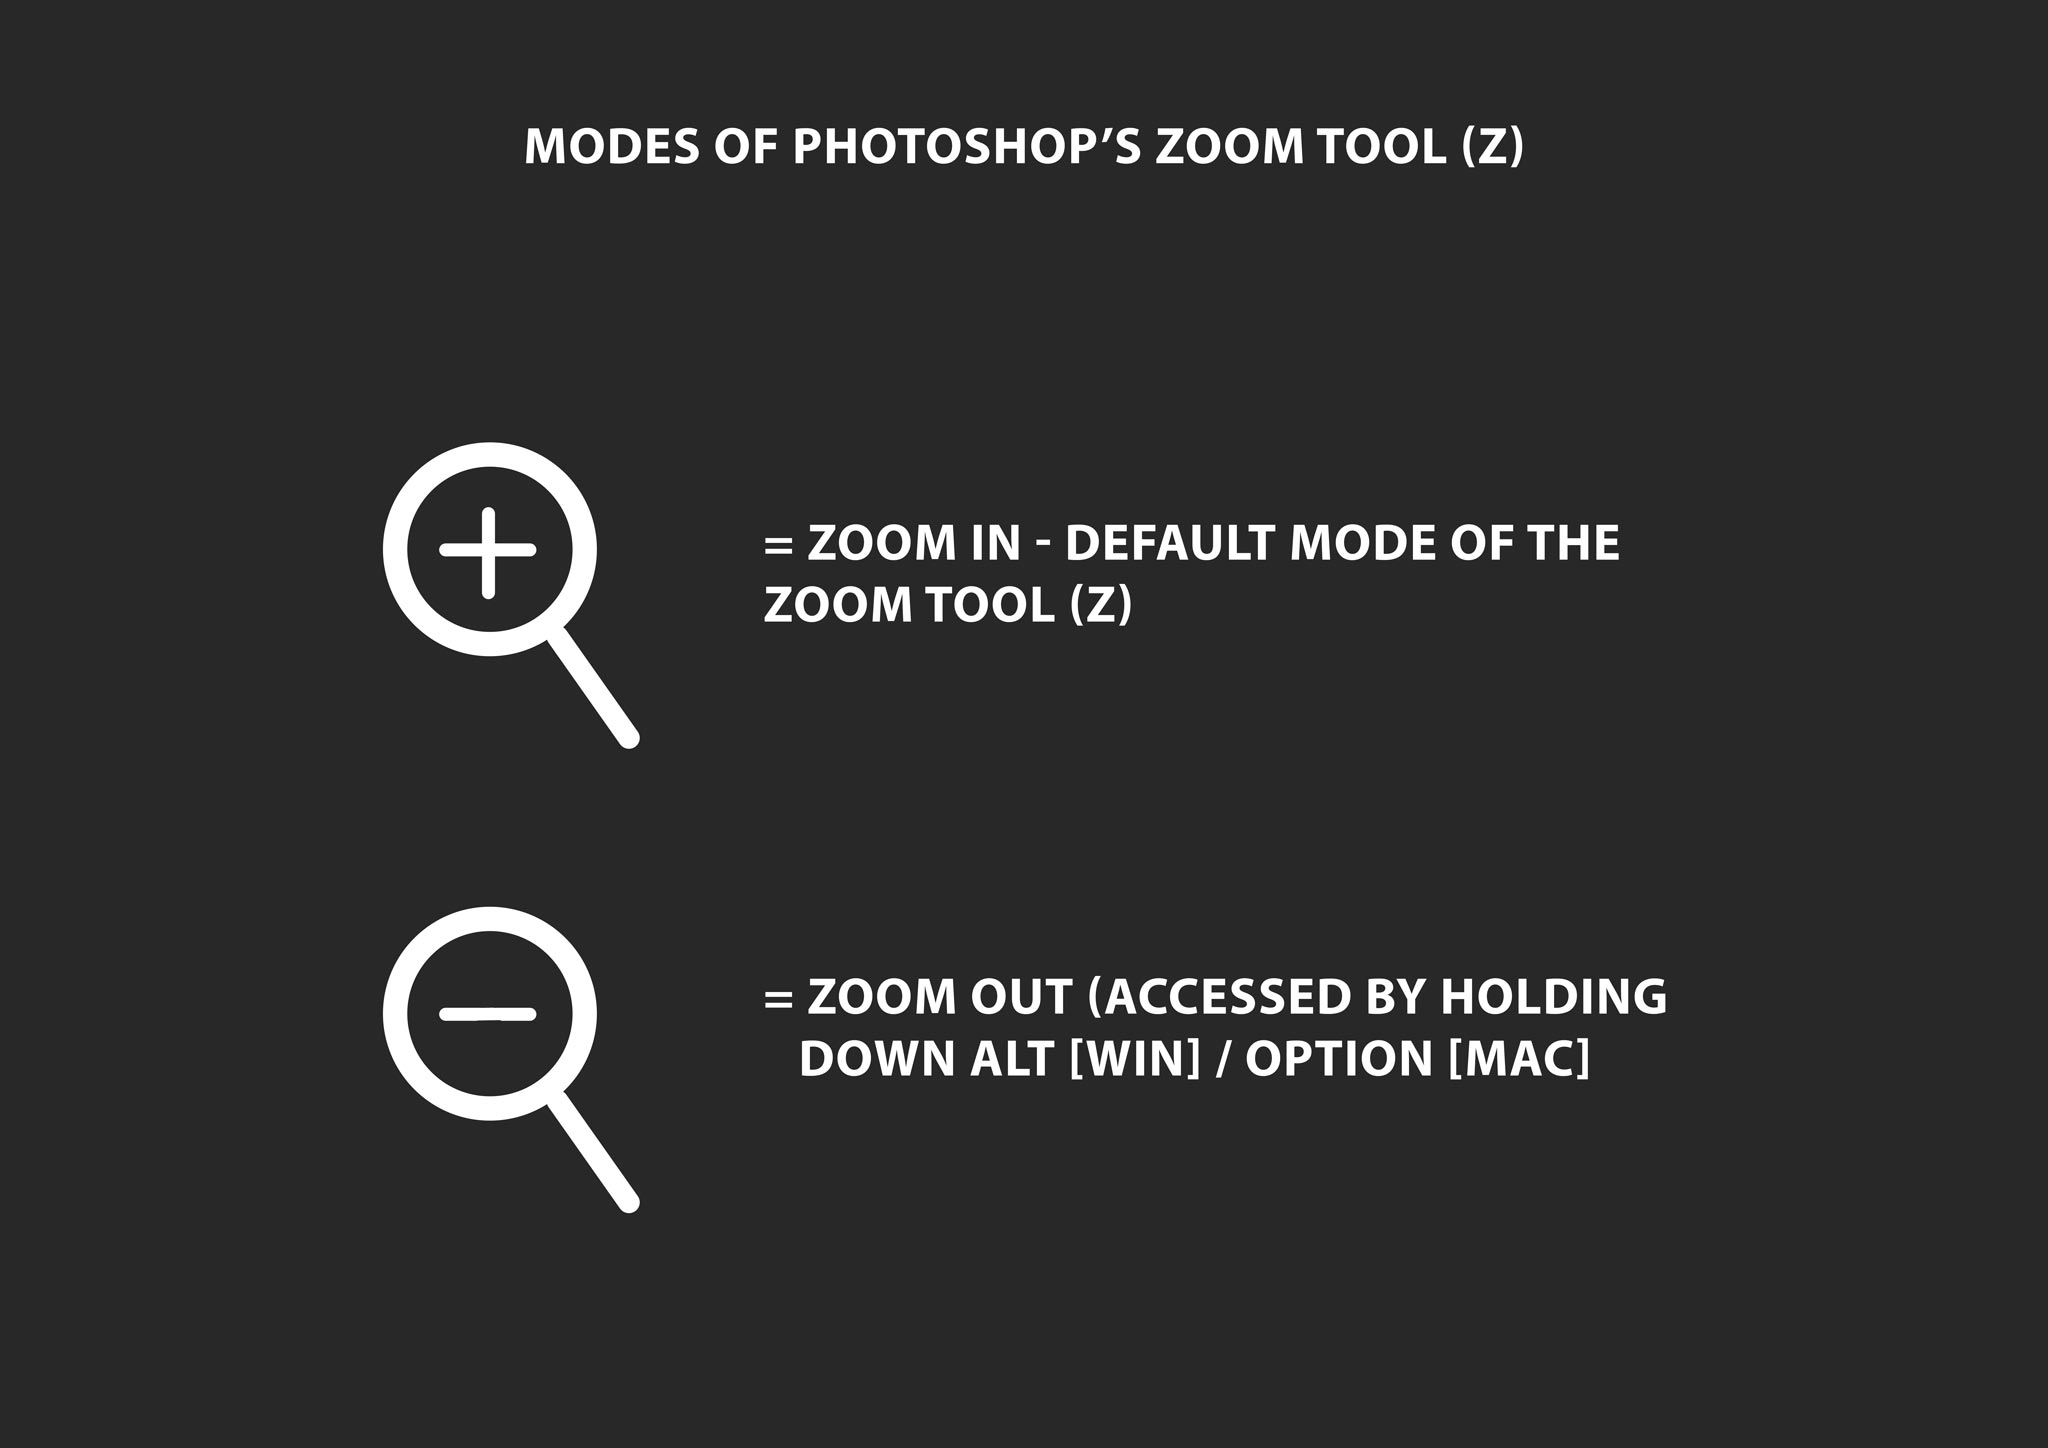
To use it to zoom out of your image and get a wider view of your document, press and hold the Alt [Win] / Option [Mac] key on your keyboard to temporarily switch to ‘Zoom Out’ mode. Whilst you’re holding down this key, every click will tell Photoshop to zoom out of your document. You should notice that the sign inside the magnifying glass in the cursor changes from a plus to a minus.
To switch back to ‘Zoom In’ mode, just release the Alt [Win] / Option [Mac] key.
Using Scrubby Zoom
One of the most efficient and effective ways to zoom in on an area of your document is to use the scrubby zoom option that is offered with the Zoom Tool.
To begin with, you should make sure that the Scrubby Zoom option is enabled. With the Zoom Tool (Z) active, draw your attention to the bar near the top of the screen, where you will see an option entitled ‘Scrubby Zoom’. Next to this title will be a checkbox, which you should make sure is ticked.

Now that the function is definitely enabled, you can go ahead and click on the position within the image that you want to zoom in on and then, keeping the mouse held down, drag the mouse either to the left or right.
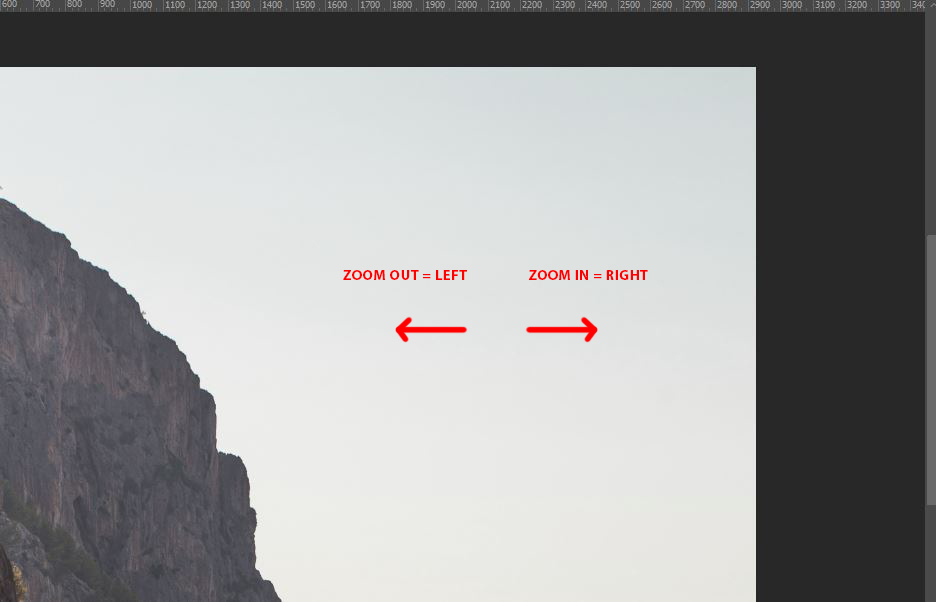
Dragging your mouse to the right will cause Photoshop to gradually zoom in on the specified area, whilst dragging it to the left will allow you to zoom out from the area.
You can control the speed at which Photoshop zooms in on or out of the area by dragging the mouse either slowly or quickly to change the zoom level very slowly and precisely or more quickly and by a greater extent, respectively.
Temporarily Accessing the Zoom Tool Using a Keyboard Shortcut
Whilst the Zoom Tool already allows for a fairly efficient workflow in comparison to the methods that we first mentioned, there are definitely still ways in which we can speed up the process of zooming in on or out of an area.
One way by which we can achieve this is using a keyboard shortcut. When discussing the Zoom Tool, we did mention that it can be selected by pressing the ‘Z’ key. This is useful for selecting the tool quickly, but it can slow us down since we must re-select another tool after using the zoom one- the Zoom Tool remains active until we select a new one.
Luckily, there is a solution! By pressing and holding Ctrl [Win] / Cmd [Mac] + the Spacebar on your keyboard, we can temporarily switch to the Zoom In Tool, allowing us to click on an area of the image, then simply release the keys when we’re done and still keep a different tool active.
To temporarily switch to the Zoom Out Tool, you can press and hold Ctrl + Alt + Spacebar [Win] / Cmd + Option + Spacebar [Mac], click on the area you want to zoom out from, then release the keys once you’re done to deactivate the tool.
Using the Scroller Wheel on Your Mouse to Zoom
You can also change the zoom level in your document using the scroller wheel on your mouse. To do so, hover your mouse cursor over the area you want to zoom in on or out from.
Then, press and hold the Alt [Win] / Option [Mac] key whilst scrolling up or down with the scroller wheel on your mouse to zoom in or out, respectively.
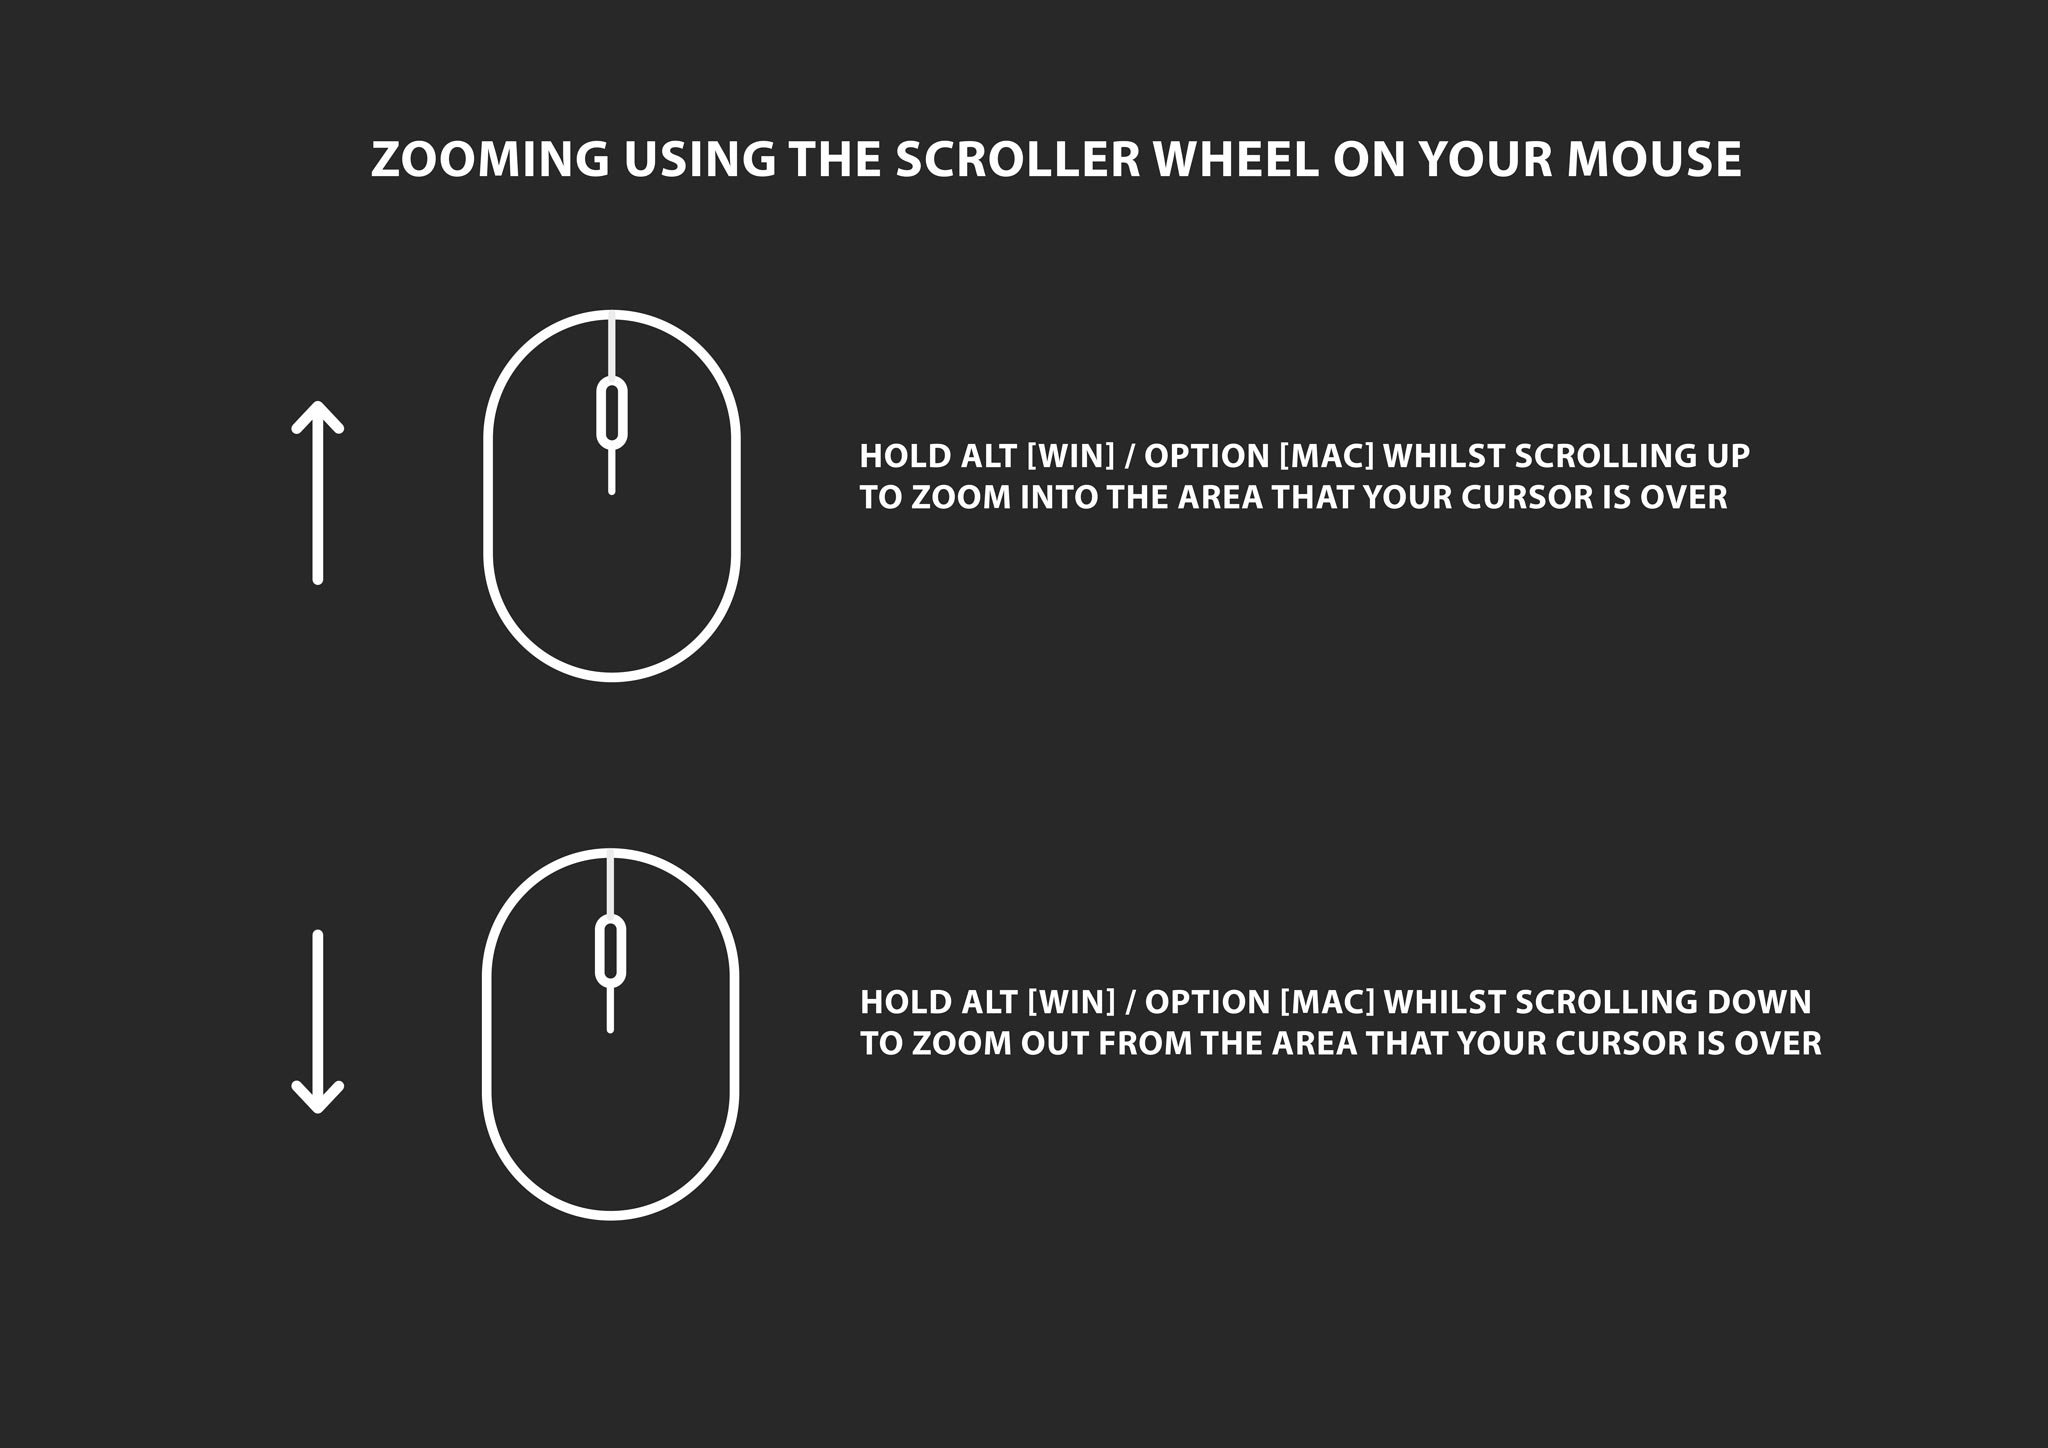
The speed with which you use the scroller wheel will affect how quickly Photoshop zooms in or out of your document. Scrolling quickly will cause a quick zoom, whilst scrolling more slowly will make the zoom more gradual.
The great thing about using this technique is that it works no matter what tool you have selected, so you do not need to switch to a new tool in order to zoom in or out.
Continuous Zoom
Another way to use the Zoom Tool is to use it to zoom into or out of an image continuously rather than in separate increments. This can be done by selecting the Zoom Tool (Z) from the toolbar down the left of the screen, and using it to click and hold on the area you want to zoom into, only releasing the mouse when you’re happy with how far you have zoomed in.
In order to use the Zoom Tool to continuously zoom out, you will need to click and hold the mouse on a particular area of your image whilst holding down the Alt [Win] / Option [Mac] key on your keyboard, releasing the mouse when you’re done.
Selecting a Specific Area with the Zoom Tool
The final way in which you can use the Zoom Tool is by creating a rectangular selection to tell Photoshop the area that you want to zoom in on.
To use the tool in this way, you will need to head up to the top of the screen whilst the tool is selected and disable the option entitled Scrubby Zoom by making sure the checkbox next to the title is empty. If there is a tick in the box, then simply click on it to make the box empty.

Once the Scrubby Zoom option is disabled, click, hold and drag outwards with your mouse in the Document Window to create a rectangle that surrounds the area you want to zoom in on.

This is very much like the technique you would use when using the Rectangular Marquee Tool.
Once you have selected the rectangular area, release your mouse. You should then notice that Photoshop has zoomed in on the area that you specified!
The ‘100%’ View Mode
Photoshop’s 100% View Mode sets the zoom level to 100%. This means that each individual pixel that makes up the image appears as exactly one pixel on your screen.
The view mode can be activated by heading along the top of your screen to View > 100%.
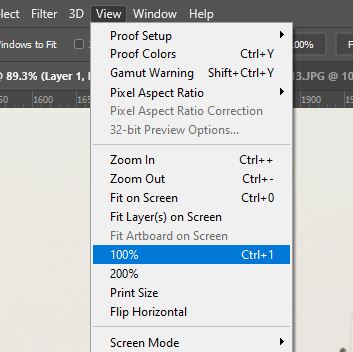
This view is the only one that lets you see the full detail of your document. However, if your image size is greater than the display resolution of your screen, then there will be too many pixels within the image for them to all be displayed at once on your screen.
But don’t worry- there are options within Photoshop that allow you to scroll, or pan, across your document, so you can see other areas of the image in full detail too, just separately. We will cover such options, like the Hand Tool, later.
The ‘Fit on Screen’ Zoom Mode
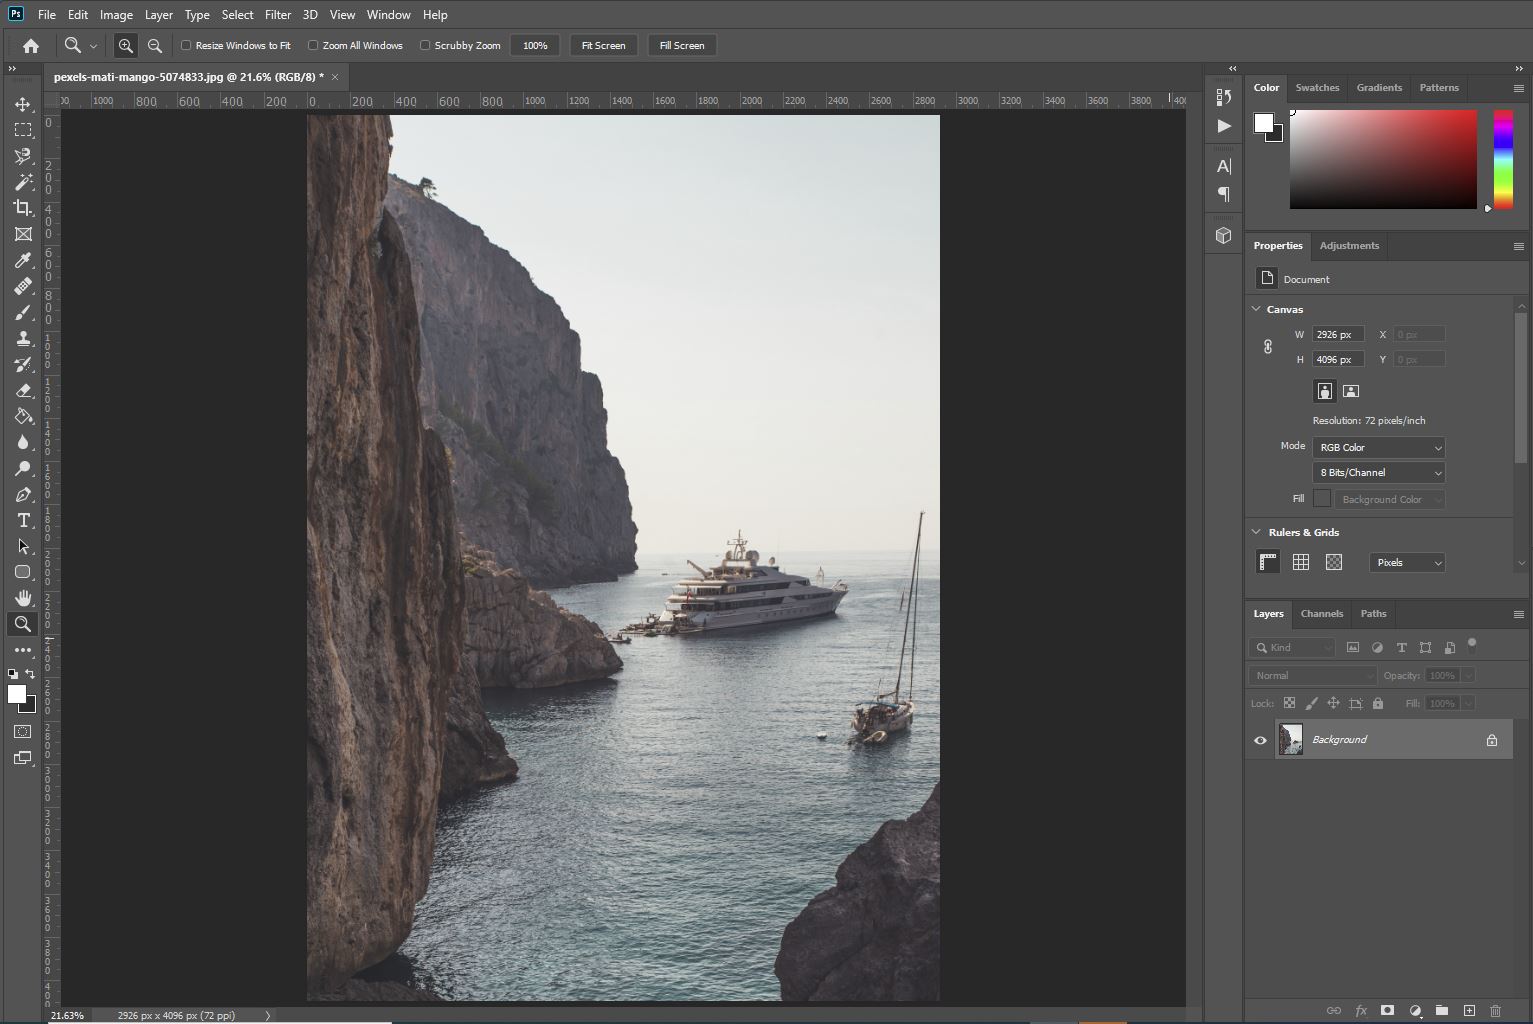
The Fit on Screen mode can be selected by choosing View > Fit on Screen from the Menu Bar at the top of the screen, or by using the keyboard shortcut Ctrl + 0 [Win] / Cmd + 0 [Mac].

It causes Photoshop to automatically set the zoom level to whatever value is necessary to cause the image to fit entirely in the document window whilst appearing as big as possible.
Panning and Scrolling Across an Image
Now that we have covered all the methods you can use to zoom into or out of an image in Photoshop, we can now move onto how you can scroll or pan across the image.
This is particularly necessary when you are zoomed in very closely to an area of your document. Since you won’t be able to see the entire image at once, you will probably have to scroll across your document to view different areas separately. Otherwise, you would just be stuck viewing a single small area of your document.
Using the Hand Tool
The most commonly used technique for navigating and panning around a document involves using the Hand Tool, which can be selected from the toolbar down the left side of the screen by clicking on the icon shown below. It can also be made active by hitting the ‘H’ key on your keyboard.
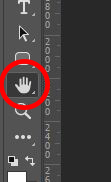
With the tool selected, you can pan around the image by clicking anywhere within the document and holding down the mouse button whilst dragging the mouse around the screen to move around the image in the Document Window.
This will allow you to bring different areas of the image into view at different times.
Temporarily Activating the Hand Tool Using Your Keyboard
Whilst you are now aware that the Hand Tool can be selected using the H button on the keyboard, you might not be aware of the more efficient way to make the tool active.
As we discussed before with the shortcut of ‘Z’ for the Zoom Tool, using H to bring up the Hand Tool will mean that the tool is active until you choose another one from the toolbar, meaning that you have to keep switching between tools which can decrease the efficiency of your workflow.
Instead, you might want to use a shortcut that only temporarily makes the Hand Tool active, meaning that you can use it without having to reselect another tool afterwards.
This can be achieved through the shortcut of pressing and holding the Spacebar on your keyboard, then clicking and dragging your mouse across the document to pan around it, releasing the mouse and the Spacebar once you’re happy with the new view of your document.
Using the Scroller Wheel on Your Mouse to Scroll Across Your Image
Another great way to scroll across your document is to use the scroller wheel on your mouse. What makes this method so good is that it can be used no matter what tool you have selected, meaning that you don’t have to go through the effort of switching between tools constantly.
To use this technique, simply push the scroller wheel up or down to scroll up or down the image. You can also scroll to the right or left by holding down the Ctrl [Win] / Cmd [Mac] key on your keyboard and scrolling down or up, respectively.

Using the Scrollbars to Scroll Around Your Image
Another way to scroll around your image is to use the scrollbars that are beneath and to the right of the Document Window. Although this method is not the most efficient, it is definitely easy to get the hang of and is therefore popular amongst beginners.
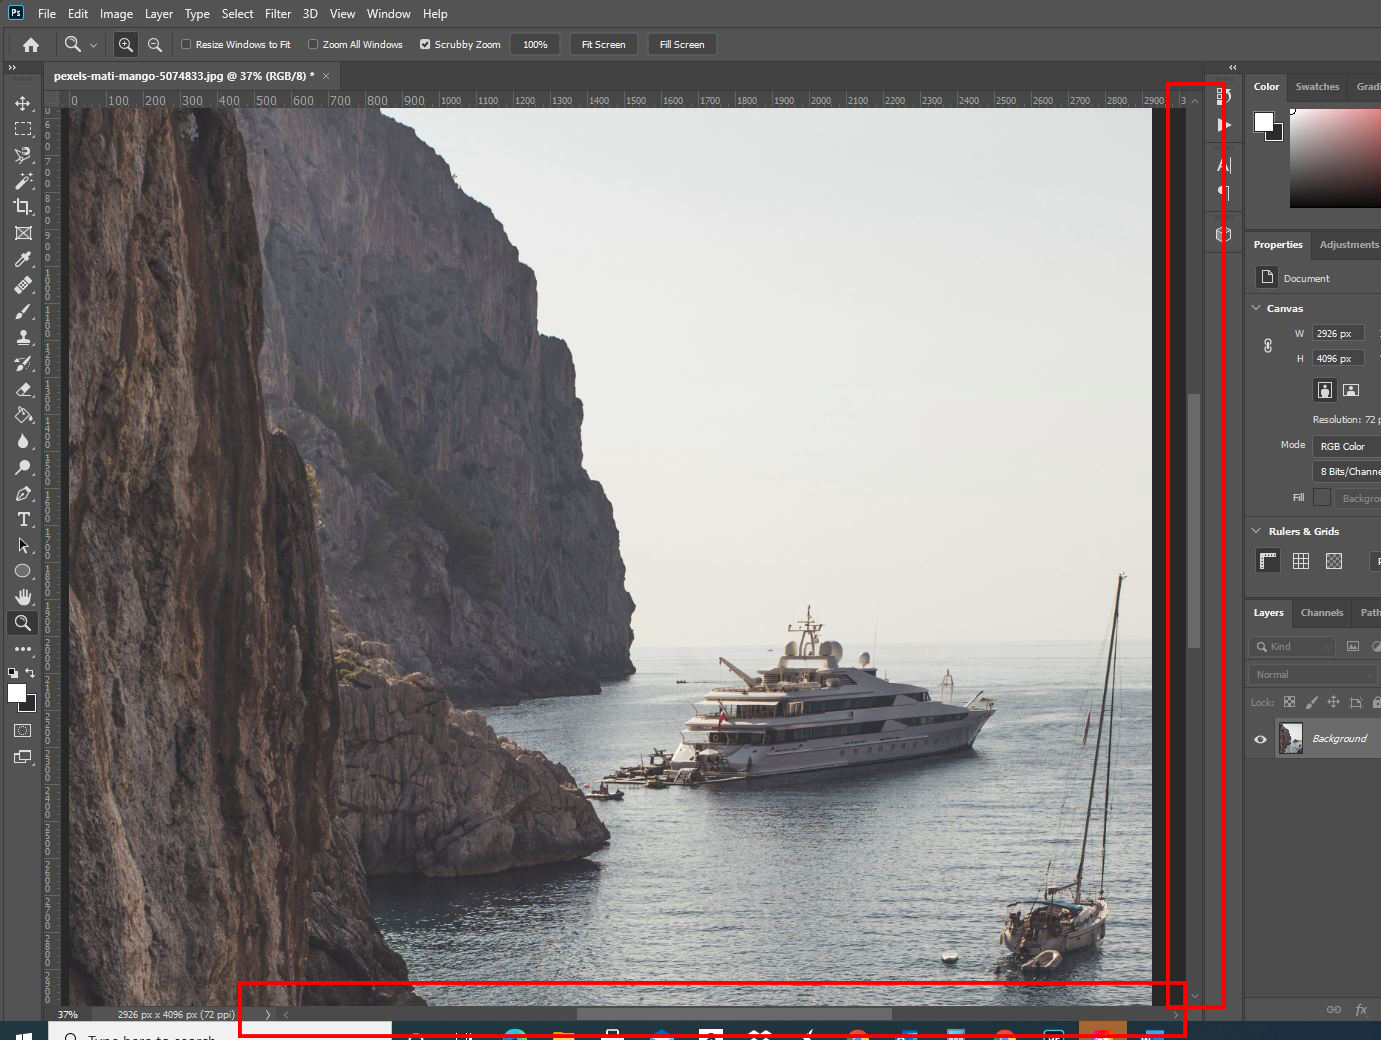
You can use these scrollbars as you would use them in any program, by clicking and dragging the scroller up and down, or along the bar.
Bird’s Eye View
This navigation mode, although less common, can be really useful as it lets you zoom in on and pan across specific areas.
To begin with, press and hold the H key on your keyboard, then click anywhere within the document. Photoshop should zoom out from the image, so that it fits entirely on the screen. Whilst the image is zoomed out, you will see a rectangular box over the image, like the one shown below.

Click on this and drag it to move it so that it sits over the area that you want to zoom in on. Upon releasing the mouse and the H key, you will notice that Photoshop zooms in on just the area that you ‘selected’ with the rectangle!
Photoshop Zoom Shortcuts
So, now you know a whole range of ways in which you can zoom in on, or out of, images, and pan or scroll across your documents. But how can you implement these methods in the most efficient way.
As we mentioned earlier, keyboard shortcuts are often highly effective at maximising the efficiency of your workflow. So, below is a list of all the keyboard shortcuts involved in the processes of zooming and panning in Photoshop:
- Ctrl + + = Zoom In
Photoshop will zoom in by a specific amount each time this is used, working through the zoom levels of 25%, 33.3%, 50%, 66.7%, 100% etc.
- Ctrl + – = Zoom Out
Photoshop will zoom out by a specific amount each time this is used.
- Z = Zoom Tool
Photoshop will make the Zoom Tool active. The tool is represented by a magnifying glass icon in the toolbar.
- Alt [Win] / Option [Mac] + Zoom Tool = Zoom Out
Pressing and holding the Alt [Win] / Option [Mac] key whilst the Zoom Tool is active will cause the tool to let you zoom out rather than only allowing for the default zoom in.
- Ctrl + Spacebar [Win] / Cmd + Spacebar [Mac] = Temporarily Switch to the Zoom Tool
This shortcut will let you temporarily switch to the Zoom Tool on ‘Zoom In’ mode until the keys are released.
- Ctrl + Alt + Spacebar [Win] / Cmd + Option + Spacebar [Mac] = Temporarily Switch to the Zoom Tool on ‘Zoom Out’ Mode
This shortcut lets you switch temporarily to the ‘Zoom Out’ mode of the Zoom Tool until the keys are released.
- Alt [Win] / Option [Mac] + Scroll Up = Zoom In
This causes Photoshop to zoom into the area over which your cursor is hovering.
- Alt [Win] / Option [Mac] + Scroll Down = Zoom Out
This shortcut causes Photoshop to zoom out from the point that your cursor is hovering over.
- Ctrl + 1 [Win] / Cmd + 1 [Mac] = 100% View Mode
This keyboard shortcut causes Photoshop to set the view mode to 100%, meaning that every pixel in the image is represented by a single pixel on the screen.
- Ctrl + 0 [Win] / Cmd + 0 [Mac] = Fit on Screen Mode
This causes Photoshop to set the zoom level to the specific value that makes the image appear as big as possible whilst still fitting the whole image on the screen at once.
- H = Hand Tool
Pressing this key makes the Hand Tool active.
- Spacebar = Temporarily Activate the Hand Tool
If you press and hold the Spacebar whilst clicking and dragging across the screen, you can temporarily switch to the Hand Tool to pan across the document.
- Press and Hold H = Bird’s Eye View
By pressing and holding the H key on your keyboard then clicking anywhere on the document, you can enter Bird’s Eye View Mode, which lets you select a rectangular area to zoom in on.
BONUS
And that is about all there is to know about zooming in on or out of and panning across images in Photoshop!
Want to find out more about the techniques discussed in this article? Then check out this video by Adobe Care which demonstrates some of the methods.
Hey, I'm a Professional Retoucher making $10k a month thanks to Photoshop.Register to my newsletter to get freelancing tips and a FREE Brush Pack in Bonus! My Newsletter

