

Photoshop offers many techniques when you want to remove objects from a photo.
Having distracting aspects in a photograph is something that happens all too often for photographers. Whether you want a ‘human-free’ landscape, or you want to remove a ‘photo-bomber’, Photoshop is the answer to all your problems.
This article will act as a complete guide to teach you all you need to know in order to remove any objects from an image in Photoshop.
So, let’s get started!
Table of Contents
Use the Content-Aware Fill to Remove Objects
This method is by far the simplest of them all and can sometimes be the most effective. It works by filling a selection with content instead of color and works the best with simple backgrounds.
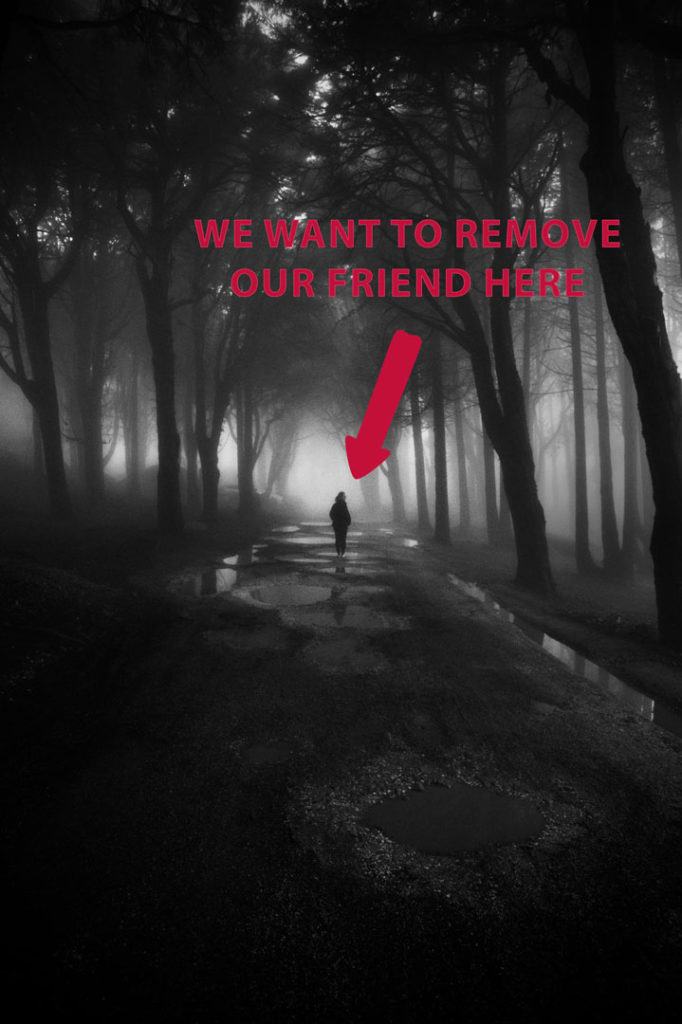
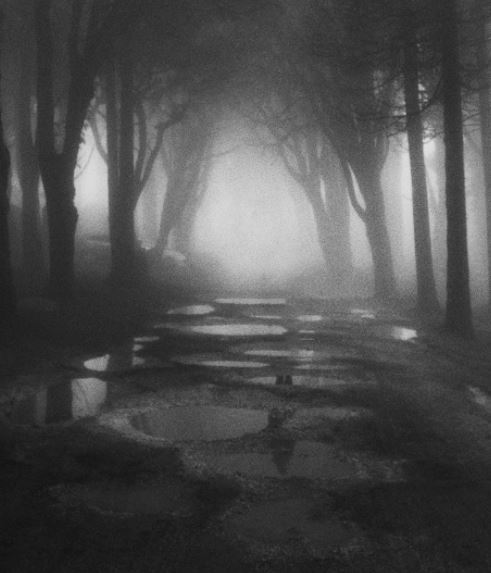
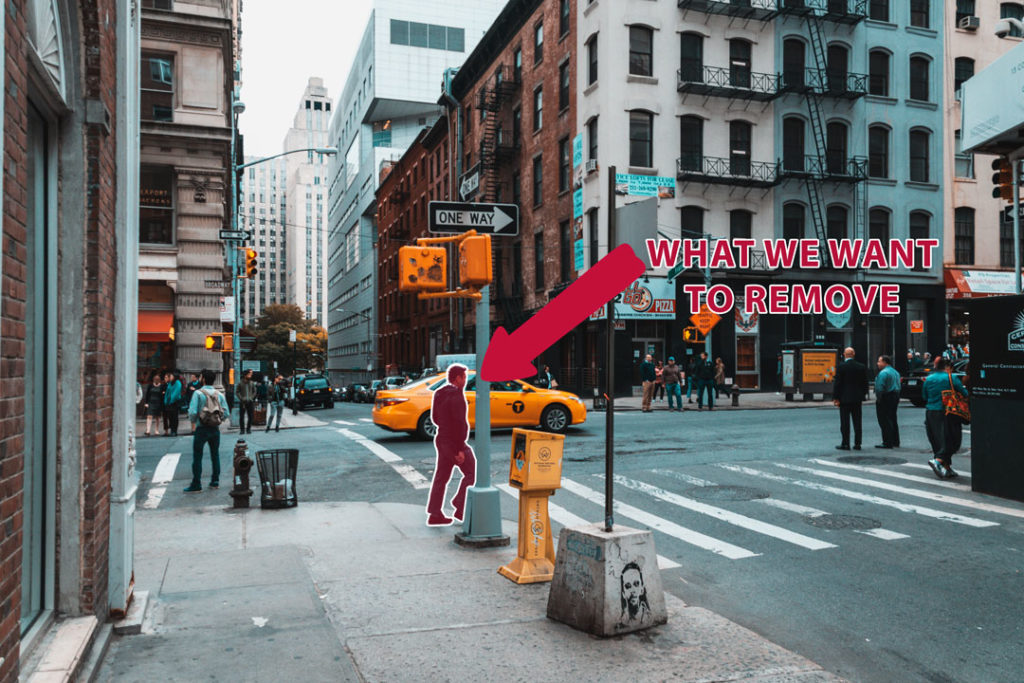
Let’s take this first example, a photo by João Cabral from Pexels. And we want to remove the person in the middle as we’re looking for a mystical ambiance.
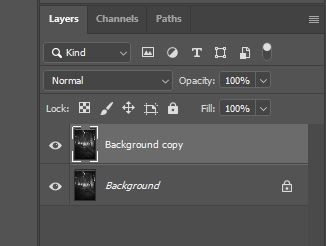
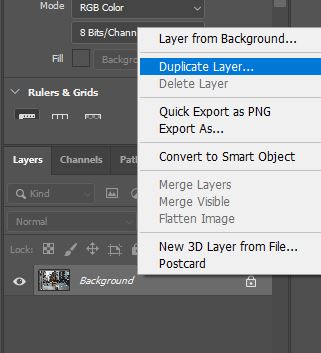
For this method, we’ll be wanting, as always, to work in a non-destructive way. So, to preserve the original image, we’ll duplicate it and work on the duplicated layer, so that if anything goes wrong, we’ll still have an unedited version of the image to go back to.
So, once the image is open in Photoshop, go ahead and right-click on it in the Layers Window and select Duplicate Layer from the list that appears.
You can also use the shortcut CTRL + J.

You should now see that there are two copies of the layer in the Layers Window– the original and the Duplicate.
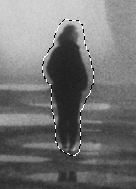
The next thing to do is to select the object that you want to remove.
This doesn’t have to be an exact selection, just make sure that it includes the entirety of the object that you want to remove, whilst trying to keep as much of the background as possible not selected.
As we’re just making a rough selection, let’s use the Lasso Tool.
It can be selected from the toolbar down the left of the screen by clicking on the icon shown below and is really good when it comes to making rough but quick selections.

With the tool selected, click and hold down your mouse whilst drawing a closed loop around the subject to represent the perimeter of the selection, like below.
Related Guides:
How to Select and Change Colors in Photoshop
How To Remove All Of One Color In Photoshop
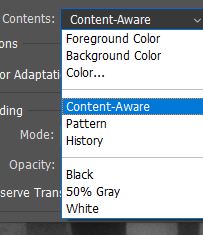
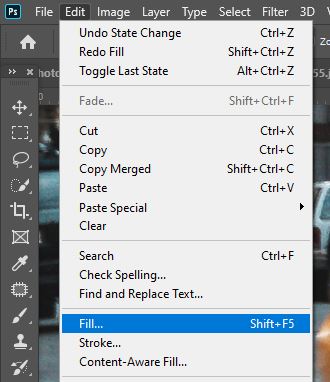
When the selection is complete, you’ll see that the solid line has turned into a line made up of moving dots. At this point, head to Edit > Content-Aware Fill.
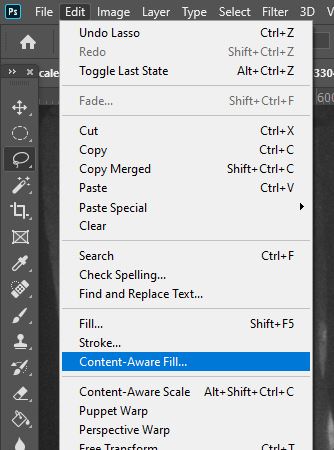
Alternatively, you can press Shift + Backspace [Win] / Shift + Delete [Mac] to bring up the Fill Dialog Box, and make sure that ‘Content-Aware’ is selected in the Contents dropdown.
The way this tool works is like magic.
It will automatically analyse the surrounding pixels within seconds and generate an informed fill of the area you selected, getting rid of whatever distraction it was that you wanted to hide.
If you have a reflection in your image as we do, then simply repeat the process in the areas containing a reflection that you want to get rid of.
Or you can keep reading and check the following methods we’re going to show you to delete elements with Photoshop.

Use the Patch Tool to Delete Objects
This method is a step up from the Content-Aware Fill in the previous method.
The tool gives us more control since we select the pixels that Photoshop uses to make an informed fill, rather than letting the program do all the work automatically.
This time, we’re going to use a photo by Ibadah Mimpi from Pexels.

As usual, you want to first duplicate your layer with CTRL + J or right-click on your layer and duplicate it.
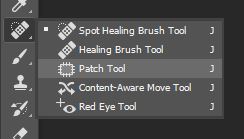
For this method, we’re going to use the Patch Tool, which is typically used to cover up larger sections of images.
It’s hidden under the Spot Healing Tool down the toolbar at the left, so it can be selected by right-clicking on the icon shown below and selecting ‘Patch Tool’ from the list that comes up.
Once you’ve chosen the right tool, you should see an options bar that appears along the top of the screen, in which you can set the properties of the tool. Here, make sure that ‘Normal’ is selected in the Patch dropdown, and that ‘Source’ is also selected.

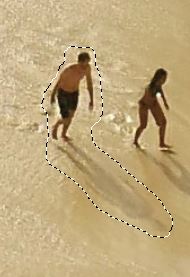
Using this tool will also involve making a selection around the area that you want to remove. So, go ahead and click and drag with your mouse around the unwanted object to create a closed-loop.
With the selection active, zoom out and identify an area that you want to sample from and use as a replacement for the area that you want to remove.
Then, click and drag the selection over to the area you want to use as the source, like below.
Once you’re happy, release the mouse and press Ctrl + D [Win] / Cmd + D [Mac] to deselect the selection.
You can see that there’s now a gap where the man was before, that has been filled with a manually selected background of duplicated pixels.
Then you can just repeat the process until you’ve cleared the photo of any unwanted elements!

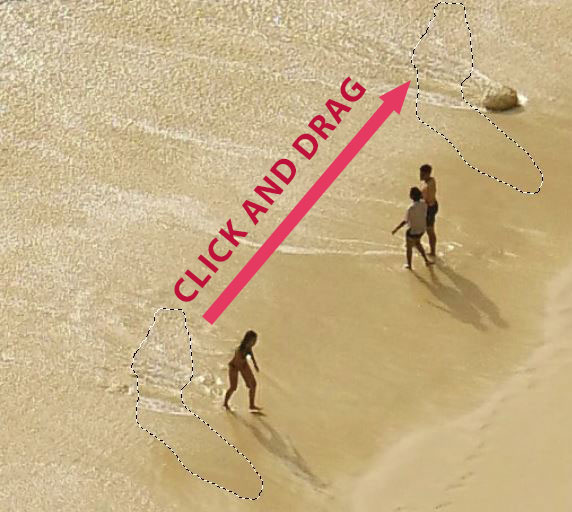
How to Remove Objects in Complexe Images
This method will take a longer time but will undoubtedly yield the most professional results. The advantage of using this method is that your subject, or the part of the image that you really want to keep, will always be separated from the rest of the photo and will sit at the top of the layers.
That way, you can be sure that it won’t be affected and no areas of it will be accidentally hidden.
For this method, we used an image by Matthis Volquardsen from Pexels.
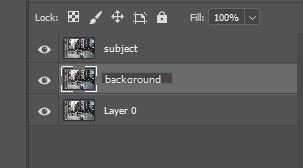
Once you’ve opened your image, you’ll want to go straight to the Layers Window where we’ll right-click on the layer and choose Duplicate Layer from the list that appears. Do this twice.
Having two copies of the layer allows us to always have an unedited version of the image to go back to if we make a mistake, and we’ll need three layers so that two of them can be changed into layers dedicated to the subject and the background.
For organisational purposes, double click on the titles of the top and middle layers to name them ‘Subject’ and ‘Background’, respectively.
In the Layers Window click on the layer entitled ‘Subject’ in order to make it active. We’re going to create a selection to use as a layer mask that will isolate the subject on this layer so that we can separate it from the rest of the image.
So, choose the Quick Selection Tool from the toolbar by clicking on the icon shown below.

Then, click and drag over your subject to create a selection of it. You can use the square bracket keys on your keyboard to change the size of the brush.
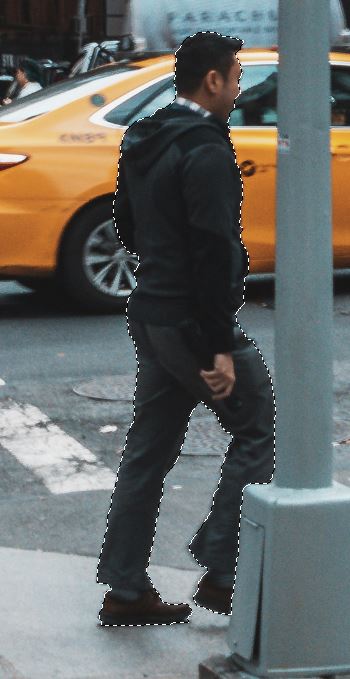
If the Quick Selection Tool isn’t giving you the perfect selection, you can manually adjust it with the Lasso Tool.
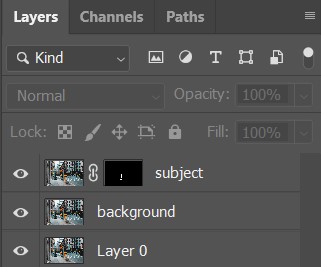
Once you’re satisfied with the selection, head over to the Layers Window and click on the New Layer Mask icon, as shown below. This will turn your selection into a layer mask that just makes your subject visible and hides the rest of the image on that layer.

Your layer panel should look like this:
Now that we’ve created a layer containing just the subject, we’re going to also create a layer containing only the background.
Hold down Ctrl [Win] / Cmd [Mac] on your keyboard and click on the layer mask of the subject layer in the Layers Window. This will load the selection that we made previously.
Then, head to Select > Modify > Expand and input a value of around 7 pixels. Note that the most suitable value will vary depending on the size of your image.
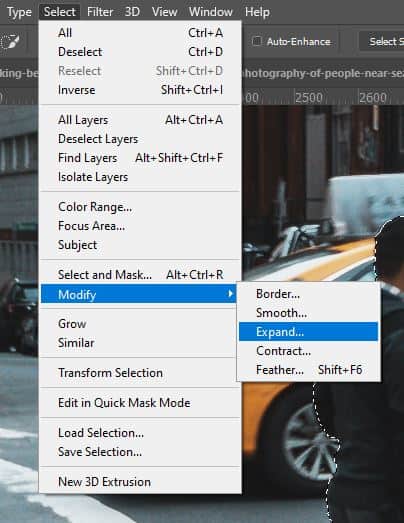
You should now be able to see that the selected area has literally ‘expanded’, and there should be some sort of gap between the subject and the outline of the selection.

For the next step, you’ll need to make sure that the layer entitled ‘background’ is active, by clicking on it in the Layers Window.
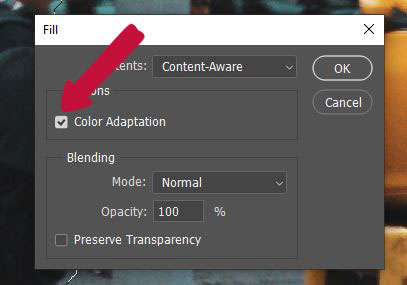
We can then bring up the Fill Window by pressing Shift + Backspace [Win] / Shift + Delete [Mac] or choosing Edit > Fill from the top of the screen.
In the options window that opens, set the Contents to ‘Content-Aware’ from the dropdown menu, and tick the ‘Color Adaptation’ option. Then click OK.
When you make the top layer invisible, by clicking on the eye icon next to it in the Layers Window, you should see that the subject has been removed from the layer, and Photoshop has made an effort to create an automatically generated fill of the area where it was, informed by the surrounding pixels.

It doesn’t matter if this isn’t perfect, is just to have a base to start with.
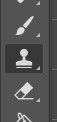
Now you want to use your Stamp Tool to manually adjust your image.
You can also use the processes discussed in the previous methods (content-aware fill and the patch tool) to get rid of all the unwanted elements of your image.
It’s a time consuming process but it’s the one that will have the best result in my opinion.
At the time of writing this article (January 2023), I saw several people using AI tools to automate this step. For example, PiXimperfect shows you how to use Dall-E to remove anything in your photos in this video.
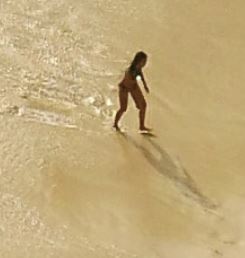
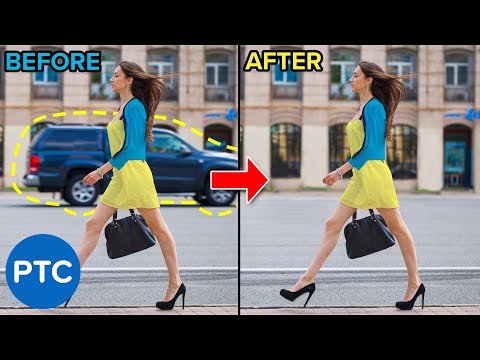
Here’s the ‘before and after’ of how we removed all the other people from the photo.

BONUS VIDEO TUTORIALS
And that’s about all there is to know about how to remove anything from a photo in Photoshop! Want to find out more about how to carry out the processes discussed in this tutorial? Then check out the three video links below:
- This video by Photoshop Training Channel that covers multiple different methods, some of which were discussed in this article.
- This video by PiXimperfect that covers the power of AI to remove anything from your images.

Hey, I'm a Professional Retoucher making $10k a month thanks to Photoshop.Register to my newsletter to get freelancing tips and a FREE Brush Pack in Bonus! My Newsletter

