
Famously versatile, Photoshop supports a wide variety of file types, and luckily, the PDF format is one of them.
You can open PDFs in Photoshop by choosing File > Open then customizing the settings with which Photoshop imports the file. Once the PDF has been imported, you can pretty much edit it as you would edit a PSD.
Whilst the process of importing a PDF can be a bit more complex than that of importing a PSD, JPEG or other more commonly used file type, it is definitely worth the effort. Photoshop gives you complete freedom when opening a PDF document, so you don’t have to worry about any unwanted edits being made to the appearance of your file.
So, how is it done? In this article, we will explore the following:
Table of Contents
What is a PDF File?
A PDF (Portable Document Format) file is a file format developed by Adobe in 1992 to present documents, including text formatting and images, in a manner independent of application software, hardware, and operating systems. (source: Wikipedia)
It was invented to provide a reliable and versatile file format that could be used to store documents and other data. The PDF file format was designed to be user-friendly, platform-independent, and secure, making it an ideal choice for a variety of applications, from document archiving to digital publishing.
How to Open a PDF in Photoshop
When opening a PDF file in Photoshop, the program allows you to select certain pages or images to open and gives you the opportunity to specify other features of your file, such as the rasterization options and the way in which your pages are cropped.
You can open a PDF by heading to the bar along the top of the screen and selecting File > Open.
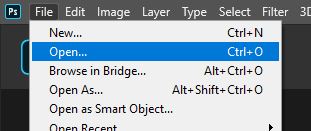
In the window that opens, browse through your files and click on the document you want to open. You can also right-click on your PDF document and click”open with Photoshop”.
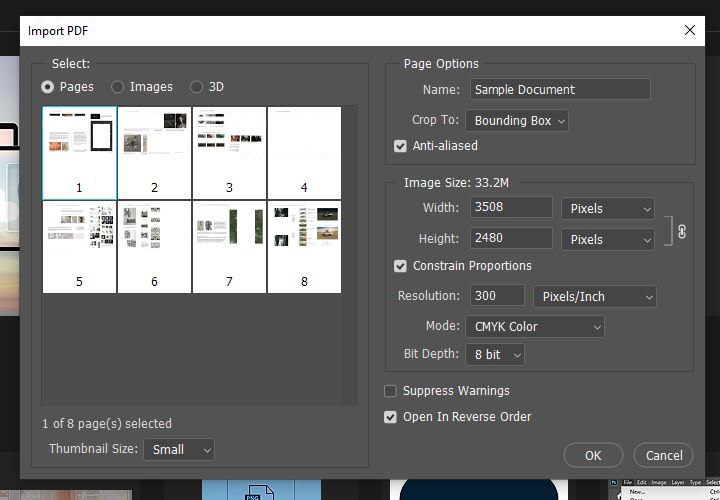
Doing this should open the Import PDF Window, as shown below. This is where we can customize the properties of the document that Photoshop will create from your PDF.
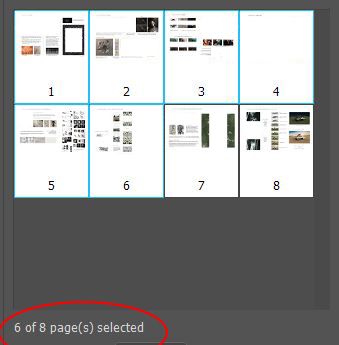
Let’s begin by selecting the pages that we want to open. Whether you want to open the full document, or just a selection of pages or images from it, you can specify it here. Draw your attention to the Select heading, as indicated in the image below.
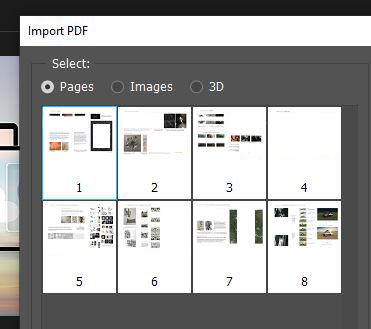
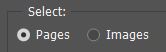
Under this heading, select either Pages or Images depending on which elements of the PDF document you’d like to import.
After doing so, simply go ahead and click on the thumbnails of the images or pages that you want to be opened in Photoshop. To select multiple adjacent thumbnails at once, click on the first thumbnail of the group, then hold down the Shift key on your keyboard whilst clicking on the last one of the group. The images or pages you have selected should be highlighted in blue, and the number of selected elements will be displayed under the preview window.
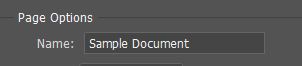
Next, let’s name the new document. To do this, we can simply type the new name in the Name textbox under the Page Options heading, as shown below.
Once you are happy with the file name, you can take a look at the other option in this section, where we can determine how we want our file to be cropped by choosing an option from the Crop To menu.
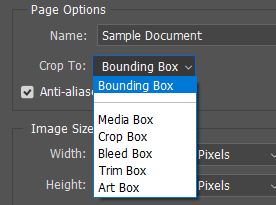
There are six different options to choose from:
- Bounding Box – Essentially, this function removes any white space from the outside of your pages by creating a rectangular crop around the outermost elements of the page (such as text and images). If white space was added intentionally in the creation of the PDF, then Photoshop will recognize this and will not delete these areas.
- Media Box – This is quite a common choice, and it crops the image or page to its original size
- Crop Box – Choosing this option causes Photoshop to automatically recognize the crop margins of the file, and to crop the document to these boundaries.
- Bleed Box – Just like in the last option, Photoshop recognises the original properties of the PDF file to make an informed crop in this case. This function crops the file according to the dimensions specified in the original PDF, accounting for production processes like cutting.
- Trim Box – Photoshop will crop the image to the dimensions specified as the file’s intended finishing size.
- Art Box – In the original PDF file, dimensions will have been specified regarding how the PDF information is carried over into another program. Photoshop will crop the file to this region.
After cropping the pages or images to suitable dimensions, you can edit the size of the file under the heading Image Size.
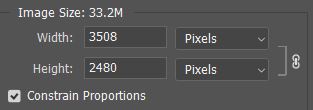
This might not be necessary if you are already happy with the crop, but feel free to input new values here to further customize the width and height of your document. Ensure that the box next to Constrain Proportions is ticked, as this will tell Photoshop to preserve the original proportions of your page, preventing it from being stretched or distorted abnormally.
In the same location, you can also set the Resolution and Bit Depth of the new document. Generally, a resolution of 300 pixels/inch will give you a sufficiently high quality whilst maintaining a reasonably low file size.
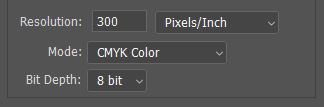
The Color Mode of the file can also be established using the dropdown menu pictured above. In general, CMYK is the best color profile for documents for which the destination will be a printed product, whereas RGB is most suitable for documents which will be displayed on a screen.
Once you are happy with all your settings, you should now be good to go ahead! Click OK to confirm the changes you made, and you will hopefully notice that Photoshop opens each image or page you selected as a separate file.
How to Edit a PDF in Photoshop
After Photoshop has generated new individual documents out of every page of the original PDF, you have full freedom to go ahead and start making edits within each file!
You can select a page to work on by selecting the accordingly numbered document from the bar shown below, near the top of the screen.

After opening the relevant file, you will have all of Photoshop’s editing capabilities at your fingertips. You may want to make color adjustments, create shapes, add text, or paint on the page with the Brush Tool– the opportunities really are endless.
If you’re struggling to figure out how to make any edits to your documents, then I’d highly recommend that you check out our complete guide to Photoshop for beginners, which covers everything you need to know about making basic, and some more complex, edits using the program.
How to Save a Photoshop PDF
Once you have made some edits to your documents and you are satisfied with the outcome, it’s time to export the files again.
To do this, we can simply head over to File > Save As to open the Save As window.
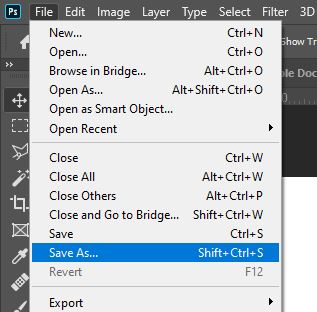
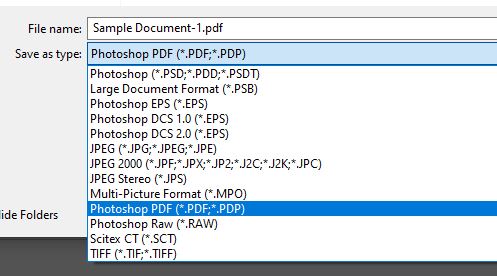
Within this window, choose a destination and name for the new document, then select Photoshop PDF as the file type.
To finish, just hit the Save button, and repeat this process for each separate document!
For a more automated way to save your PDF document if you have more than one page, you can go to File > Automate > PDF Presentation in the Photoshop menu.

And that’s about everything you need to know about opening and editing PDF documents in Photoshop!
Video tutorial
If you want to find out more about the topic, then take a look at this YouTube video by SSdevelopersChannel, which walks you through and clearly demonstrates the process of using Photoshop to edit PDFs.
Hey, I'm a Professional Retoucher making $10k a month thanks to Photoshop.Register to my newsletter to get freelancing tips and a FREE Brush Pack in Bonus! My Newsletter

