Photoshop’s Match Fonts feature has been an element of the program since 2015, yet a lot of users don’t know of its presence. It really is an absolute blessing for any font-lover, eliminating the tedious guesswork of identifying fonts by eye and instead allowing Photoshop to do the work for you.
And, fortunately, it couldn’t be easier to use! Within just a minute you can identify the font and start using it, or one that is similar to it, in your own designs.
Of course, if you don’t need a perfect match, you can stick with the traditional method of guessing the font by eye. You can search for fonts that wouldn’t be available for use in Photoshop by default on hundreds of sites, such as Dafont, Urban Fonts, and Font Squirrel, and download them onto the program by using the method we’ve explained in our article on how to add fonts to Photoshop.
Looking for a certain type of font in general, rather than just one specific font? Then you can use the filters on the websites listed above, searching within particular categories that match your needs. If you’re in need of a font that has a vintage feel, then check out our list of ten high-quality vintage fonts that are completely free to use!
How to Copy Fonts in Photoshop
To identify a font and find matches for it, all you need to do is:
- Open the Image Containing the Font You Want to Identify
- Correct the Perspective of the Image if Necessary, Using the Perspective Crop Tool
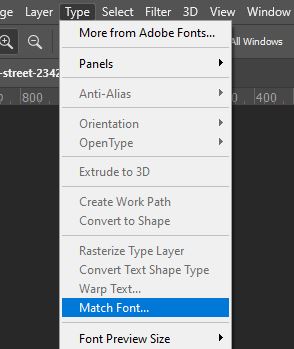
- Go to Type > Match Font to Open the Match Font Window
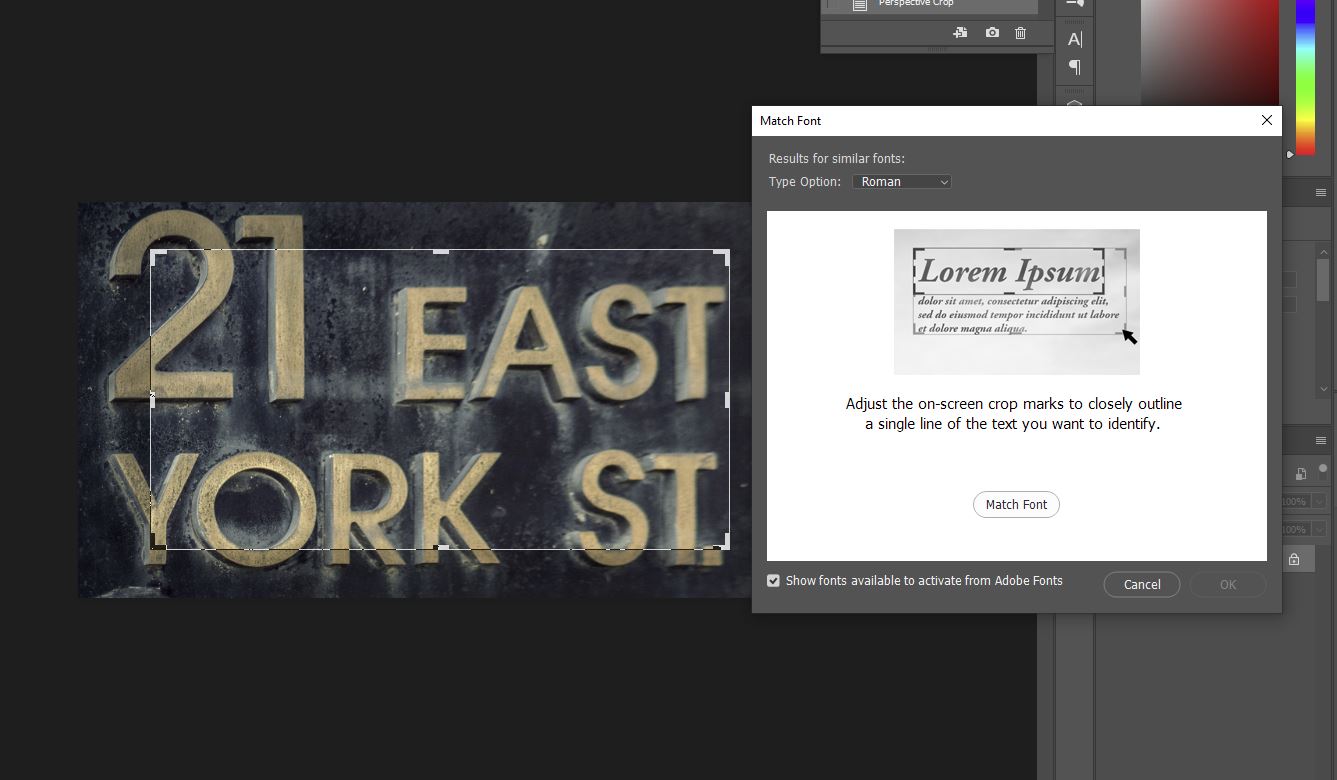
- Click and Drag the Corners of the Selection Box so that it Selects an Area of the Text
- Choose the Most Nearly Matching Font from the Automatically Generated List, Then Click OK to Select it Ready for Use in Photoshop
How Does the Match Fonts Feature Work?
Before we get into telling you how to use the Match Fonts feature, we will quickly explain how it works. Photoshop uses an intelligent method of image analysis in order to determine which font has been used to create the text in the area of the photo that you have selected.
Within seconds, you will then receive a set of numerous fonts that either are an exact match for or are similar to the font used in the reference image that you selected. The fonts displayed will be a mixture of fonts that you already have installed on your computer and fonts from Typekit.
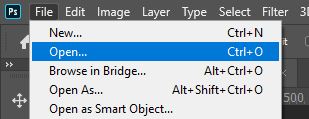
1: Choose File > Open to Open the Image Containing the Font You Want to Identify
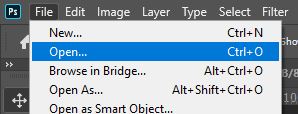
First of all, we’ll need to open the image that includes the font you want to identify and copy in Photoshop. This can be done by clicking on File > Open, located at the left of the top options bar.
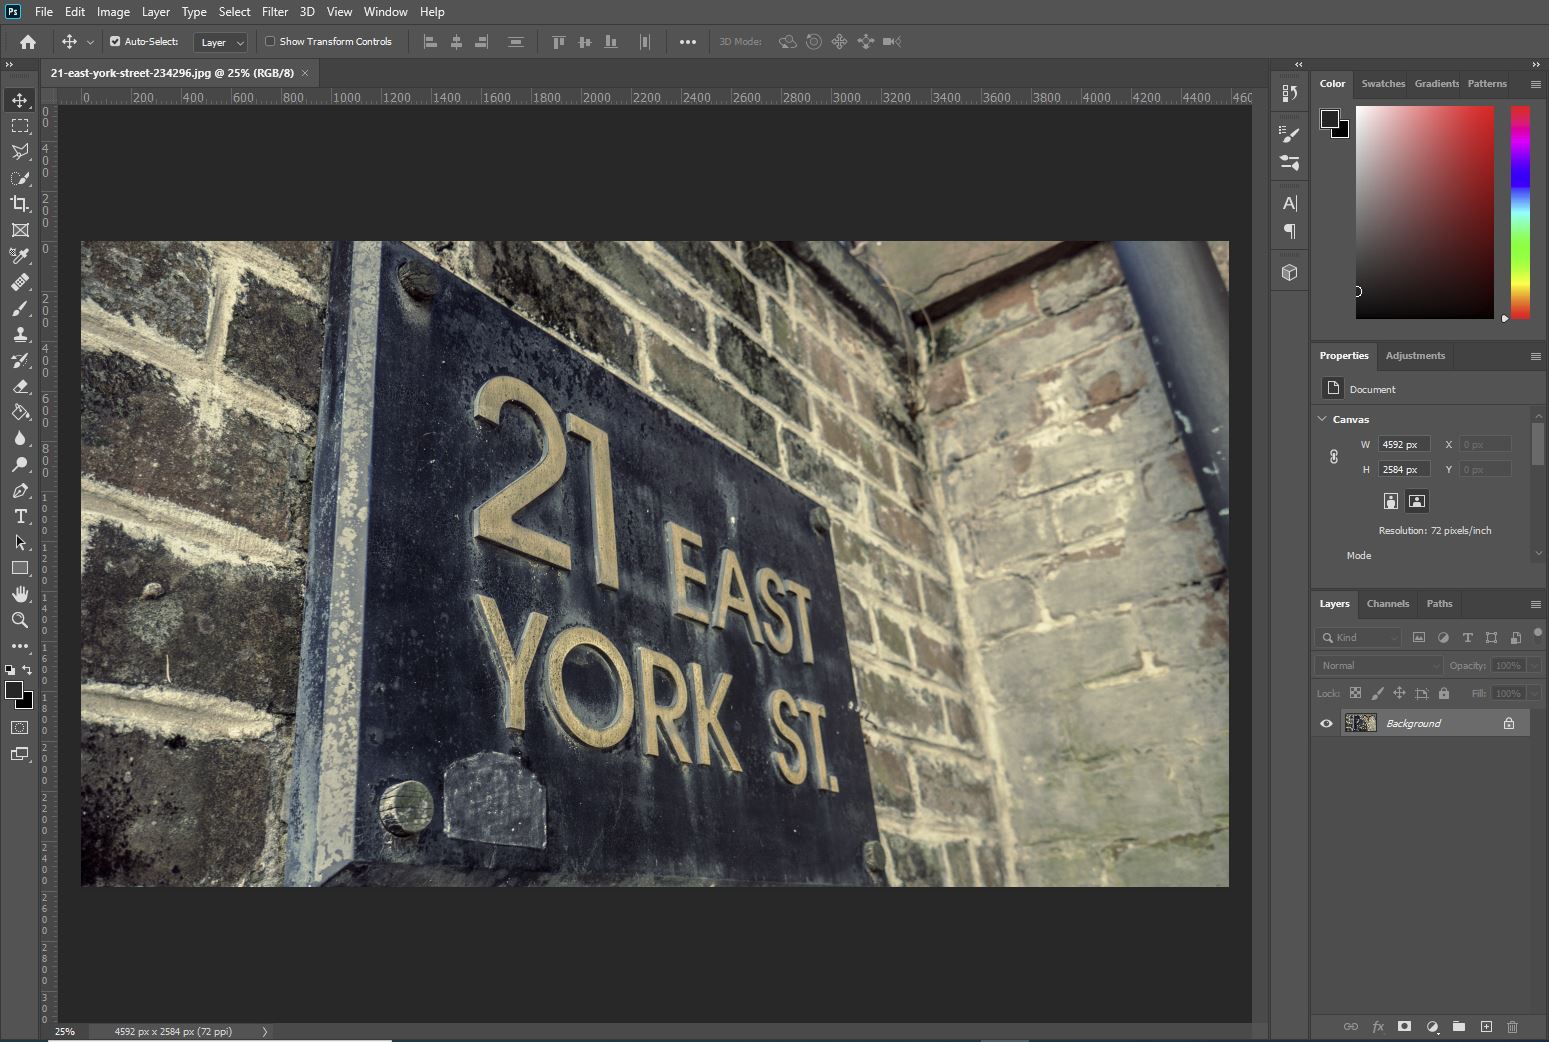
Then just go ahead and select the relevant photo from your files. You will see that it opens in a new document as its own layer (you can see this in the Layers Window).
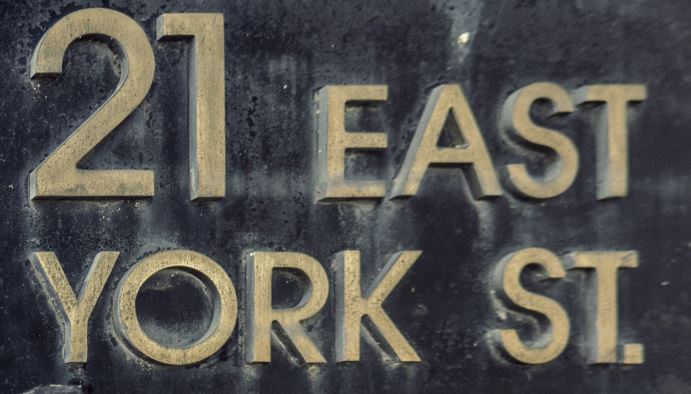
For this tutorial, we’re demonstrating the process using this photo by David Besh from Pexels
2: Correct the Perspective of the Image Using the Perspective Crop Tool
For the Match Font function to work effectively, you will first need to make sure that the reference image of the font that you are providing Photoshop with is clear and not distorted.
Therefore, if your image has been captured from an angle rather than straight on, you will need to alter the perspective so that the text appears clear.
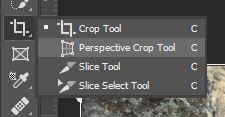
To do this, we can use the Perspective Crop Tool, which can be selected by clicking and holding (or right-clicking) on the Crop Tool’s icon, as shown below.
Doing so will generate a list, from which we are going to select the Perspective Crop Tool.
Changing the perspective with this tool whilst also cropping the image can sometimes seem confusing at first, but it’s pretty simple once you’ve gotten the hang of it.
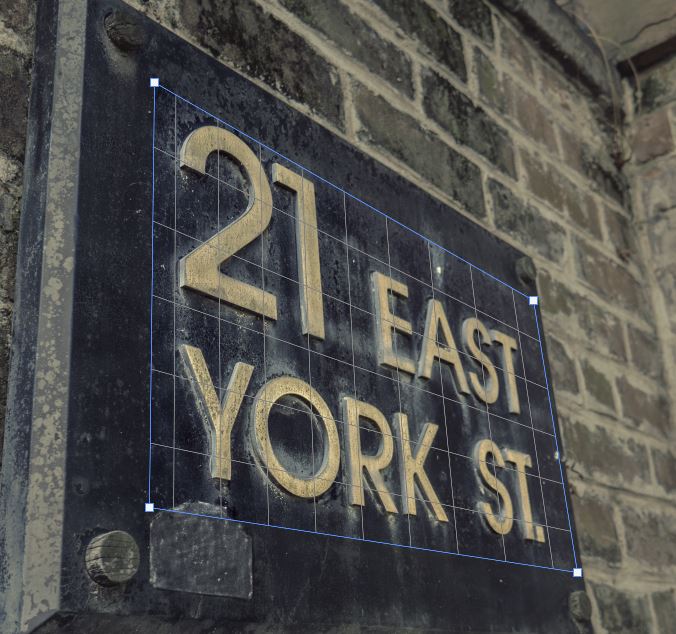
It involves drawing lines along the perspective lines in the image to form a rectangle at the image’s perspective that surrounds the area you want to keep in the photo.
So, to use it, let’s go ahead and make the first click to create an anchor point that will act as the first corner of the rectangle. For instance, click on the position where the top corner of the rectangular area that you want to select, containing the text you want to sample, would be located.
After making your first anchor point, it’s just a case of following the perspective lines along the plane holding the text, keeping the top line parallel to the bottom, and the right line parallels to the left, clicking where you want to place the corners of the rectangle.
Once you have completed the rectangle, just hit the Enter key to apply the edit. And you should see that you have now ended up with a rectangle that contains text that isn’t distorted as if the image was taken from directly in front of the text!
How awesome is it that you’ve managed to crop the image and correct the perspective in just one step?
You are now ready to move on to using the Match Font function to identify the font!
3: Go to Type > Match Font to Open the Match Font Window
With the image of the font open in Photoshop, we are first going to want to open the Match Font Window, by selecting Type > Match Font from the options bar along the top of the screen.
This causes a selection box to appear over the image, like in the screenshot below. The area covered by this box represents the area that Photoshop will analyze to identify the font in the image.
4: Click and Drag the Corners of the Box so That it Selects Just the Text
Next, we will use the selection box that has automatically appeared over the document to select an area of text. This will act as the sample of text that Photoshop will refer to in order to develop a list of matching fonts.
There are just a few requirements for the selection that will remove any confusion that Photoshop may encounter during the automated identification and matching process.
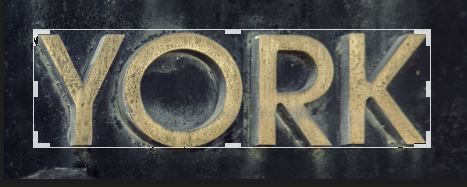
First, you will need to select only a single line of text. Within this single line, you should make sure that there is only one font: don’t select a mixture of fonts or styles of fonts (eg a mixture of bold and light, or italic and straight).
Additionally, be sure to closely crop the selection to the left and right edges of the text, as we did in the example below.
To select the text, simply click and drag on the corners of the selection box to resize and move the box to form a rectangle surrounding an area of text that uses the font you want to identify and find matches for.
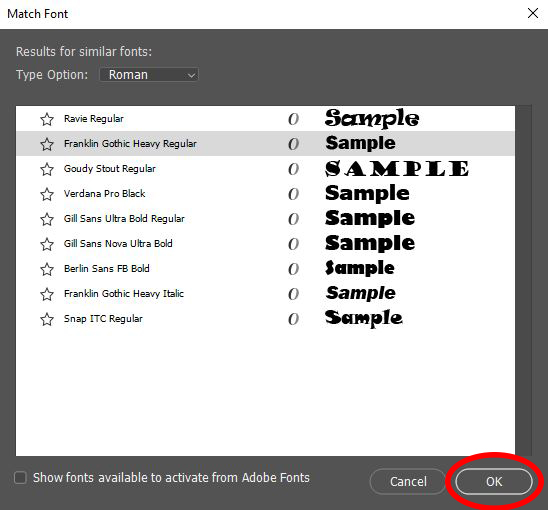
5: Choose the Most Nearly Matching Font from the Automatically Generated List, Then Click OK
Upon selecting a suitable sample of the font, Photoshop will immediately generate a list of other fonts that appear to match that one, or that are at least somewhat similar to it. This list will appear in the Match Font Window.
The list that is created will, by default, include fonts from Typekit. If you want to only view the matches that are already downloaded on your computer, then you can just uncheck the box entitled ‘Show Fonts Available to Activate from Adobe Fonts’, and the program will only display the ones that you won’t have to install onto your computer.
Take a look at the fonts in the list and pick the one that you think most closely matches the font in the image that you used as a sample. Click on your favorite, then hit the OK button.
This will cause Photoshop to automatically select the font you clicked on, so that, straight away, you’re ready to use it in your own design work! Pretty cool, right?
It couldn’t be easier to then use the font that you selected within your designs. If you want to work in a new document, then simply head to File > New at the top of the screen, then choose the dimensions of your document and hit Create.
If you want to work in an existing document, then instead select File > Open from the top options bar and select the relevant document from your files.
With the document open, all you then need to do is click on the ‘T’ icon from the toolbar down the left side of your screen, to select the Type Tool. Alternatively, you can hit the T key on your keyboard.
Upon selecting the tool, you will notice that a new options bar appears near the top of the screen, in which you can choose the appropriate settings for your text.
At the left, in the dropdown menu that sets the font, you should see that the matching font that you selected from the list has automatically been made active, meaning that you’re ready to type using that font right away!
BONUS
And that’s about all there is to know about how to identify, copy, and match fonts in Photoshop! Want to find out more about the process?
Then take a look at this video by Photoshop Training Channel that covers the same method that we discussed in this article.
Hey, I'm a Professional Retoucher making $10k a month thanks to Photoshop.Register to my newsletter to get freelancing tips and a FREE Brush Pack in Bonus! My Newsletter


