
Procreate is a reference in digital drawing application and everyone is looking for a way to use Procreate’s brush in Photoshop.
Indeed working across various different pieces of software to produce digital artwork can be really useful since it can offer you a much higher level of versatility. One particularly promising combination is Procreate and Photoshop: Procreate is home to such a wide variety of brushes and Photoshop can be great at producing digital drawings with customisable brushes.
So, wouldn’t it be great to be able to use brushes from Procreate whilst creating artwork in Photoshop? Unfortunately, it isn’t the easiest thing to do as there is no way to directly bring Procreate’s brush files into Photoshop.
Yet, there is a technique you can use to get around this issue, and luckily it will only take around ten minutes. By making a mark with the brush in Procreate, saving it as a JPEG, and importing it into Photoshop where you can use it to define a brush preset, you can essentially convert the brush into one that is compatible with Photoshop.
In this article, we will explore this technique in more depth to help you find a way to work around the issue. Before we jump in, if you would like to learn more about how you can increase the range of brushes you have access to in Photoshop, then check out our article about how to install and use Photoshop brushes from external sources.
Table of Contents
Can You Use Procreate Brushes in Photoshop?
Procreate uses its own proprietary file type .BRUSH that you can’t directly use in Photoshop because it’s not compatible.
This means that you cannot directly use Procreate brushes in Photoshop by simply importing them into the program.
However, there’s an easy work around.
Let’s take a look now at how you can use Procreate brushes in Photoshop.
One method will require you to have access to the application Procreate and the other one will let simply let you convert .brush files to get a png.
How to Create a Photoshop Brush From a Procreate Brush
Procreate app is required
Since we can’t use Procreate brushes directly in Photoshop, let’s explore how you can achieve the next best thing: producing a new Photoshop brush from the Procreate one.
1: Create a Mark on White with a Black Version of the Brush
For this technique, you will need to begin in Procreate by setting the color of the brush you would like to use in Photoshop to black. Make sure that the Opacity of the brush is set to 100%.
Fill the background of the document with pure white, then use the black brush to make a single mark that is representative of the brush’s style as big as possible within the constraints of the canvas. Make sure that none of the edges of the mark leave the borders of the document.
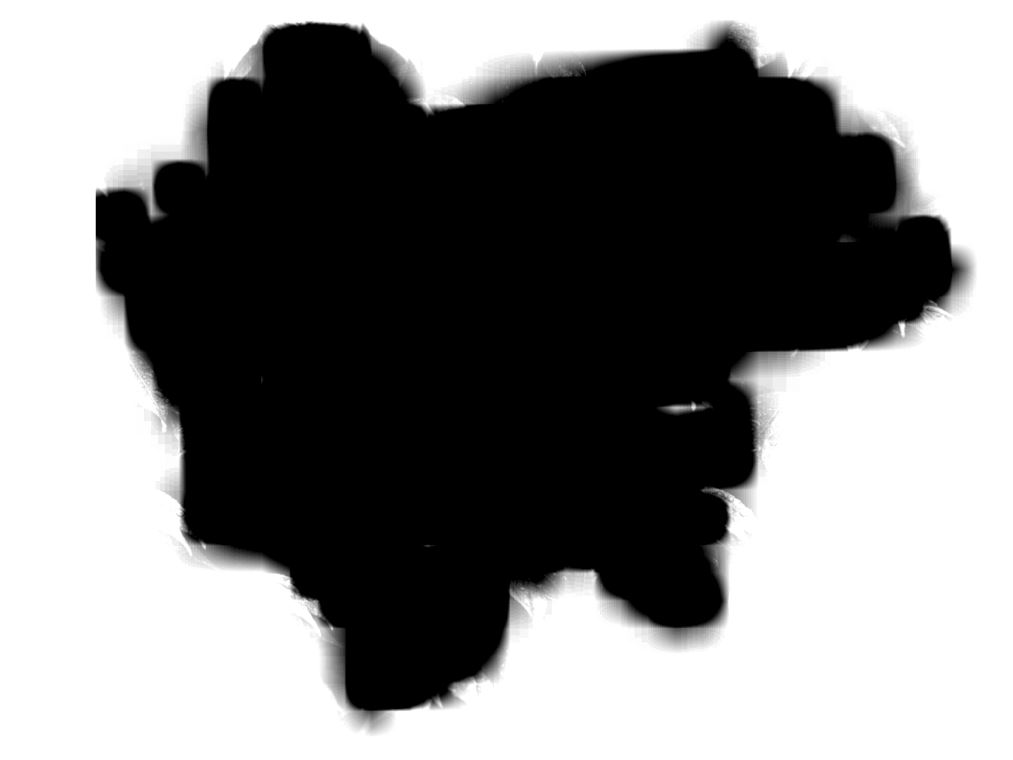
Later, when we use this sample image to create a Photoshop brush, Photoshop will automatically create a brush based on the varying tones of gray within the image. This means that any black areas are completely visible in the created brush, whereas the white areas in the sample image will be translated into transparent pixels. Any tones of gray between black and white will adopt varying levels of transparency.
Thus, by using black for the brush mark and white for the background in our Procreate sample image, we have ensured that the elements of the brush itself will be rendered completely visible when we create the Photoshop version of the brush whilst the unwanted background areas will be made completely invisible.
2: Save the Brush Sample as a JPEG and Open it in Photoshop
Now that you have created a mark with the brush, save the document to a suitable file location as a JPEG image. Then, open up Photoshop and head to File > Open.
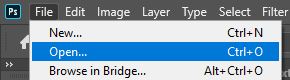
In the window that opens, select the JPEG image from your documents to open it in Photoshop.
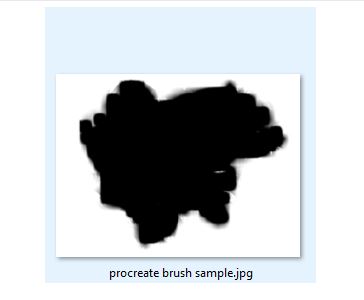
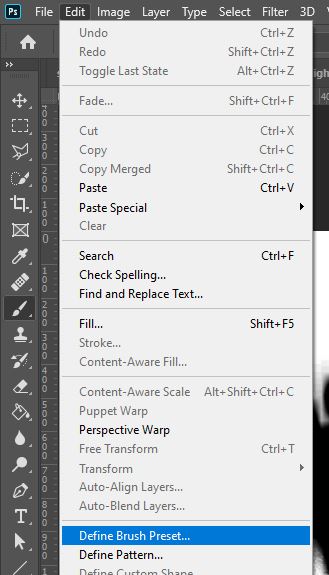
3: Select Edit > Define Brush Preset to Create a Brush from the Image
Now that the image of the Procreate brush has been opened in Photoshop, you can go ahead and select Edit > Define Brush Preset from the menu bar along the top of the screen.
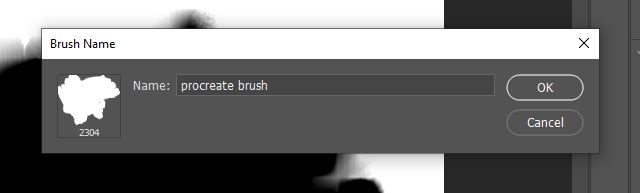
Doing so will open a new dialog box where you can type in a name for the new brush. Name it whatever you wish to, then hit OK to confirm the creation of the brush!
You can now use the brush in whatever way you want! To do so, simply activate the Brush Tool by clicking on the icon depicted below, found in the toolbar down the left side of the screen. Alternatively, you can use the keyboard shortcut ‘B’.

With the tool active, a new options bar will appear near the top of the screen, as shown below.

Within this bar is a wide selection of settings that you can alter in order to customise the properties of your brush, such as the size, hardness, type, and opacity.
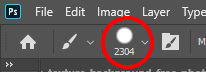
To select the brush that we just created, all you will need to do is click on the Brush Preset icon to open a new window where you can select the style of brush you would like to use. So, click on the icon circled below.
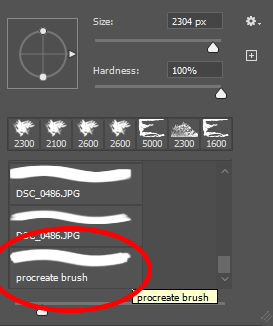
After doing so, you should see that a new box appears below the icon. Scroll through all the brushes displayed in it until you get to the bottom of the list. The last brush in the box should be the one you just created based on the Procreate brush! Click on it to activate it.
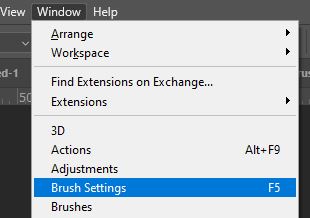
With the right brush selected, you can now paint with it in Photoshop. Remember that you can alter the size, hardness and opacity of it in the bar near the top of the screen. To access more settings that you can edit to alter the properties of the brush, choose Window > Brush Settings to open a new box containing a wide variety of settings that you can change.
How to Convert Procreate Brushes for Photoshop
An easy solution that I discovered on Reddit is exceptionally easy and straighforward.
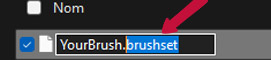
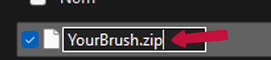
You simply need to change the file extension of your .brushset to zip.
I tested it on Windows (as of 21st of February 2023) and it worked.

Select now the file extension “.brushset” and convert it to “.zip”.
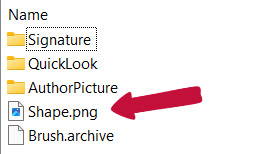
Once you open it, you get a list of all the brushes that are in this brushset.
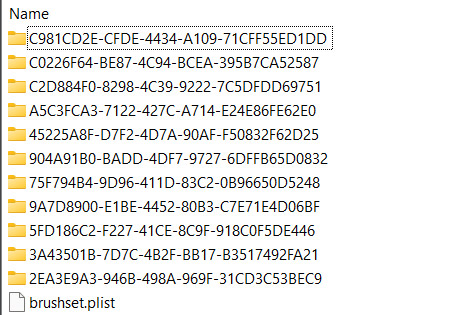
Their name don’t make any sense but once you open one, you’ll find the brush shape in png.
Check the video below for a full walkthrough to convert your Procreate Brushes for Photoshop.👇
VIDEO TUTORIAL
Hopefully, you have now managed to create a Photoshop-compatible version of your Procreate brush which looks pretty authentic and as similar as possible to the original one!
If you would like to see a method that is largely similar but differs only in the first few steps, then you might want to check out this video by Shahzad Riaz which also features a quick demonstration of some of the ways in which you can customize the properties of your brush.
Here are some of my favorite Photoshop tools:
Thank you for reading this article. I hope you found it helpful as you’re using Adobe Photoshop. Here are some tools that I use daily while retouching or editing that made my life easier. I hope you’ll also find them as useful as me. These are affiliate links, so if you do decide to purchase any of them, I’ll earn a commission.
But in all honesty, these are the exact tools that I use and recommend to everyone, even my closest friends and family.
Tablet: I remember purchasing my first tablet back in 2011. It was the smallest Wacom available at that time, I think it was an A5 format. Tablets make a huge difference with Photoshop and I can’t work without one nowadays. I recently switched to the amazing Xencelabs Medium Bundle and I just love it.
Quick Fixes: Whenever I need to edit pictures quickly, I use the AI-powered Luminar photo editing tool.
Content Creator Essentials: If you’re taking pictures, video footage, or any other types of media, I recommend you the Samsung T5 external SSD to safely backup and transport your files. Regarding my working station, since I’m always moving from one place to another, I’m using the ASUS ZenBook Pro Duo 15. Its second screen comes in really handy when working on Photoshop.
Hey, I'm a Professional Retoucher making $10k a month thanks to Photoshop.Register to my newsletter to get freelancing tips and a FREE Brush Pack in Bonus! My Newsletter

