
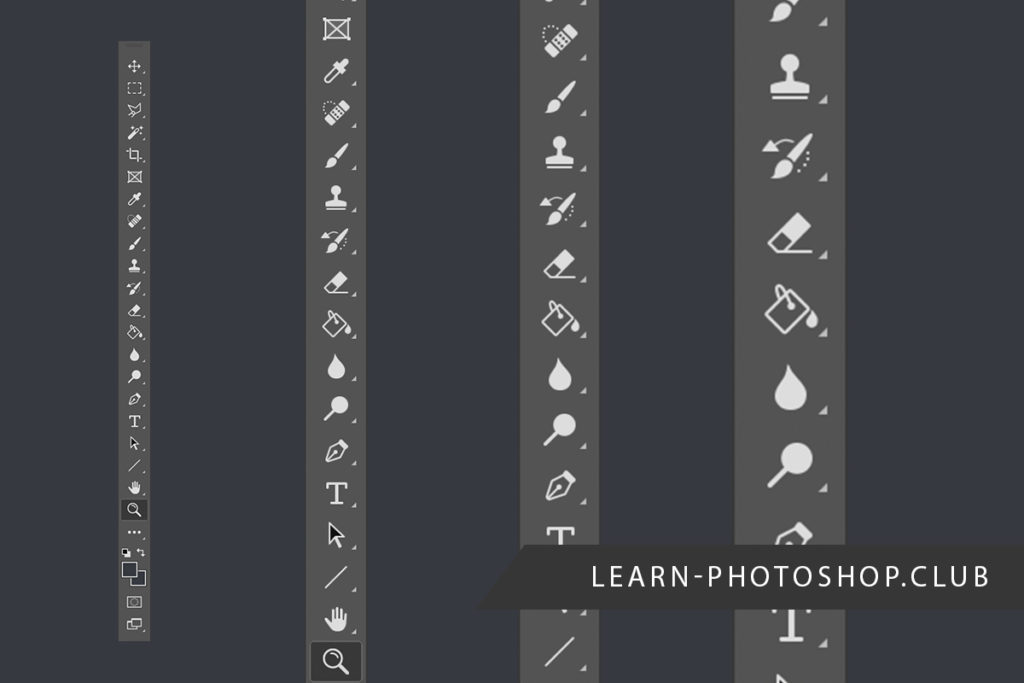
Particularly for designers working at computers for extremely long periods of time, eye strain can be a significant issue. One problem that can lead to this is having the icons in your toolbar appearing too small.
If this is the case, don’t worry! In this article, we will teach you how you can increase the size of your toolbar within seconds.
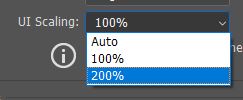
In short, you can increase the sizes of the icons in your toolbar by heading to the top of the screen and choosing File > Preferences > UI Scaling: 200%.
Before we jump straight into the article, if you would like to learn more about the toolbar and other elements of Photoshop’s workspace, check out our comprehensive guide to Photoshop, which includes a whole section dedicated to explaining everything you need to know about the toolbar.
Why is My Photoshop Toolbar So Small?
One reason why your toolbar might be too small is if your device has an unusually high resolution. This can cause Photoshop to display the icons representing each tool as a lot smaller than usual. Another factor that can affect the size of the toolbar is your Preferences settings.
By editing these settings, you can change a wide variety of Photoshop’s features, enabling you to customize the program’s appearance, how it operates, the functions of different tools, and more. One aspect you can alter here is the size of the icons in your toolbar.
How to Make the Toolbar Bigger in Photoshop
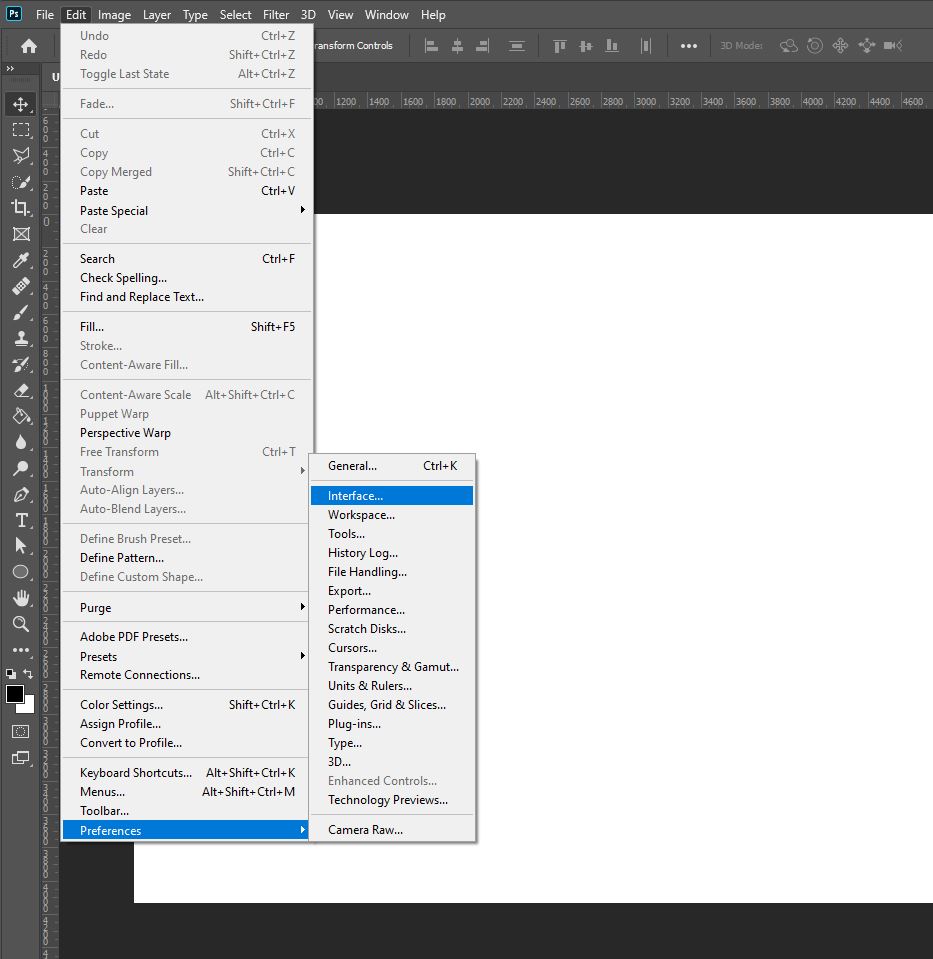
1: Open the Preferences Window by Choosing Edit > Preferences > Interface
To begin, let’s head over to the Interface section of the Preferences Window. We can open this window by selecting Edit > Preferences > Interface from the bar along the top of the screen.
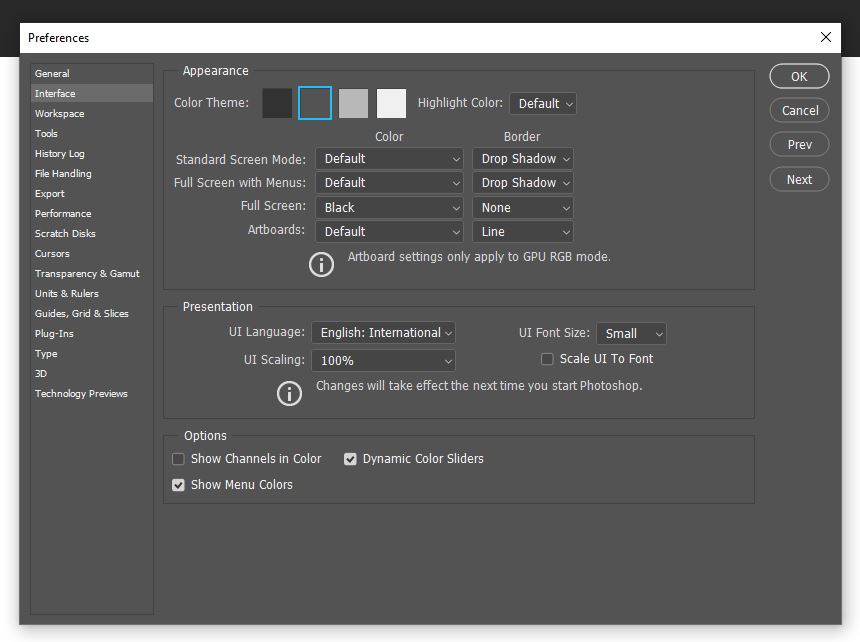
After doing this, you should notice that a new dialog box opens, resembling the one depicted below.
2: Set the UI Scaling to 200%
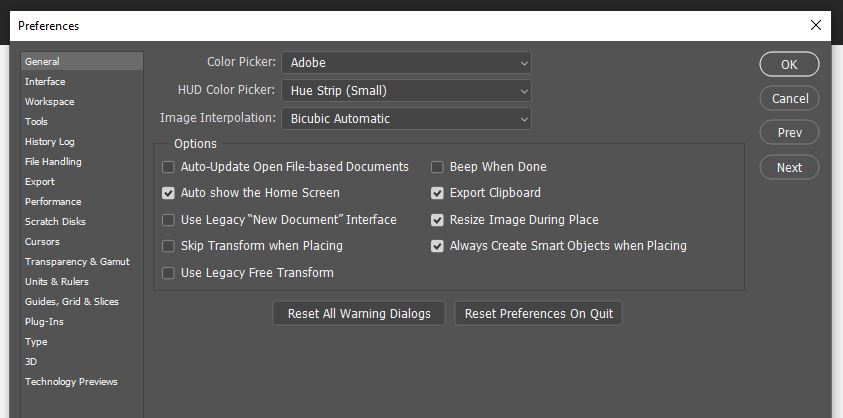
Now that you have opened the relevant section of the Preferences Window, you can go ahead and edit the setting that determines the size of the icons in the toolbar. The UI Scaling setting affects the sizes of the icons in Photoshop. So, if your toolbar appears to be too small, you can increase this value to make the icons bigger.
So, how can we find this setting? Within the Interface menu on the middle section of the box, draw your attention to the area entitled Presentation. Under this heading, you should see an option labeled UI Scaling.

Here, click on the arrow at the end of the dropdown box and select 200% from the list that comes up as a result.
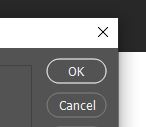
Once you’re done, click on the OK button in the top-right corner of the window to confirm the changes and close the box.
After this, you’re pretty much finished! All that’s left to do is restart the program to let Photoshop apply the edits you made. To do this, click on the cross at the top right of the screen. Make sure that your work has been saved before doing this by hitting Ctrl + S [Win] / Cmd + S [Mac] on your keyboard or heading to File > Save. Otherwise, you may lose any progress you’ve made in the session upon closing the application.
Now, the next time you reopen Photoshop, you should see that the size of the icons in the toolbar has increased!
What to do if Photoshop Scaling option isn’t working
It happens sometimes that changing your UI Scaling inside Photoshop Preferences isn’t changing anything.
There is a work around for Windows only.
High DPI Override Settings
You can try to fix this by going to your Photoshop installation folder (C:\Program Files\Adobe\Adobe Photoshop 2023) and finding your Photoshop application. You need to quit Photoshop before doing any changes to this folder.
Right-click on Photoshop.exe (be sure to do this on the Photoshop version you’re currently using and not a older one)
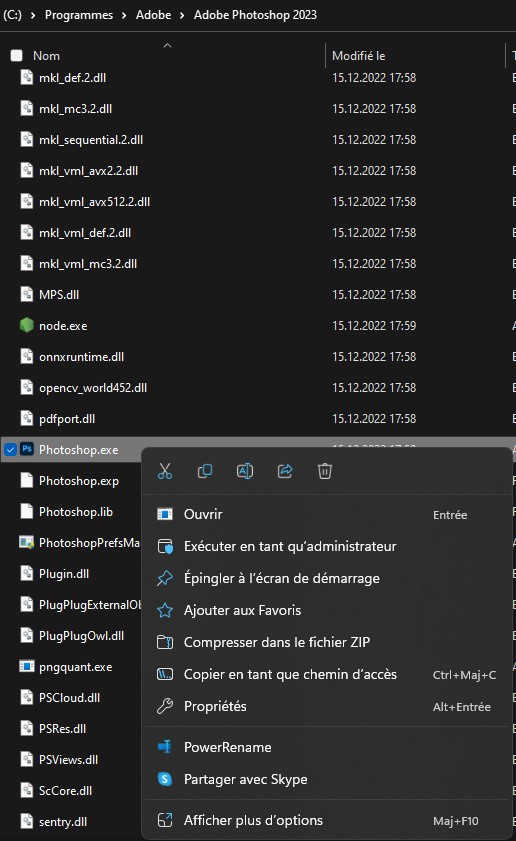
And choose Properties (Alt+Enter).
Go to the Compatibility tab and click on “Change high DPI settings”

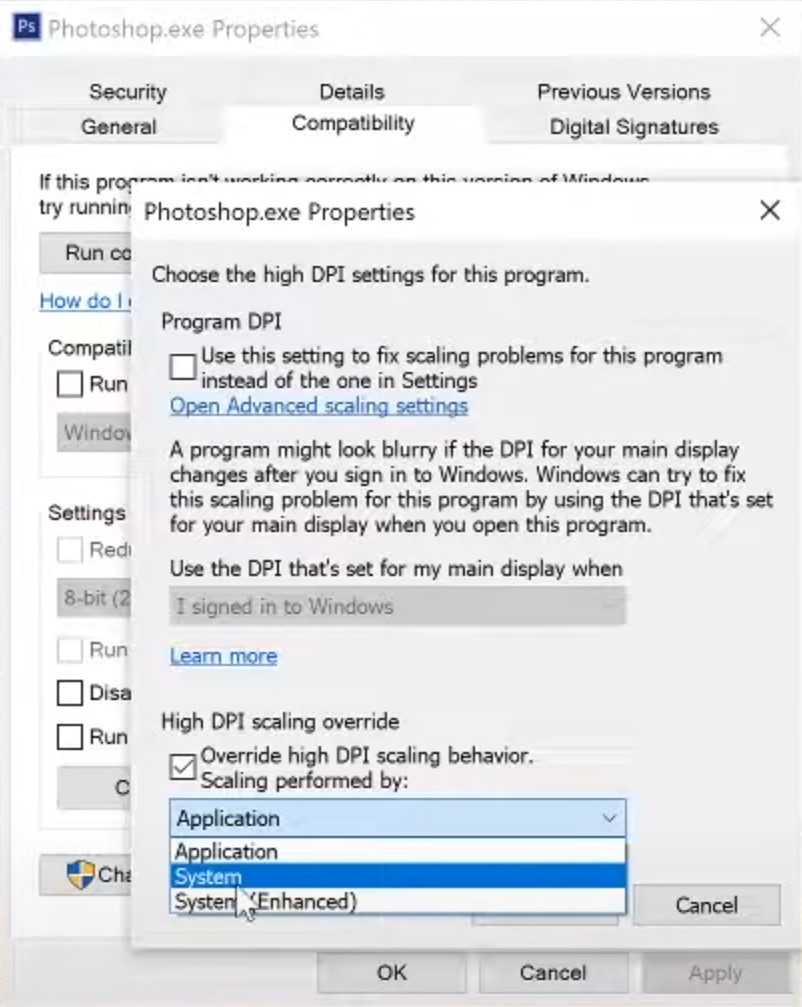
A new window will open and you want to go to the “High DPI scaling override” section. It will be gray out by default, like this:
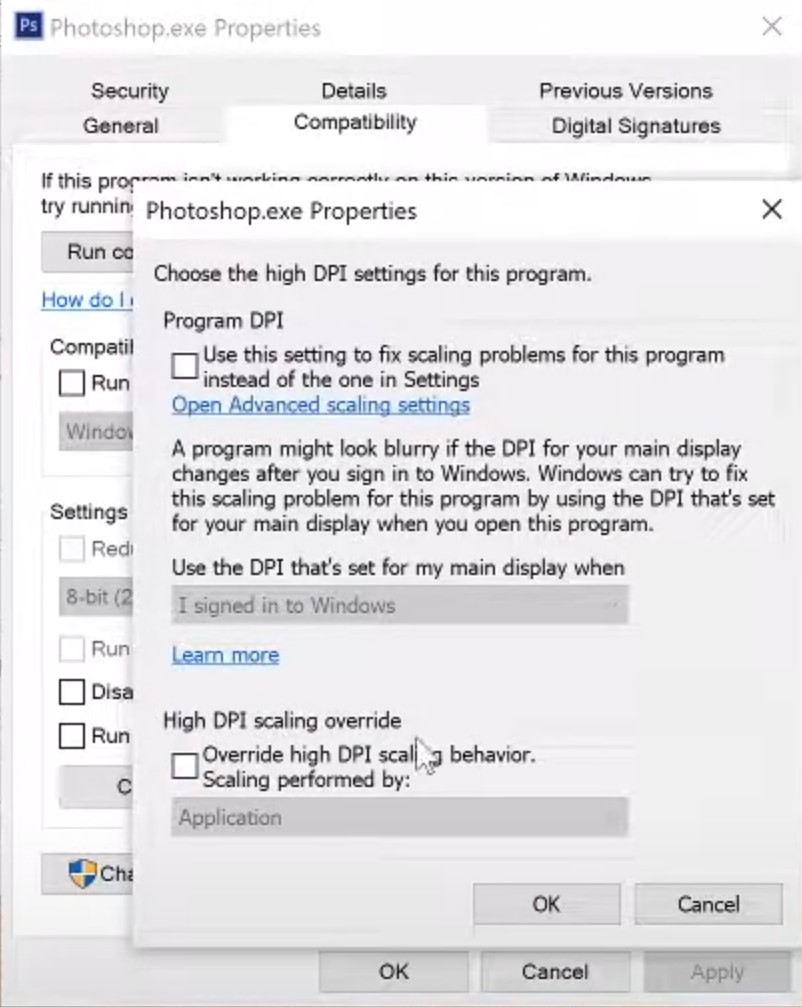
You want to check the “Override high DPI scaling behavior.” and choose Scaling performed by: “System”:
This workaround fixes your Photoshop interface in most cases but I know it’s not working 100% of the time. This UI scaling is a well-known issue from both Photoshop users and Adobe itself.
I contacted many times their support team asking if they finally fix the problem, but I always get the same answer: “it’s on our list and will be fix for the next update”.
If you can’t find any solution for your Photoshop Interface being too big or too small, you can explain Adobe support team your issue and how it affects your work. They are generally speaking understanding and will, in most cases, offer you free months of your current subscription as a compensation.
Video Tutorial
Hopefully, these techniques were successful in changing the scaling of your Photoshop Interface! If not, I advise you to contact Adobe direct support team.
Here’s a video that walks you through all the different solutions on Windows 11.
Here are some of my favorite Photoshop tools:
Thank you for reading this article. I hope you found it helpful as you’re using Adobe Photoshop. Here are some tools that I use daily while retouching or editing that made my life easier. I hope you’ll also find them as useful as me. These are affiliate links, so if you do decide to purchase any of them, I’ll earn a commission.
But in all honesty, these are the exact tools that I use and recommend to everyone, even my closest friends and family.
Tablet: I remember purchasing my first tablet back in 2011. It was the smallest Wacom available at that time, I think it was an A5 format. Tablets make a huge difference with Photoshop and I can’t work without one nowadays. I recently switched to the amazing Xencelabs Medium Bundle and I just love it.
Quick Fixes: Whenever I need to edit pictures quickly, I use the AI-powered Luminar photo editing tool.
Content Creator Essentials: If you’re taking pictures, video footage, or any other types of media, I recommend you the Samsung T5 external SSD to safely backup and transport your files. Regarding my working station, since I’m always moving from one place to another, I’m using the ASUS ZenBook Pro Duo 15. Its second screen comes in really handy when working on Photoshop.
Hey, I'm a Professional Retoucher making $10k a month thanks to Photoshop.Register to my newsletter to get freelancing tips and a FREE Brush Pack in Bonus! My Newsletter

