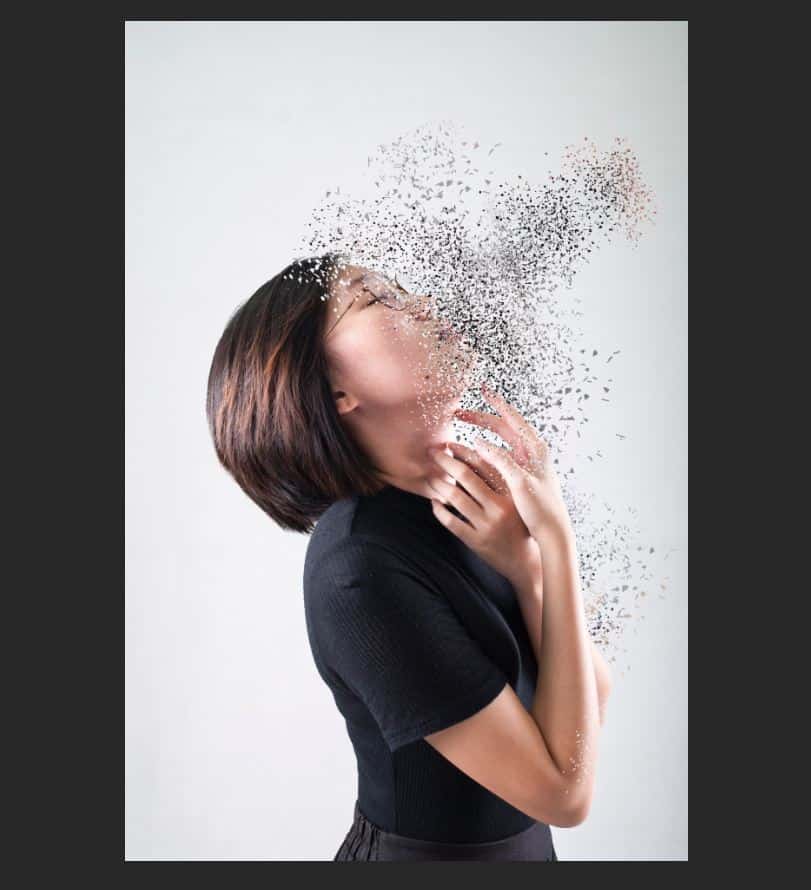
How to Create a Dispersion Effect in Photoshop
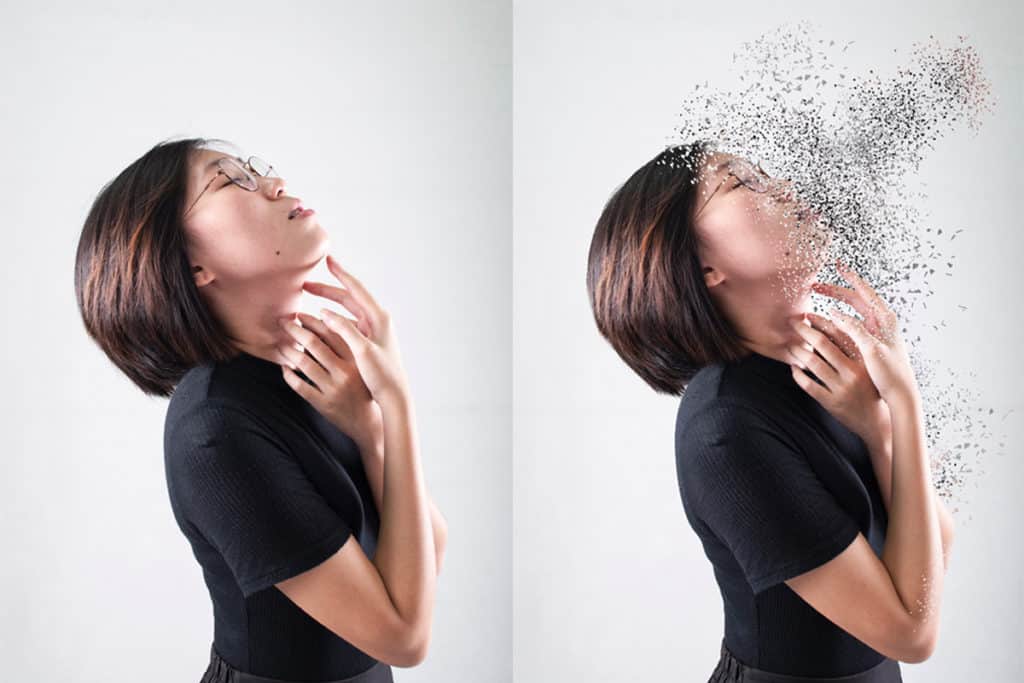
Popular amongst many digital artists, the dispersion effect is one that can be used in many situations- from typography to basic photographic communication. In fact, the dispersion effect and simple adaptations of it are present in a large number of designs that surround us in everyday life.
Now, whilst the popularity and success of this effect can seem intimidating, you will be glad to hear that it is actually exceedingly simple to create. The technique is also popular amongst new learners and first-time users, as well as those who are more experienced, making it a great technique for all.
Before we begin, you will need to download dispersion brushes. For a tutorial on how to download brushes for use in Photoshop, see this article.
Step 1: Setting Up Your Document
The first thing we will need to do is open the image to which you want to add the effect in Photoshop. To do this, load the program, then head to File > Open, and select the relevant image.
For this tutorial, we used this photo by Elice Leong from Pexels.
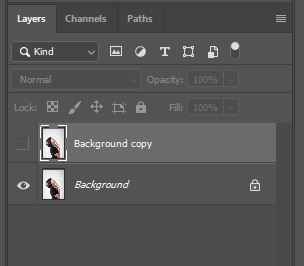
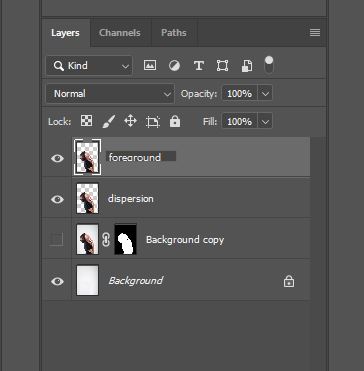
Once you’ve got the image open in Photoshop, you’ll need to duplicate the layer. You can do this by right clicking on the layer in the Layers Window, then clicking duplicate, or through the shortcuts Ctrl + J [Win] or Cmd + J [Mac].
After duplicating the layer, you’ll then want to make the newly created duplicated layer invisible. This can be done by clicking on the Eye Icon at the end of the layer in the Layers Window.
The window should now look something like this:
Step 2: Select the Subject
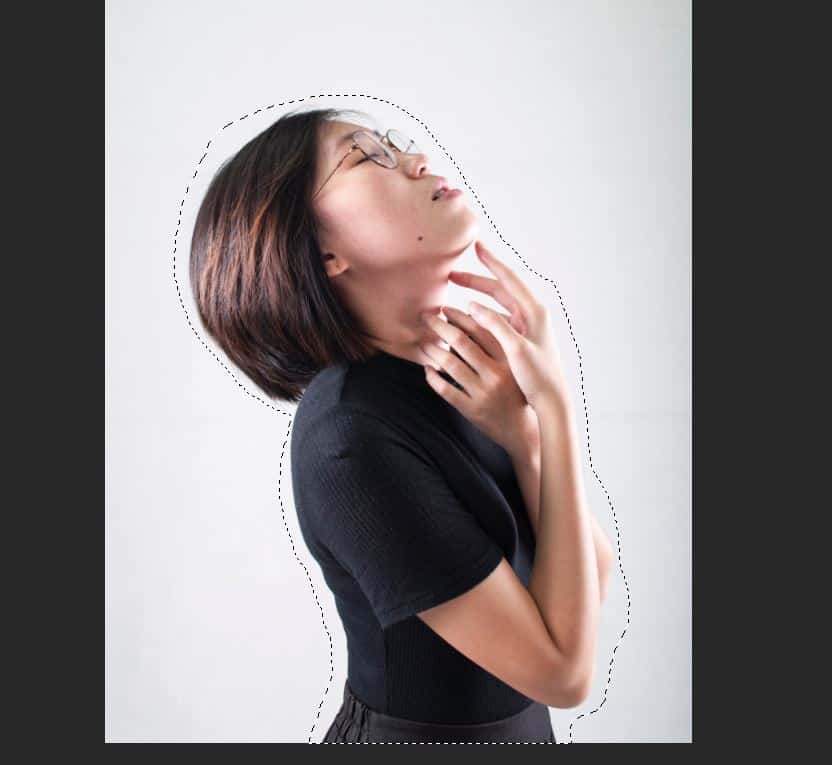
This step involves taking a vague selection of the subject. It doesn’t have to be precise, but make sure that it contains the entire subject (note that it’s okay here for the selection to contain some areas of the background).
We’ll make this selection using the Lasso Tool, which is represented by the icon shown below, down the left side of the screen.
The selection should look something like this. Don’t worry about the degree of precision, all that matters is that the whole subject is included in the selection.
Step 3: Replace the Selection with Background Contents
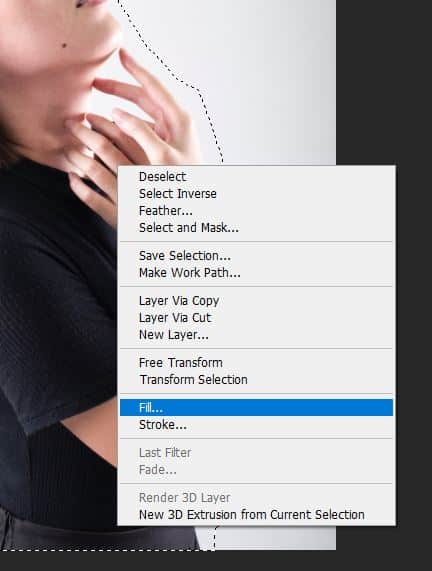
The next thing to do is right click on the selection. This will cause a menu to come up, from which you should select Fill.
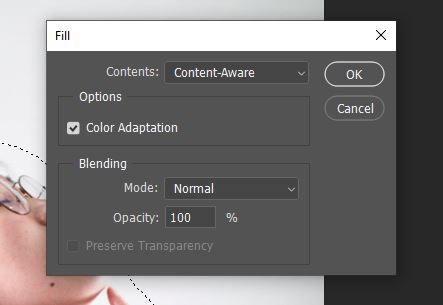
In the window that appears, make sure that ‘Content-Aware’ is selected, and click OK.
This should leave you with just the background, as Photoshop has used the contents of the image to replace the selection with pixels of an informed colour. To deselect the selection, head to the bar along the top of the screen and choose Select > Deselect. (Ctrl + D [Win] or Cmd + D [Mac]).
This could depend on how complex is your background. The content-aware option uses in this case the information from you image in general and try to replace your selection accordingly.
Step 4: Make a More Precise Selection of the Subject
You’ll now want to select the new layer and make it visible again using the Eye Icon next to the layer in the Layers Window. We’re going to make another selection of the subject, but this time a more precise one.
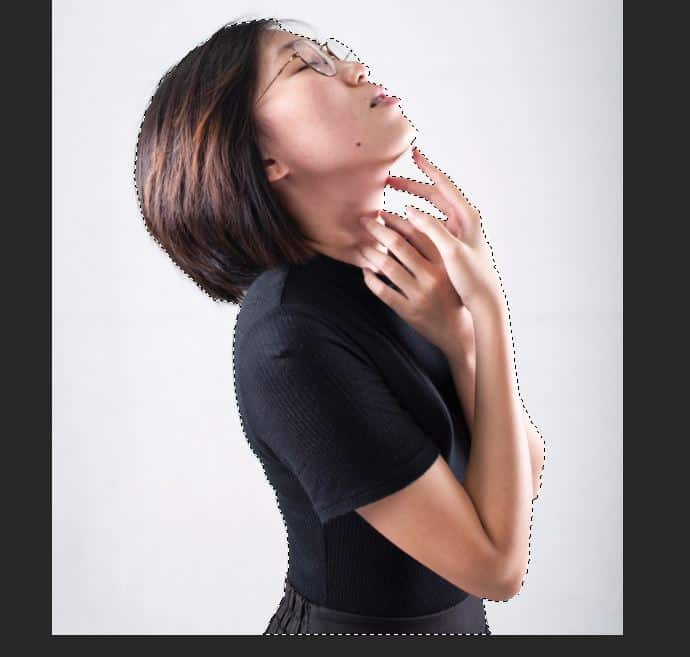
Select the Quick Selection Tool from the toolbar down the left of your screen and use it to click and drag over your subject to select it. At this point, make sure it is fairly precise, but don’t worry about single hair strands and other difficult aspects to select, as these will be handled in the next step.
Once you’re happy with the selection, click Select and Mask from the top of your screen. If this isn’t present (likely because you are working with an older version of Photoshop or because Photoshop struggle to make the difference between your subject and your background), then select Refine Edge instead.
Step 5: Refine the Edges of the Selection
Clicking Select and Mask will open up a new window, in which you can edit the properties of your selection.
We’re going to use the Refine Edge Tool in order to clean up the edges of the selection. So let’s continue by choosing this tool from the toolbar down the side of the window (indicated by the icon shown below).
Selecting this will open up a window, within which we’ll choose the Refine Edge Brush (located on the left side of the screen). You may wish to resize this as required.
Once you’ve selected this brush, you can use it to mask finer details, such as the edges of hair. Click and drag with the brush over the edges of the subject’s hair, and Photoshop will make an informed selection based upon the local pixels.
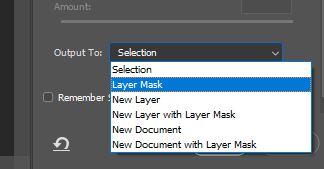
When you are happy that you have sufficiently neatened up the edges, head to the bottom right of the window, where you should see an option entitled ‘Output To’. Here, select Layer Mask from the drop-down menu. This will cause Photoshop to export the selection as a layer mask, which will be applied to the selected layer. You can then click OK.
Step 6: Duplicate the Layer and Apply the Layer Mask
You should now be able to see in the Layers Window that the selection has now been applied to the layer as a temporary layer mask. We can still remove this, or make its effect invisible, at any point.
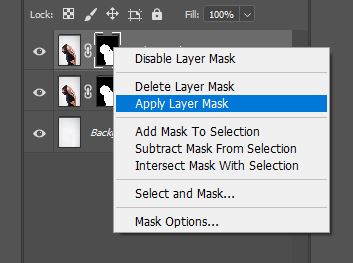
We’ll now want to duplicate the layer (Ctrl + J [Win] / Cmd + J [Mac]). Then, right click on the copied layer’s layer mask and select Apply Layer Mask. This will make the layer mask permanent, meaning that we can’t easily make quick changes to the selection again.
The permanency of this doesn’t matter in this case, since we duplicated the layer with the mask, so we will always have another ‘safety’ layer to head back to in case there’s an issue with the copied layer that we are working on.
Step 7: Rename and Duplicate the Layer
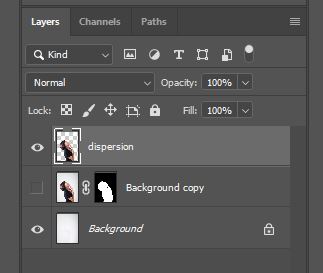
Once the layer mask has been applied, the selection should mean that the layer appears to consist solely of the subject, as the background has been removed.
For organisational purposes and to avoid confusion later on, we’ll now rename the layer ‘dispersion’ by double clicking on the layer’s title in the Layers Window.
At this point, we’ll also turn off the visibility of the middle layer that we copied, to avoid it temporarily harming the composition for now. You can do this by clicking on the Eye Icon that’s next to the layer in the window.
Next, you will need to duplicate the layer that we just renamed ‘Dispersion’- (Ctrl + J [Win] / Cmd + J [Mac]).
Rename this duplicate ‘Foreground’.
Step 8: Use the Liquify Tool
So now that you’ve got the layers and relevant selections set up, you can start on creating the dispersion effect.
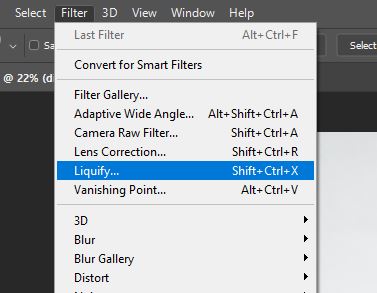
First, click on the layer entitled ‘dispersion’, then head to the bar along the top of the screen and select Filter > Liquify.
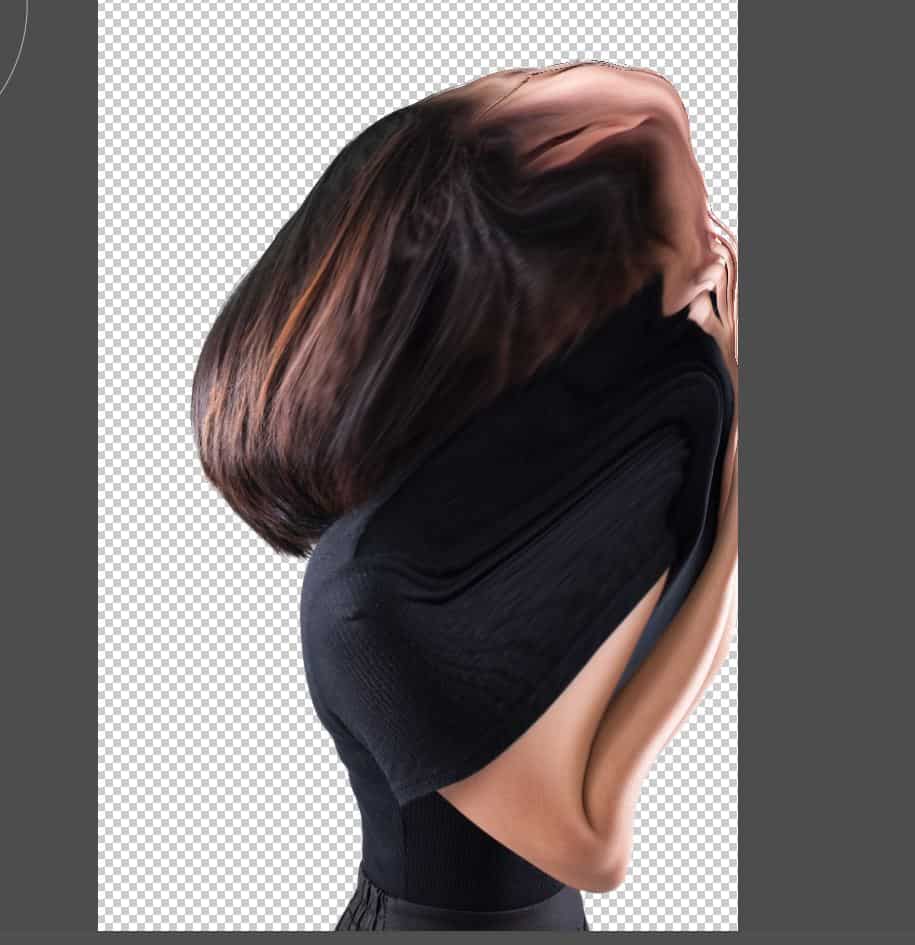
Within the Liquify Window, choose the Forward Warp Tool– the top option from the menu on the left of the screen. Click and drag with your mouse to pull out and warp the areas of the image that you want to see dispersed.
Distort and pull the subject as far as you want the effect to reach. You may wish to experiment with this a few times to get some sort of idea of how far you would like this to be. Once you’re satisfied, click OK.
Step 9: Use Layer Masks and Special Brushes to Create the Dispersion Effect
Once you have completed the liquifying and warping process, you’ll need to add a layer mask to hide the entire layer.
To do this, and add a completely black layer mask (making all areas of the layer invisible), hold down the Alt [Win] / Option [Mac] key, whilst click the Mask Button at the bottom of the layers panel (as shown below).
Next, select the ‘Foreground’ layer from the layers window and add a layer mask to it, by clicking the same Mask Button as before, but this time without the Alt / Option key.
This will create a ‘reveal mask’ which makes everything initially visible. We can work on this with a black brush to make elements invisible.
Click on the layer mask, and then select the Brush Tool from the left tool panel. Select a dispersion brush you previously downloaded, and use it with a black colour to make areas of the layer invisible. You can use a white brush to add in any areas again.
If you haven’t already installed any dispersion brushes, see the top of the article.
Remember to experiment with the size, rotation and type of the brush to avoid repetition, which would make the effect less convincing.
We’ll now use a similar technique on the ‘dispersion’ layer, but instead using a white brush to make areas visible. Remember that you can always use a white brush to restore the invisibility of elements.
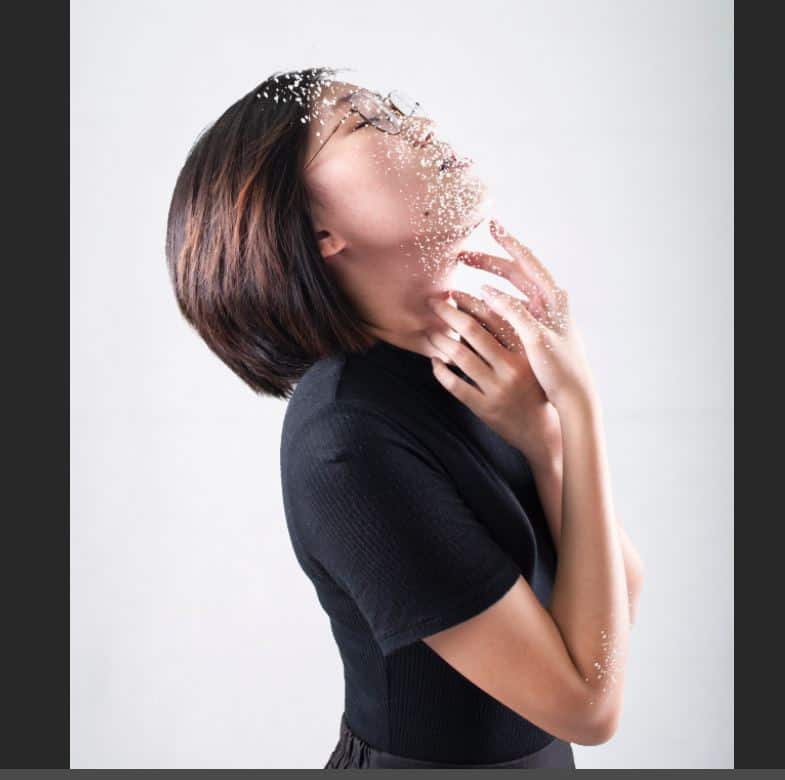
Doing this will reveal areas of the liquify distortion that you created. Experiment with this step, and keep playing with the amount of editing, to increase or decrease the extent of the effect.
And you’re finished! You should now have created an awesome dispersion piece and should have gained the skills necessary to utilise similar techniques in typography, design and more.
BONUS
Want to find out more about the processes discussed in this article? Check out this video by Webflippy on a similar technique, which explores the use of the same process but with different types of brushes.
Hey, I'm a Professional Retoucher making $10k a month thanks to Photoshop.Register to my newsletter to get freelancing tips and a FREE Brush Pack in Bonus! My Newsletter

