How to Install & Use a Photoshop Brush
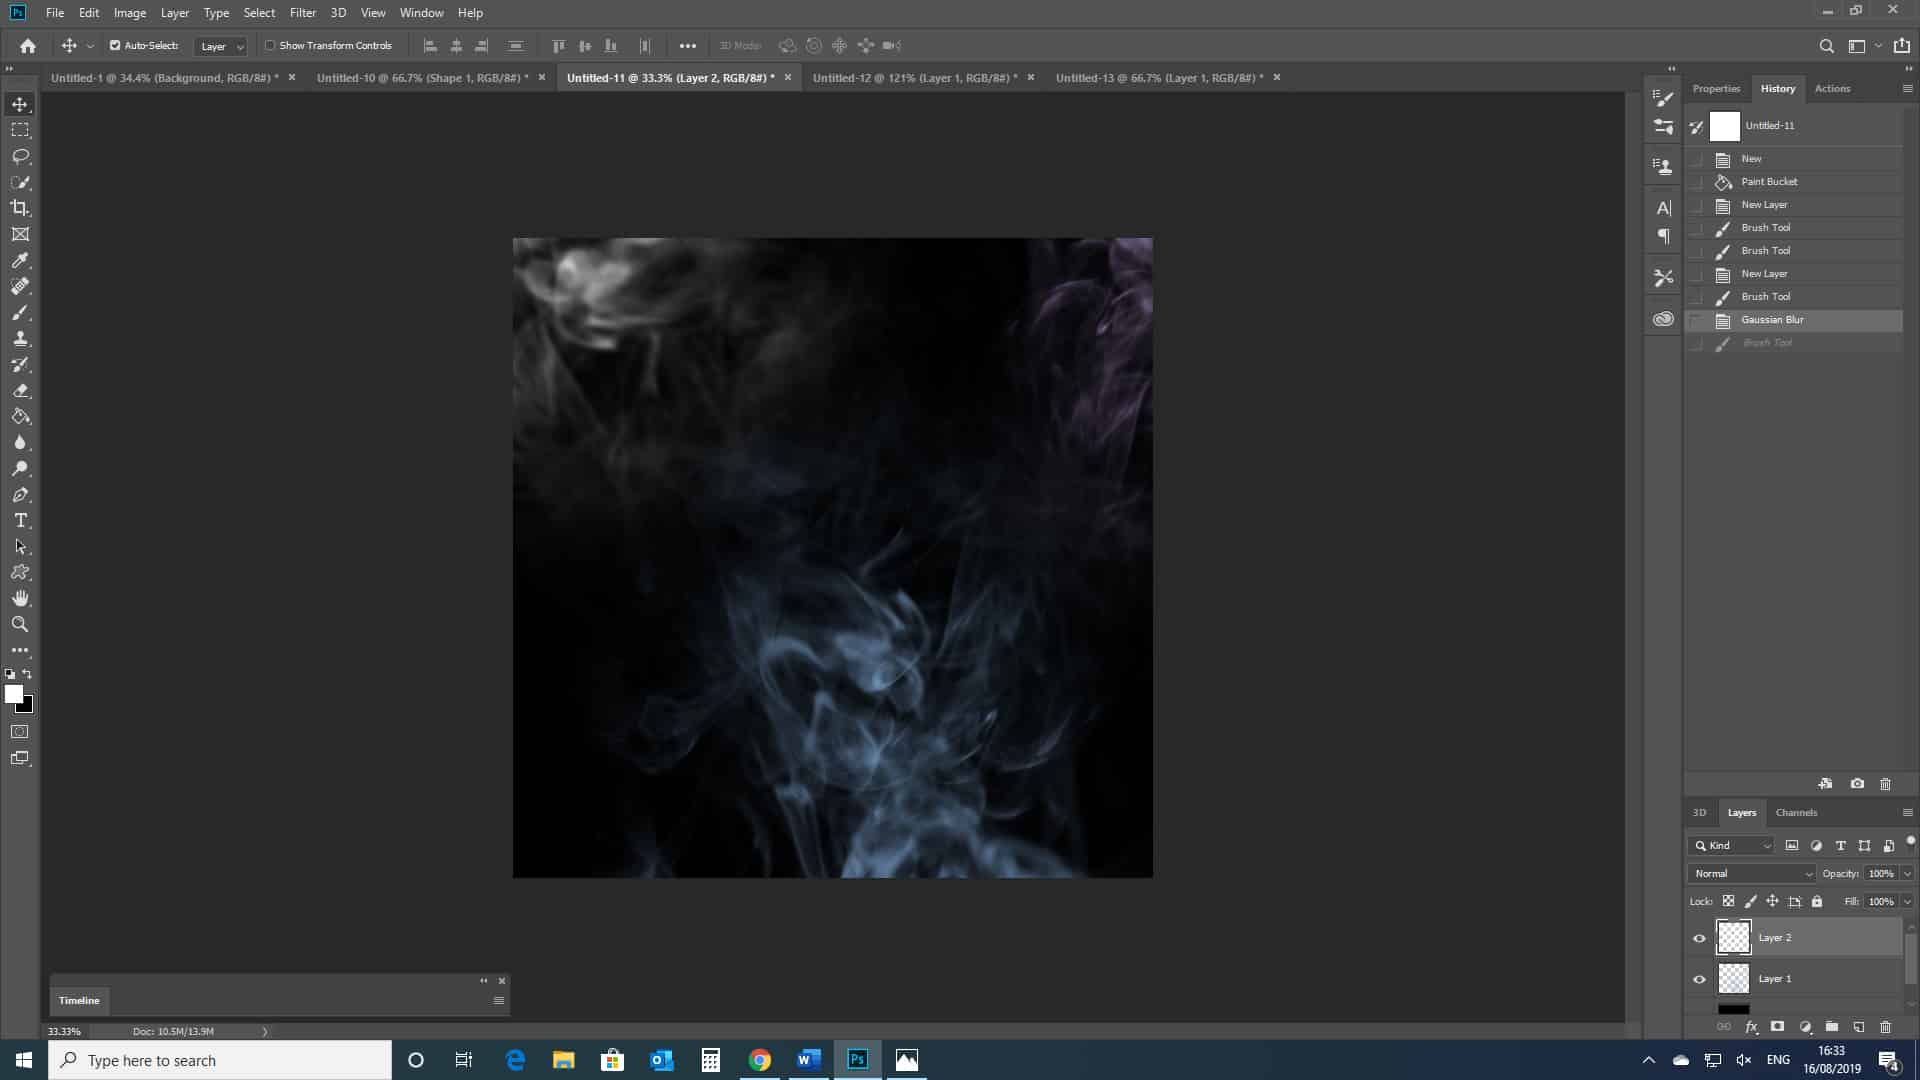
If you’ve ever used Photoshop, you’ve almost certainly used the brush tool at some point. Whether you are creating a layer mask, completing a digital painting, or forming a variety of textures or patterns, brushes allow you to work creatively to reach pretty much any outcome that you can imagine.
Now I’m sure that if you have worked with Photoshop brushes before, you will already be familiar with using the basic preset brushes that are automatically present in the program. But after reading this article, you will be able to take your brushwork to a whole new level, knowing how to install and use a Photoshop brush of your choice.
Learning how to use more personal brushes can save time, make your work stand out, and allow you to create an unlimited number of unique pieces.
So, let’s get started!
Introduction to Photoshop Brushes
A Photoshop brush is a tool that allows you to select the appearance of any lines that you paint onto a document, which effectively acts as a digital canvas, when using the brush tool.
Whilst the Adobe program does automatically provide you with a few choices of brush style- under the categories of general styles, dry media, wet media, and special effects- there are thousands of other brush styles available to download.
Read on to discover how to download and use these brushes to add a personal touch to your pieces.
Step 1: Finding and Installing a Brush
To begin, we will first need to locate and select a brush to install. To find one, you can simply search for ‘Photoshop brushes free download’ or similar, along with a keyword if you’re looking for a particular style of brush (for instance, ‘watercolour’)
For this tutorial, I used these smoke brushes from ‘Brusheezy’
Once you have chosen and downloaded a suitable brush, select the file and click on it to open it up. This will display the contents of the zip folder. One of these files should be a .ABR brush file- copy it (right click > copy) and paste it into a sensible location in your files (right click > paste).
Step 2: Importing the Brush Into Photoshop
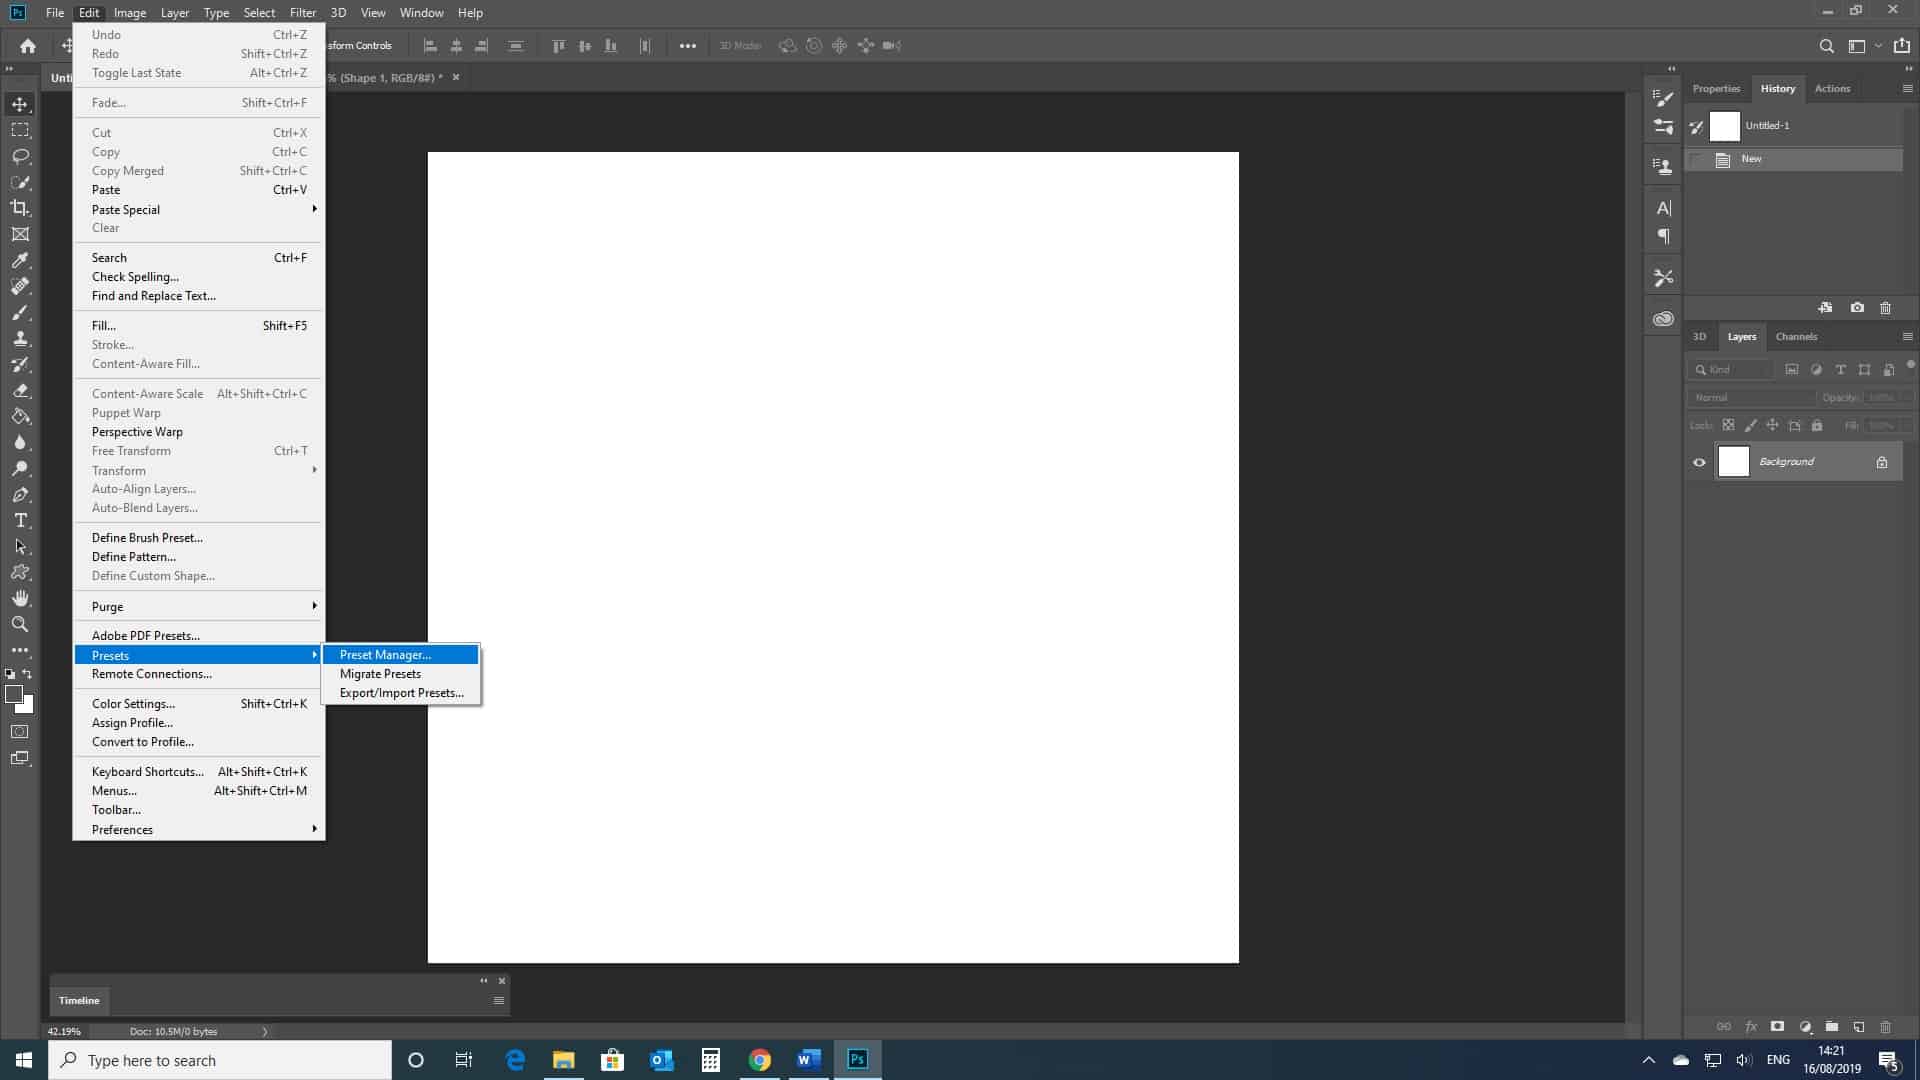
After you have done this, open up Photoshop, and head to the top panel. Go to Edit > Presets > Preset Manager.
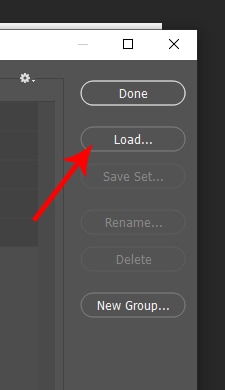
Select Brushes from the dropdown menu at the top of the window that appears, and then hit the Load button to import the brush that you downloaded previously.
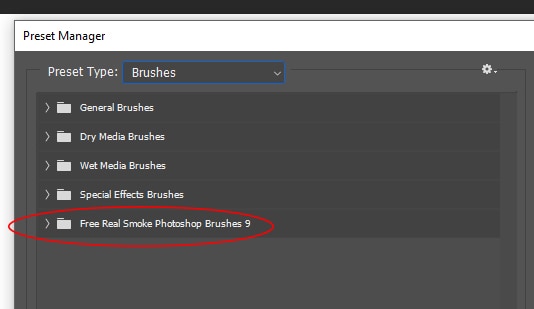
The file containing your new brush should now appear in the Preset Manager Window. Click done to close the tab.
Step 3: Using the New Brush
Now that your brush has been imported into Photoshop, you’re ready to get creative with it!
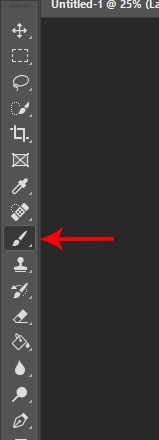
Let’s make a start by selecting the brush tool from the side panel.
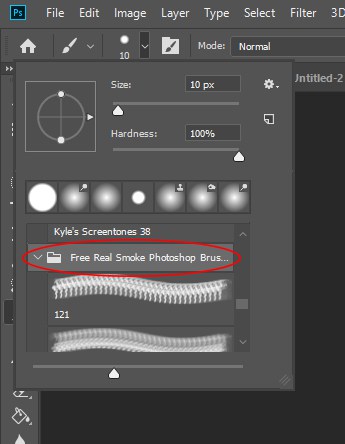
Once you have selected the brush tool, there should be a panel that appears at the top, in which you can select a brush and alter its properties, such as size, hardness, opacity and orientation.
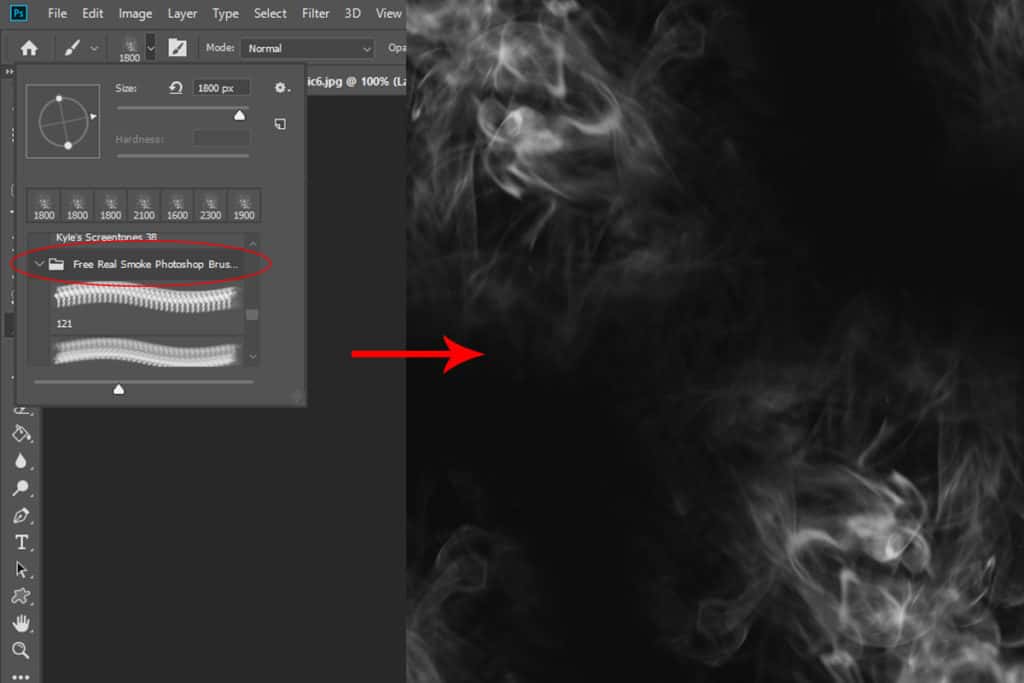
Here, select your new brush from the drop-down menu (you will probably have to scroll down through this menu to find the correct one).
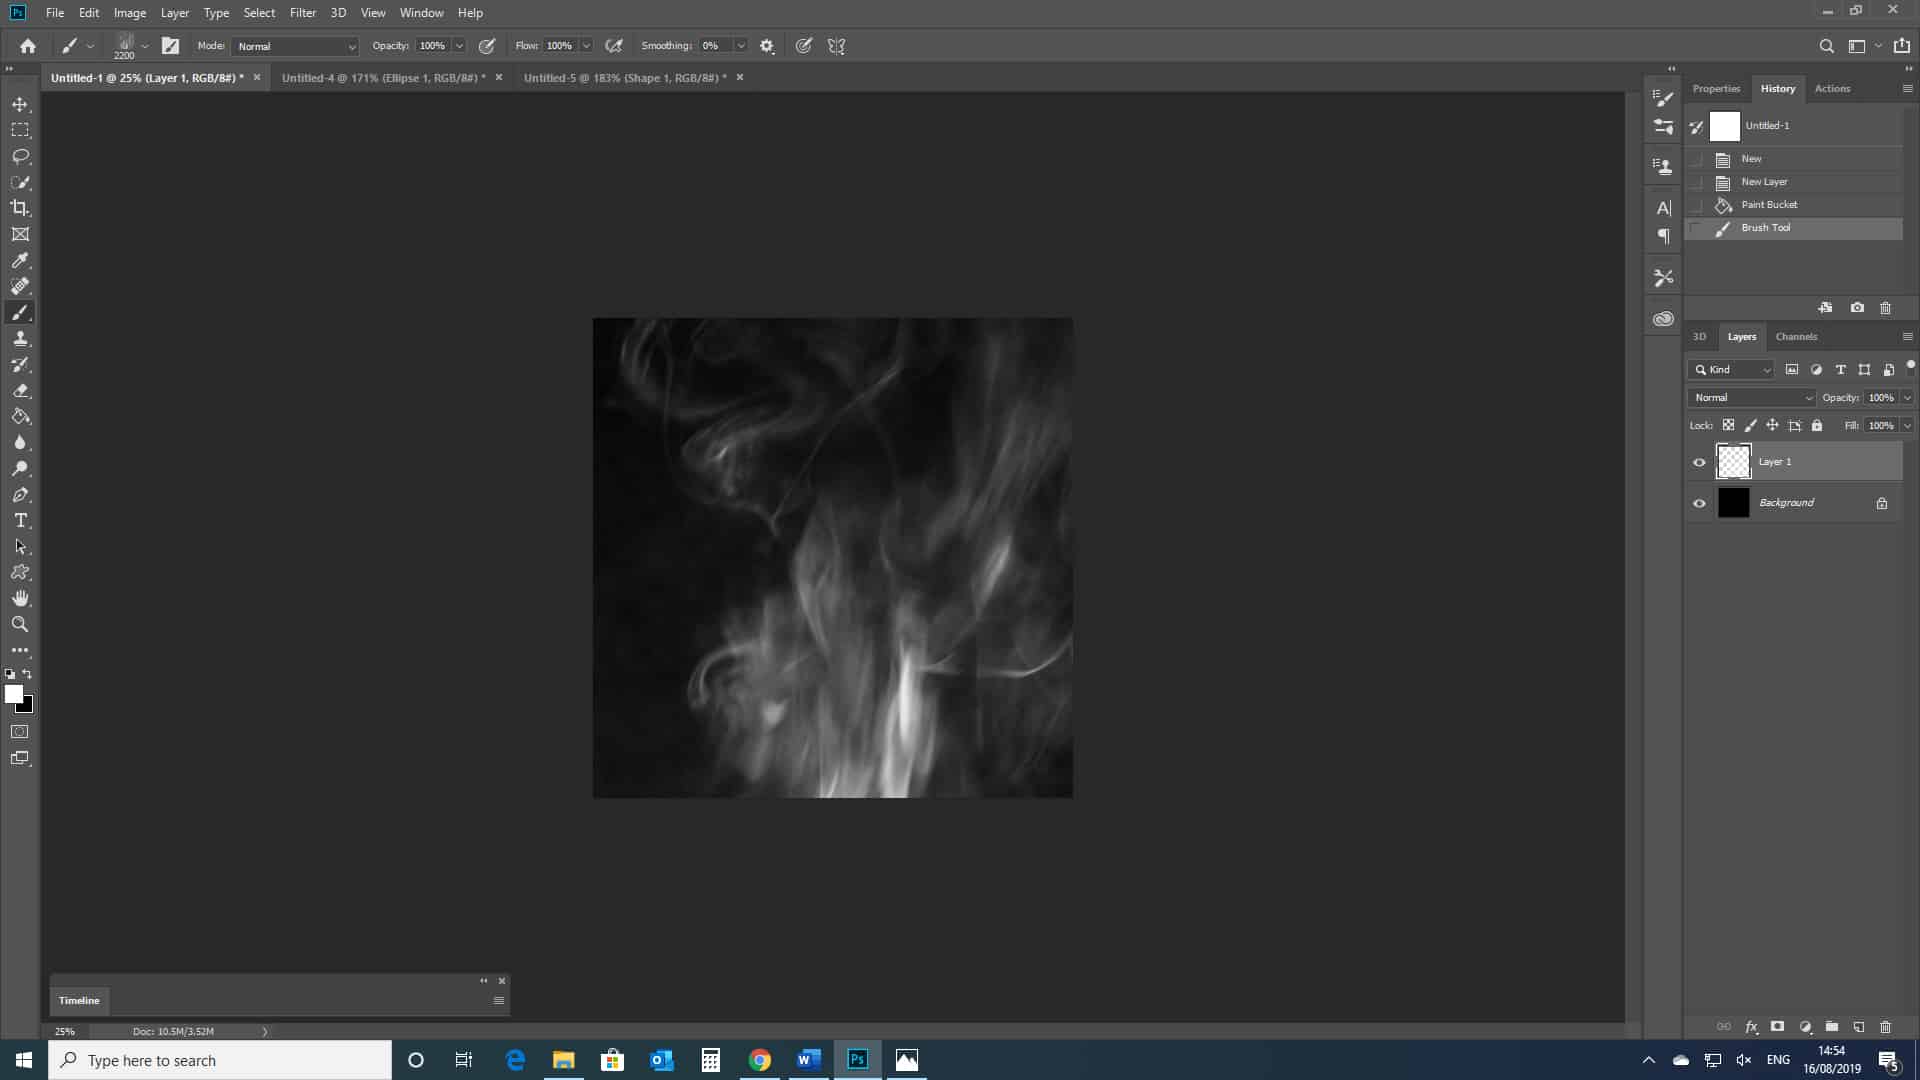
Now, using your brush, simply click anywhere on your canvas to paint with it. You will achieve different effects depending on whether you paint with a single click, or by clicking and dragging. See below for examples of how your technique could affect the outcome.
Note that these exemplar outcomes were created using a smoke brush, and different effects could be created by using brushes of different styles, such as watercolour or acrylic looks.
The outcome shown above was created by using a large white brush of full opacity, with a single click. Through using such a technique, you tend to get a clear image, which, in this case, ended up looking simply like a photograph of smoke.
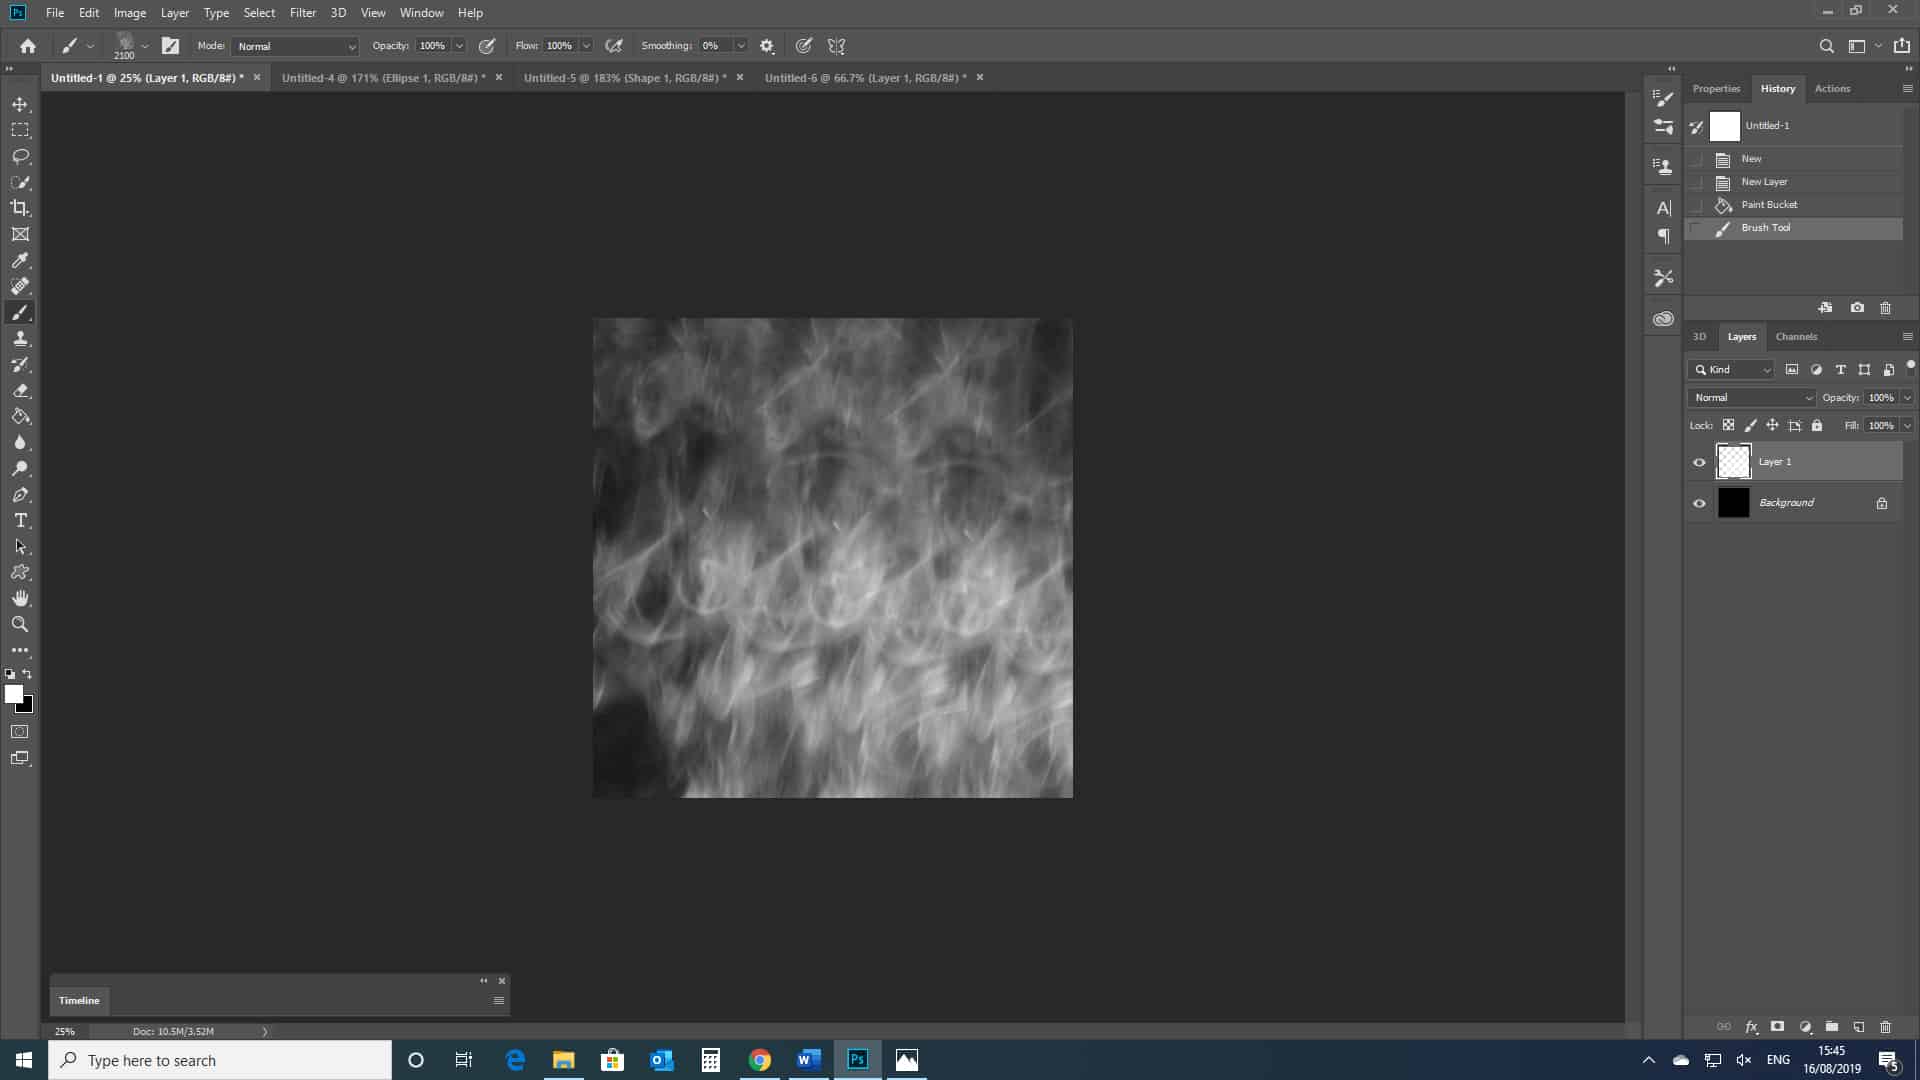
This second outcome (above) displays the effect that you would achieve if you were to use the brush by clicking and dragging. As you can see, this technique is not ideal in this case as the outcome is not as clear. However, this could possibly work as a texture to incorporate into other pieces.
Now let’s decrease the size of the brush.
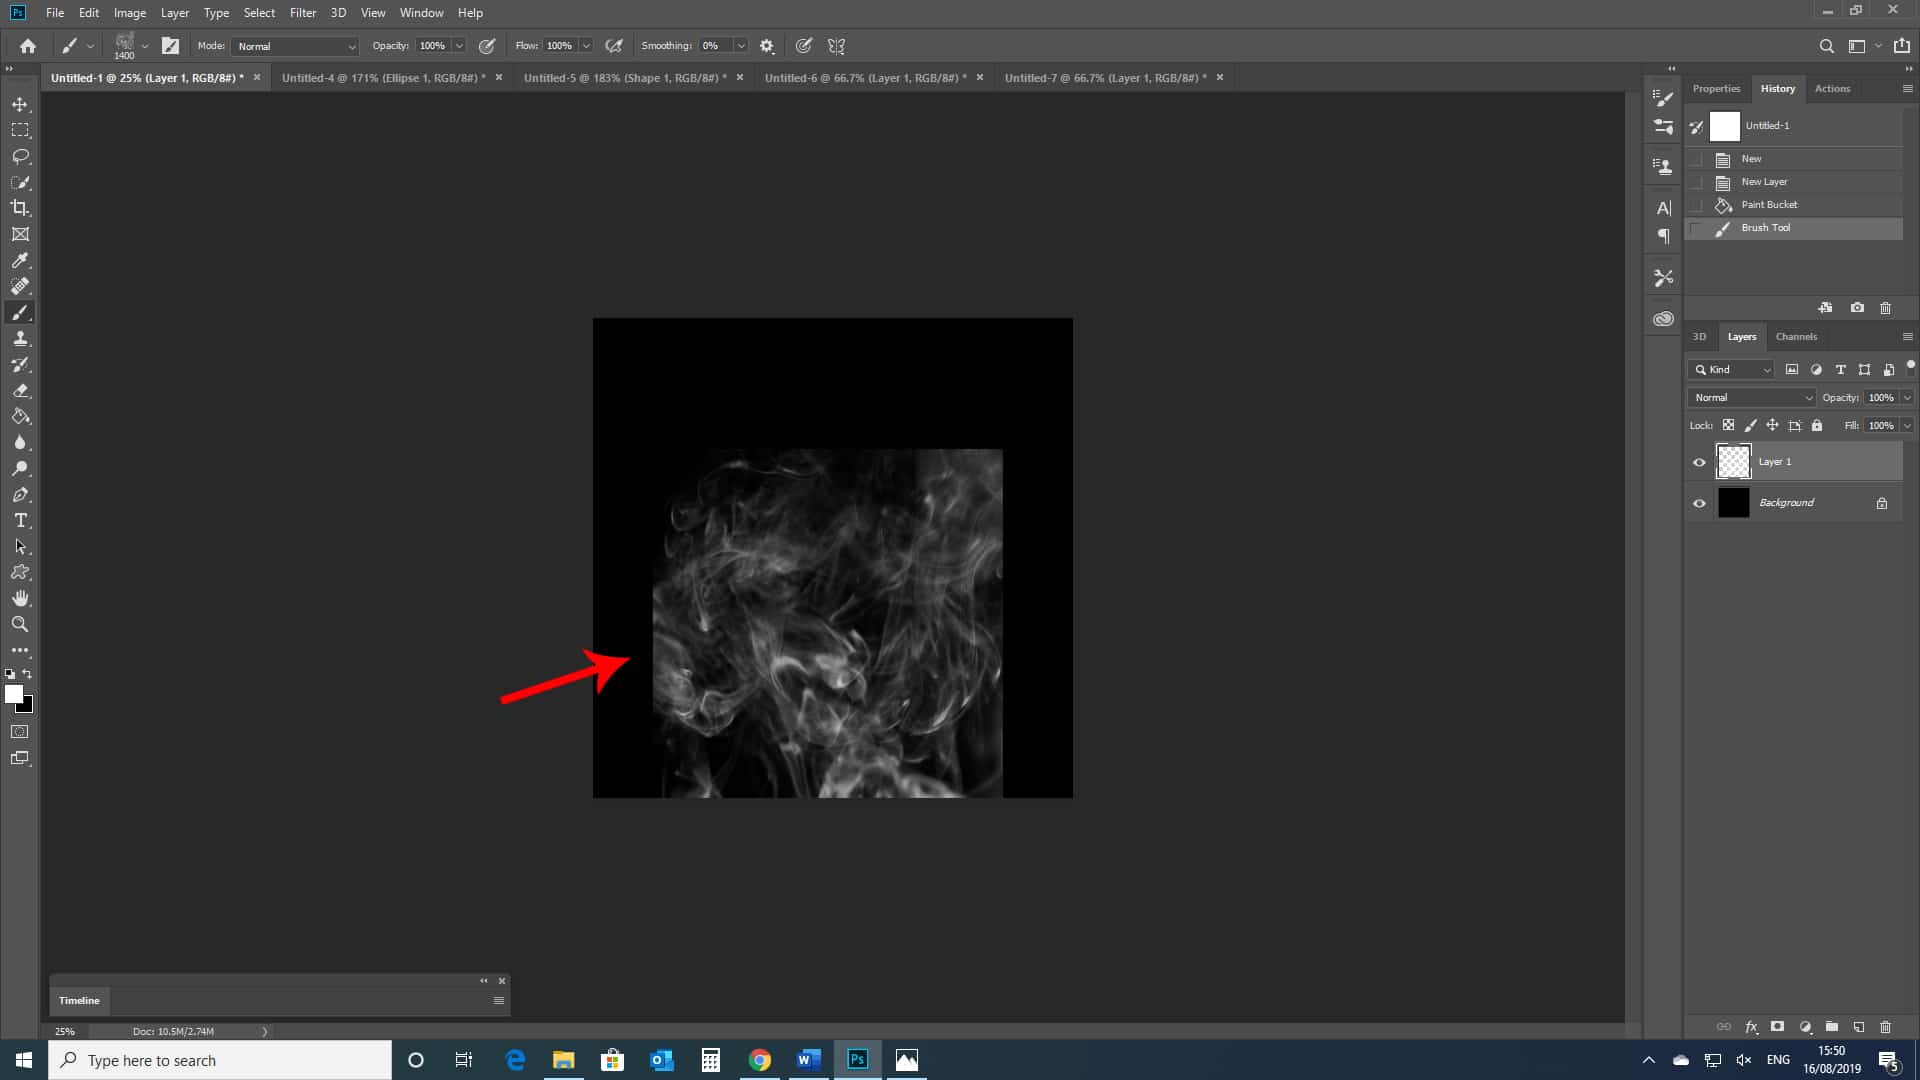
The picture above is an example of what happens if you decrease the size of the brush that you are using. The brush used in this tutorial turned out to not be ideal when used with a small size, since it had clearly defined edges, meaning that in this case it didn’t blend in too well with the background.
If this is happening with your brush, then see below for a quick tutorial on how to get rid of these harsh, unnatural edges.
Step 4: Editing the Brush- Getting Rid of Harsh Edges (if Necessary)- and Creating a New One
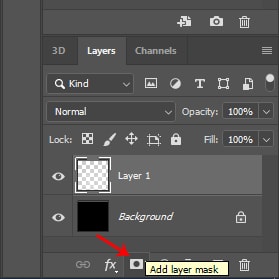
If your brush, like the one used for this tutorial, causes there to be visibly harsh edges in your piece, where the brushed-on colour ends and meets the background, then we can use a layer mask to edit them out. Let’s begin by selecting the layer containing the brushwork, then adding a layer mask to it.
To do this, simply click on the indicated icon (see image below) at the bottom of the layers window.
When working with a layer mask, we use two colours- black and white only- to determine which areas of the layer will be visible, and which will be invisible. A black brush is used to make areas of the layer invisible, whilst a white brush can be used to make areas of the layer visible again.
Ensuring that the layer mask is selected, click on the brush tool, and select a soft round brush of any reasonable size. Decreasing the opacity of this brush will likely give you a better outcome.
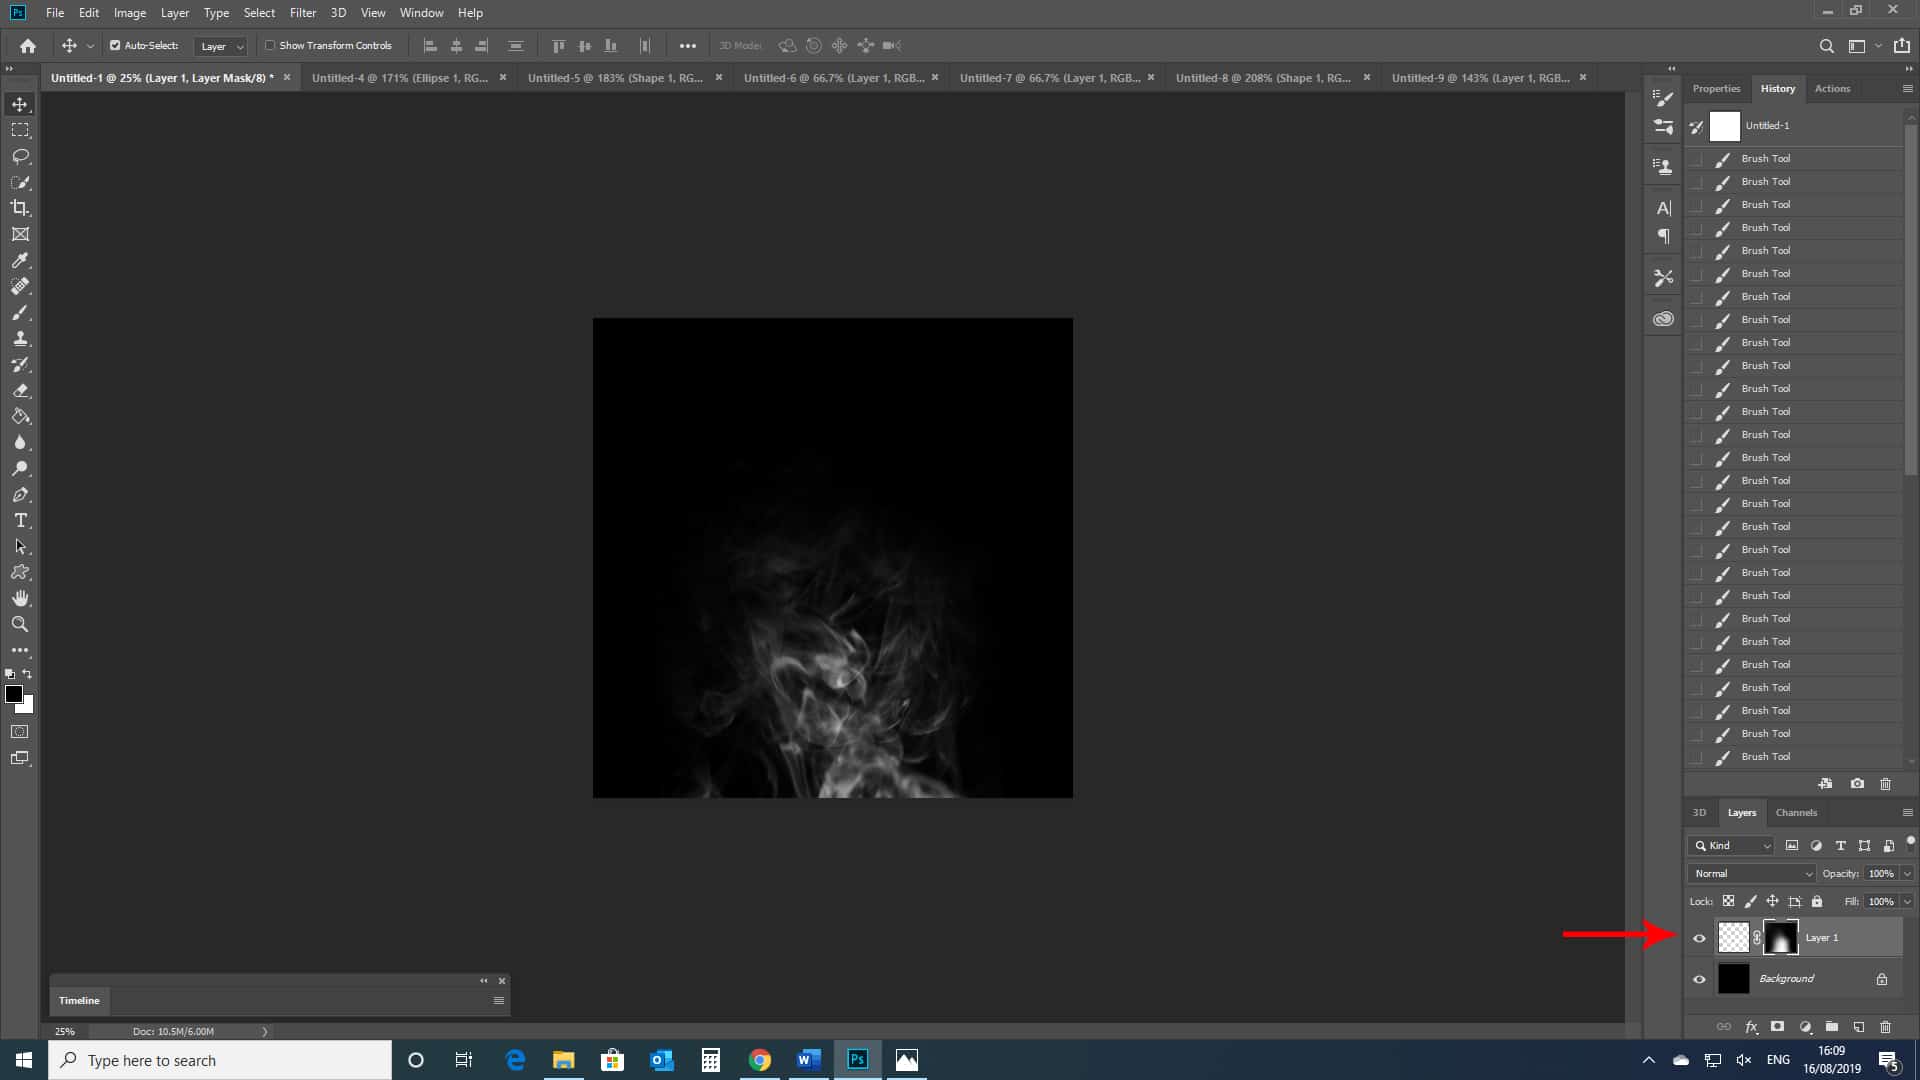
Using the colour black with this brush, paint over any areas that you wish to be invisible (in this case the harsh edges).
You can see in the image above that the harsh edges are now invisible. The arrow points to the layer mask, which as you can see now has black on it (corresponding to the invisible areas of the layer).
Once you’re satisfied with the look of it, you can turn this into a new brush, creating essentially the same brush as before but without the harsh edges.
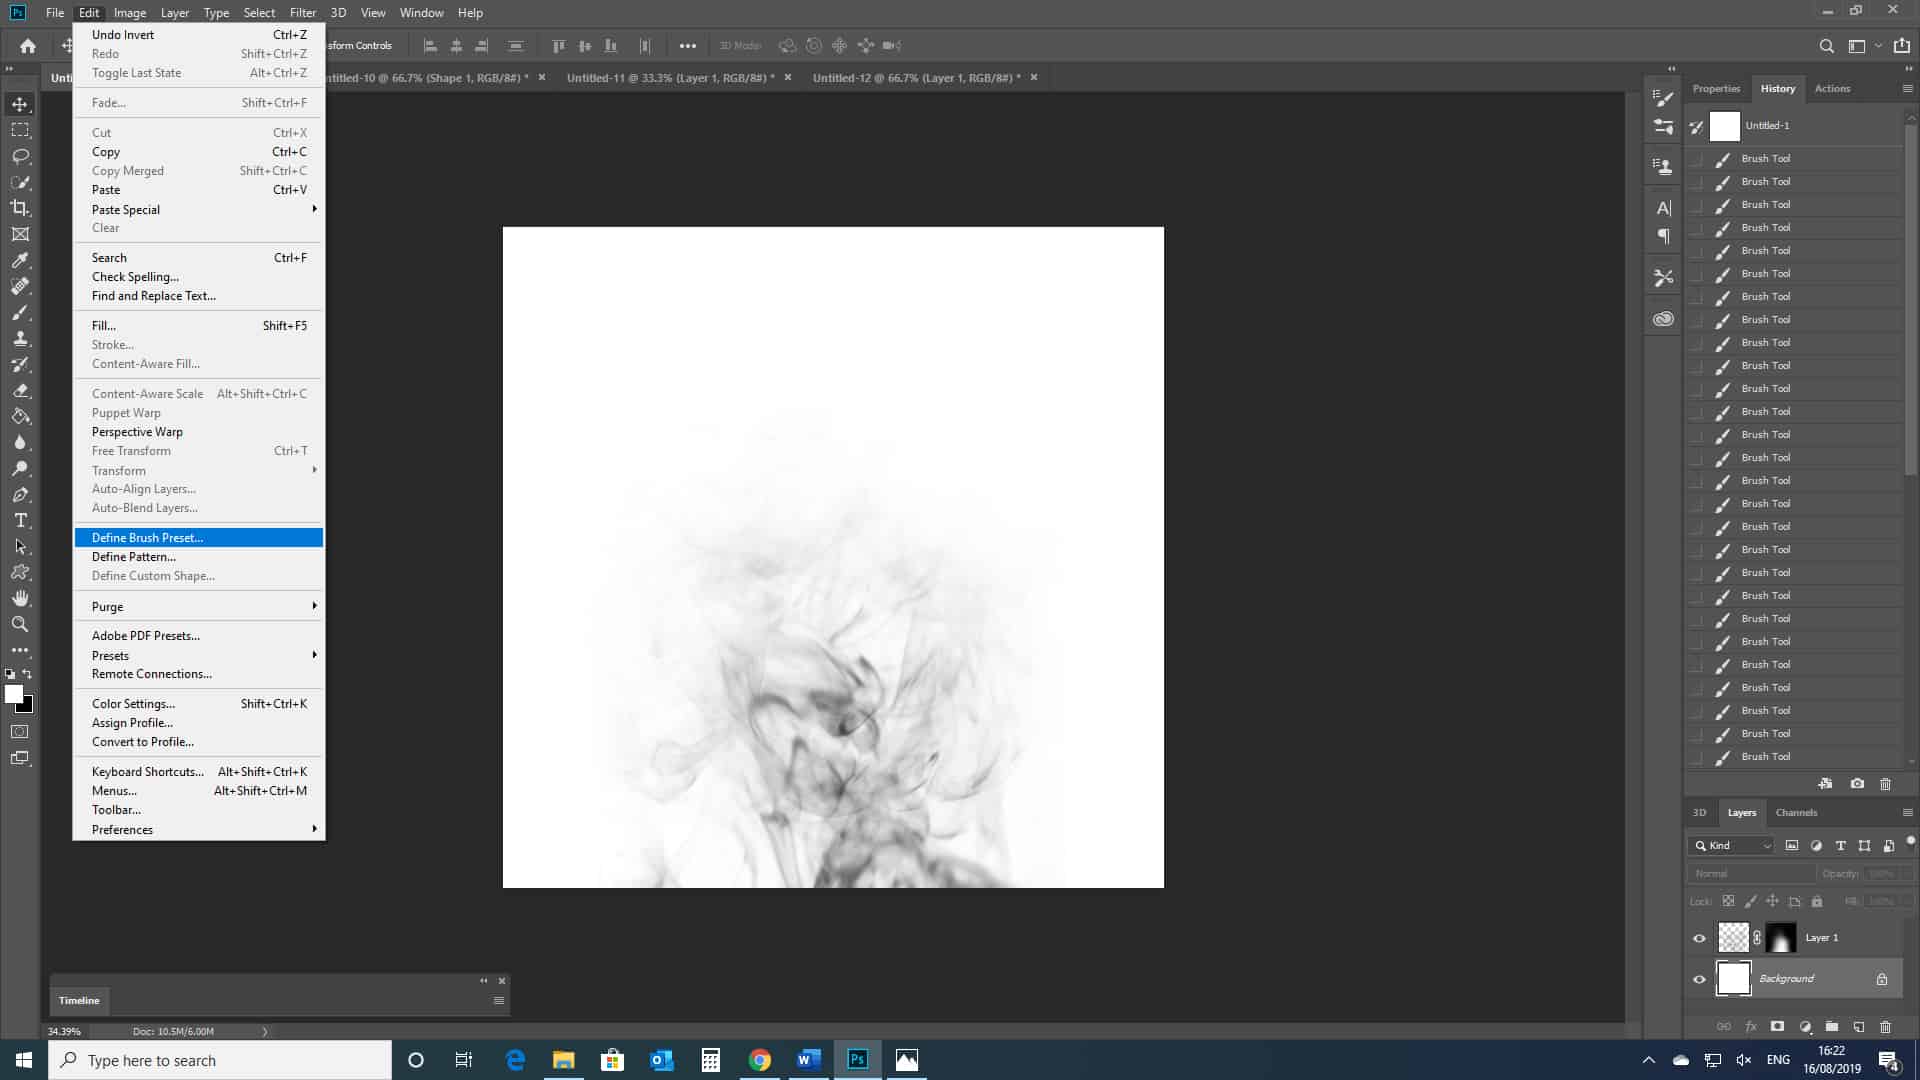
If, like in the tutorial, you have been working with a white brush on a black background, you are going to have to invert the colours. This only works if the area that you want to act as the brush is black, and the background is pure white.
If you therefore need to invert the colours, do so by heading to Image > Adjustments > Invert.
We’re now ready to turn this into a new brush. Select Edit > Define Brush Preset.
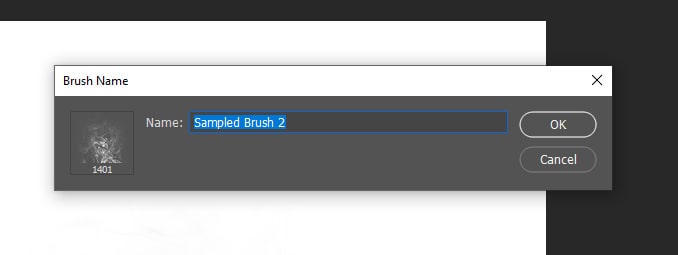
This will prompt a window to come up, in which you can set the name of your new brush to whatever you want. Once you are happy, select OK.
You can now access and use this brush whenever you would like to, in whatever colour, size, opacity and orientation.
And that’s everything you need to know about installing and using Photoshop brushes to use in almost any project. The uses of this technique are endless, from adding logos to your pieces, to painting digitally.
BONUS
Do you feel confident enough with Photoshop to start earning money with it? Check our 7 Proven Ways to Make Money with Photoshop.
Want to learn even more about how you could use these brushes to create your next masterpiece? Check out this video by Envato Tuts+ that teaches you 10 tips on how to master Photoshop brushes.
Hey, I'm a Professional Retoucher making $10k a month thanks to Photoshop.Register to my newsletter to get freelancing tips and a FREE Brush Pack in Bonus! My Newsletter


