Amongst beginners, there can often be lots of confusion surrounding channels and how they differ from layers. However, understanding both elements, particularly layers, is especially important when using Photoshop.
This article will help to explain the individual concepts of layers and channels, and provide a comparison between the two elements, sharing the situations in which you would make use of each one and the options you have when editing them.
If you are only just starting to use Photoshop and want to learn more about the program and its capabilities, then please go ahead and take a look at our free guide to Photoshop, which covers everything that a beginner needs to know about the program! In the guide, we cover the basics of layers and channels, which might help you in understanding the content of this article.
In summary, the two can be differentiated by the fact that layers are used to isolate various parts of an image for individual editing, whilst channels are used for providing a visual breakdown of how much color information is stored in an image. But now, let’s take a deeper look at the differences!
There is a video at the end of the article explaining you everything, click here to jump right to it.
What Are Layers?
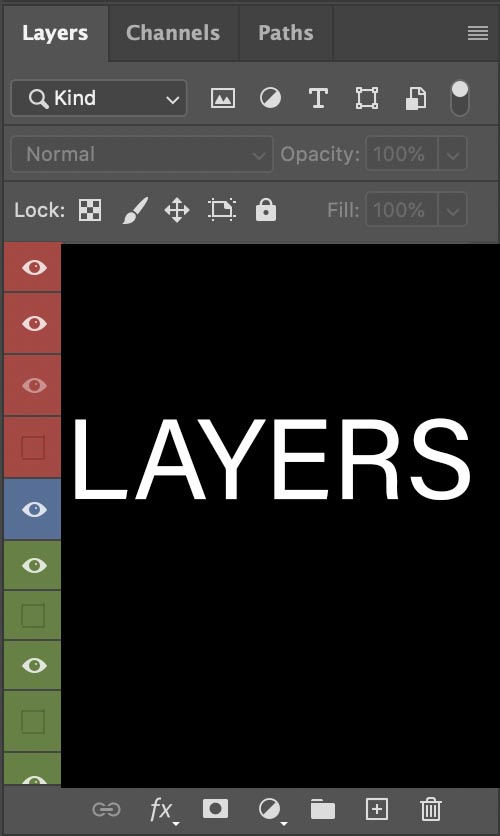
Layers are one of the most important aspects of Photoshop. They are what makes the program unique, giving it so many capabilities and providing users with the opportunity to make specific edits to individual areas of a document without affecting any other areas. Even though back in time, layers weren’t even available in the first versions of Photoshop, now it’s what makes it so powerful.
Layers can be used to isolate particular elements of an image so that they can be edited individually as discrete objects via image adjustments, transformations, painting tools, and various other editing options and effects.
A great and commonly used way to explain the concept of layers is by comparing them to layers of acetate. Imagine that you were to have a printed image placed flat on a table. Then, imagine placing a sheet of acetate over the top, on which you have drawn a car.
If you were to want to move this car to a different position in the image below, then you would simply be able to move the sheet of acetate and reposition the drawing of the car without affecting the background (the printed image).
Let’s now imagine a different situation involving the same elements. This time imagine that you have again placed a printed image on a table. But instead of drawing the car on a sheet of acetate, imagine that you draw it directly onto the sheet of paper.
If now you were to want to move this car to a different position within the background, you would not be able to do so, since you have already marked a specific area of the sheet of paper. You cannot just move a pen mark to a new position on the paper.
The same principles apply when it comes to working with layers in Photoshop. If you were to use the brush tool to draw an element onto a layer, then you wouldn’t be able to move or edit that newly drawn element independently from the rest of that layer’s contents.
However, if you were to instead create a new layer and draw on this empty one, then you would be dedicating a whole layer to that one element, allowing you to move and edit this element individually without affecting any other layers above or below it.
What Are Channels?
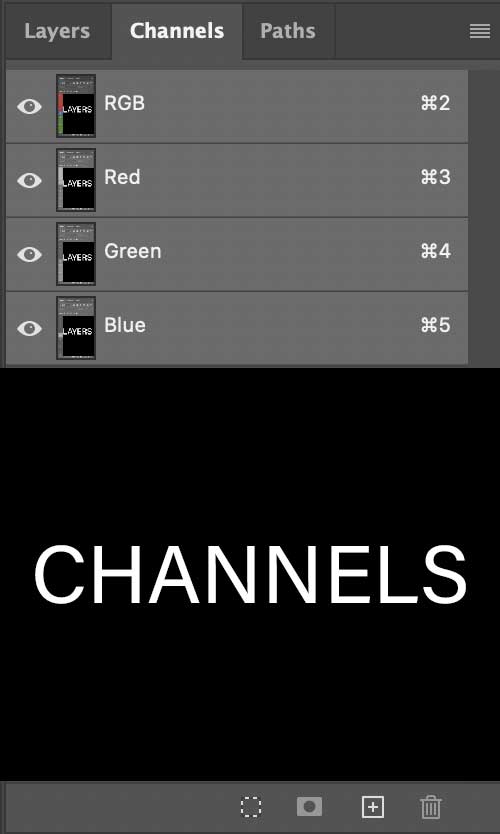
Channels, on the other hand, are used as storage areas for color information or saved selections. Color information channels are created automatically upon the creation of a document, and all Photoshop documents contain at least one channel.
The default channels will be created based upon the image mode that you are working in. For instance, if your document is in RGB mode, then three individual channels (plus an additional composite channel) will be created for the colors red, green and blue.
Channels will be automatically displayed as grayscale versions of your image, with varying brightness levels (from black to white) representing different concentrations of the color in different areas of the image.
White areas of a particular color’s channel correspond to where there is a high concentration of the given color, whilst black, darker, areas of the channel correspond to the areas where there is a lower level of that color.
Documents that will consist of only a single channel include ones that are in bitmap, grayscale, duotone, or indexed-color modes.
Where Can They Be Found?
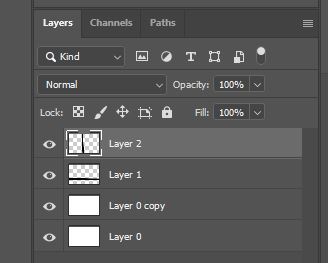
Layers can be found, added, edited, or deleted in the Layers Window. This should, by default, be located in the bottom-right corner of your screen, and should look something like the one shown below:
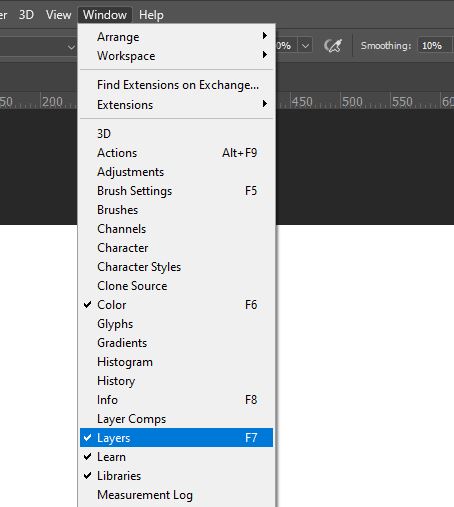
If the window is not already opened by default, then you can open it manually by heading along the top of the screen to Window > Layers.
Similarly, the Channels Window can be found by default at the bottom right of the screen. To bring it up, you tend to have to click on the title ‘Channels’ directly above the Layers Window and next to the word Layers, as shown below:
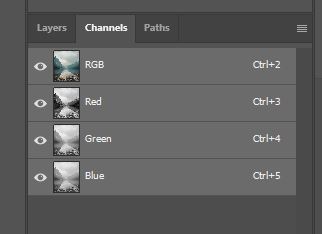
If this option isn’t here, then you will probably have to open the window manually. This can be done by selecting Window > Channels from the menu bar along the top of the screen.
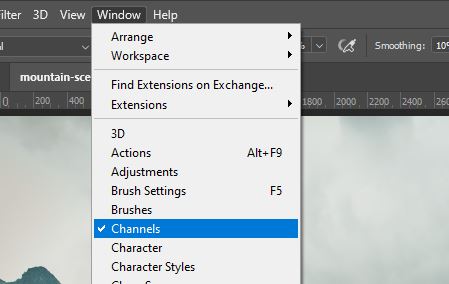
As you can see, layers and channels are similar here in that they both have a dedicated window in which they can be found, created, or edited, and both of these windows are automatically located at the bottom right of your screen.
You can toggle between each window by clicking on the panel’s respective title from the bar just above the window.

Difference 1: What They Store
The main difference between layers and channels is the difference between what they are used to store. This difference really places layers and channels in completely different spectrums- the two are actually extremely far from one another when you become familiar with their purposes.
Layers are essentially used for storing image data and are typically dedicated to individual parts of a document that make up the whole image. They are an essential building block in the development of a non-destructive workflow, as they allow you to make edits to single elements without affecting others.
Effectively, they are what form the overall appearance of your document/image.
By contrast, channels are used for storing color information or saved selections. Unlike layers, they do not store pixels that will form part of the image, but rather act as visual breakdowns of the amount of color information in each section of an image.
Difference 2: How They Appear in the Document
Another difference between layers and channels is that layers are seen in the final document/image whilst channels are invisible.
In other words, unless you explicitly display a channel, it doesn’t appear in image or print. Channels are just a way of displaying color information. You can make them temporarily visible in order to analyse or edit the distribution of this information, but ultimately, they won’t be directly visible in the final full-color image.
On the other hand, the content on your layers will always be visible unless it is:
- On a layer that has been made invisible (keep reading to discover how to do this)
- On a layer with a layer mask that causes certain areas of content to be invisible
- Covered by overlapping content on a higher layer
- On a layer that has an opacity value of 0% or a blend mode that causes certain tones of your content to become invisible
Any edits that you apply to your layers, or any new layers you create, will be visible in image and print, unless the layer has been made invisible by any of the methods listed above.
One way in which layers and channels are similar in terms of visibility is that, for both elements, there is the option available to make them invisible. The process used to do this is the same for both layers and channels.
We’ll explain the process used that is applicable to both, but we will demonstrate with images the one used when making a layer invisible.
First, you will want to head to the Layers Window (or for channels, the Channels Window) at the bottom right of your screen.

Next, identify the layer (or channel) that you would like to make invisible. Click on the invisibility icon at the left of it, resembling an eye:

You should then notice that the layer or channel is now invisible! If you have made a layer invisible, it means that the contents and effects of the layer have been temporarily hidden. If you have made a channel invisible, then the specific color that channel was dedicated to will now be absent from the image. For instance, making the Red channel invisible would remove the red from your image.
To make the layer or channel visible again, simply click again on the spot where the eye icon was at the left of the layer to bring it back.

With channels, you have the option to view them in isolation in order to see the areas in which there are high or low concentrations of a given color. To see a single channel in isolation, simply click on it in the Channels Panel.
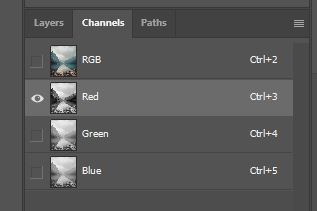
This will display, in the Document Window, a grayscale version of your image, in which light areas represent where the color represented by the channel is highly concentrated, and black areas represent where the color is entirely absent or where there is a very low concentration of it.
(For this tutorial, we are using an image by Marlon Martinez from Pexels.)
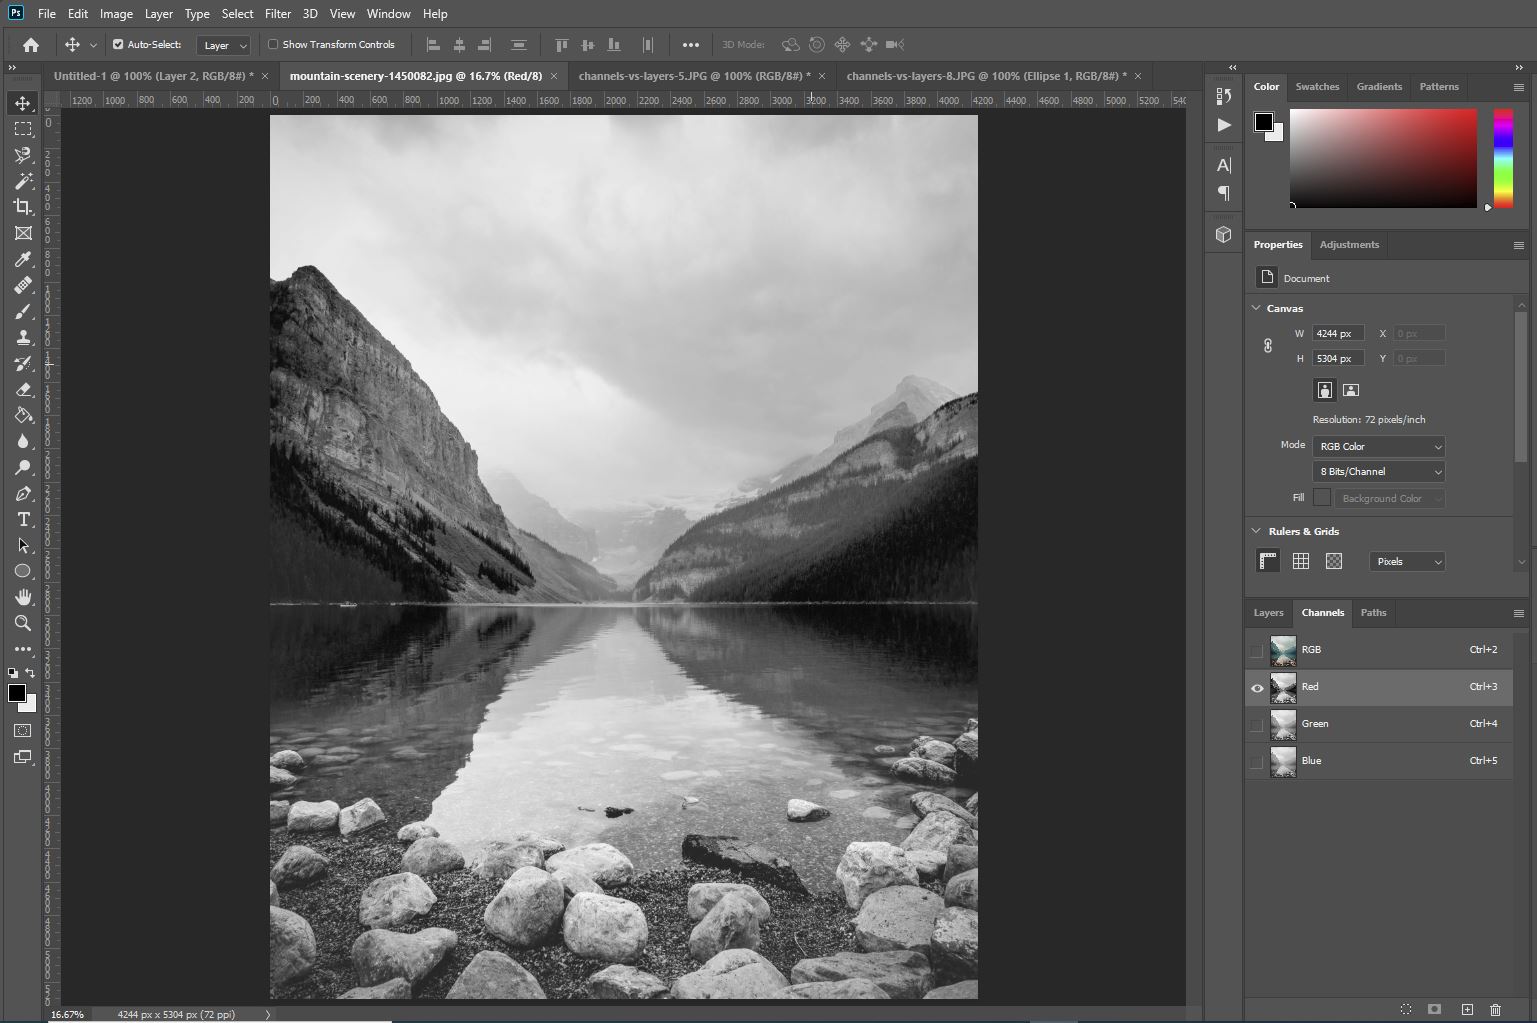
To make multiple channels visible at once, you can click on them individually whilst holding the Shift or Ctrl [Win] / Cmd [Mac] key on your keyboard. You can see which channels are active by seeing which ones are highlighted in the Channels Panel.
It’s a similar case with layers. If a layer is highlighted in the Layers Window, Photoshop is indicating that the layer is active. This means that any edits that you make will be applied to only that layer. For instance, if you use the Brush Tool (B) to paint on your document, then the pixels painted on will be added to the active layer only.
Just like with channels, there is also the option to make multiple layers active at once. This can also be done by holding down the Shift or Ctrl [Win] / Cmd [Mac] key on your keyboard whilst selecting the layers that you would like to make active.
And that is about all there is to know about the differences between layers and channels in Photoshop! After reading this article, we hope that you are now more familiar with the uses and properties of layers and channels, and that you feel more comfortable with knowing the differences between each one.
BONUS
If you still want to learn more about the differences between them, or you would like to learn about the topic in a video format, then feel free to take a look at this video by 3DBuzz, which provides a good in-depth explanation of layers and channels.
Hey, I'm a Professional Retoucher making $10k a month thanks to Photoshop.Register to my newsletter to get freelancing tips and a FREE Brush Pack in Bonus! My Newsletter


