The Most Efficient Technique to Remove a Background in Photoshop

Background removals are one of the most common procedures performed inside Photoshop. However, they are also some of the most complicated, requiring all the skills of a Photoshop artist to be used all at once.
So, today we’re going to cover some of the techniques you can use to efficiently and quickly cut out the foreground from the background in a picture.
Remember, there is no perfect method for background removal.
In this tutorial, we are going to explore two examples of background removal: one that is simple, and one that is a little more complex. So without further ado, let us get started.
Example 1: Removing the background in a simple image
In the context of this tutorial, a simple image is any image that has a clear distinction between the background and foreground. In this example, I am going to use this image from Pexels:
Feel free to over to our 25 Best Stock Images Websites to find great and free images to use.
As you can see, this is a very simple image. The foreground is an extremely simple circular shape, and the background is uncomplicated and made of an even color. For such an image, Photoshop has a great toolset that makes background removal an absolute piece of cake.
Let us now open this image inside Photoshop. If you would like to learn how to do that, click here.
Step 1: Preparing the image
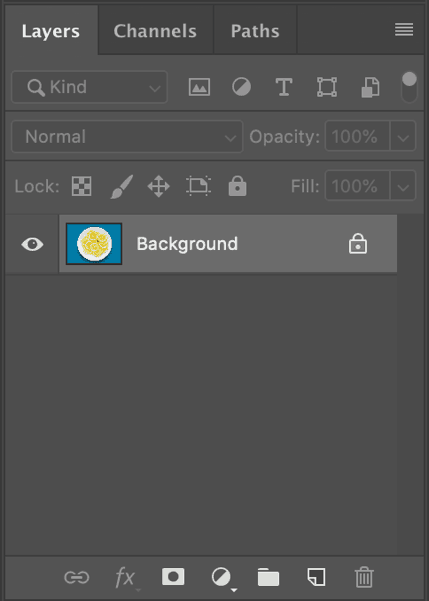
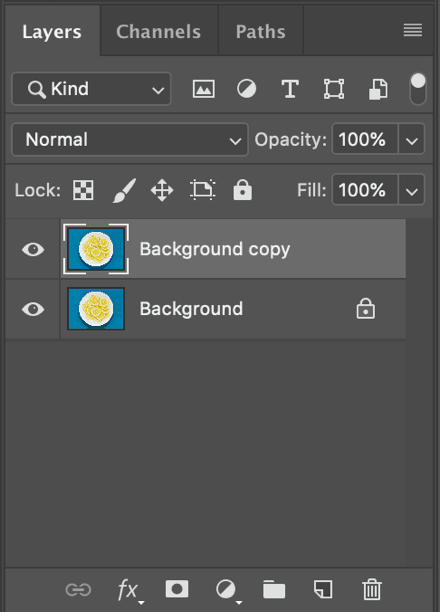
First, we have to duplicate the background layer in order to be able to work on it. To do this, on the bottom right of the screen go to the Layers panel and, with the layer Background still selected, press Ctrl + J [Win] or Cmd + J [Mac].
This will create a copy of the original layer.
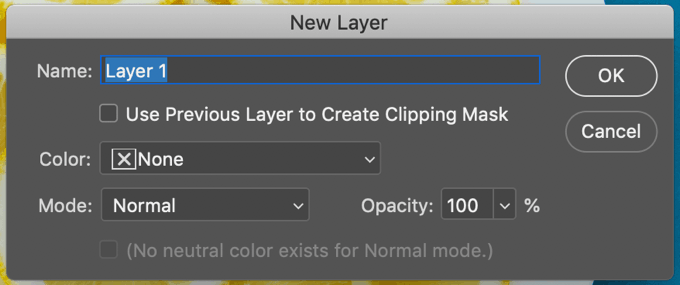
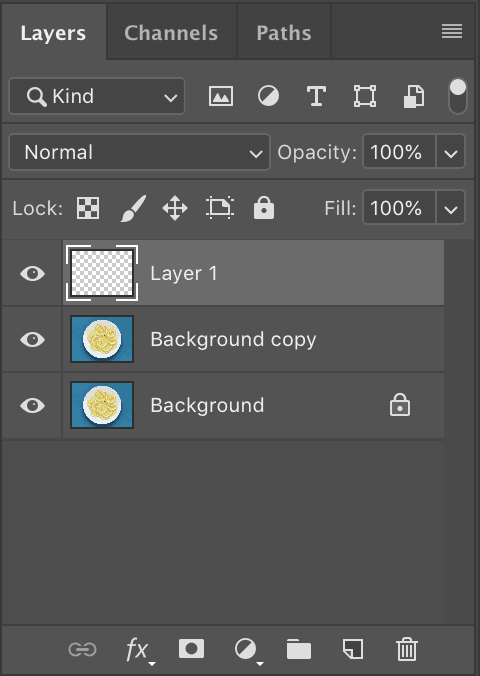
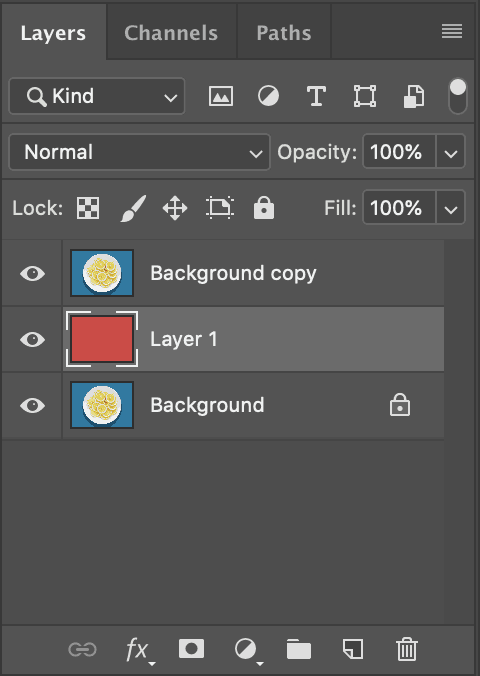
Now that the background layer is duplicated, we will create a new layer for the new background. To do this, press Ctrl + Shift + N [Win] or Cmd + Shift + N [Mac]. This will bring up the New Layer dialogue box. Leave the options as they are and click OK.
This will now create a new layer.
Now we need to fill this new layer with a background color. This is so that when the background of the image is removed, the still remains another visible background behind the image. Doing this will also aid in making a clean background removal.
Go to the Tools Palette and select the Paint Bucket tool.
Further down on the Tools Palette, you will see two color swatches.
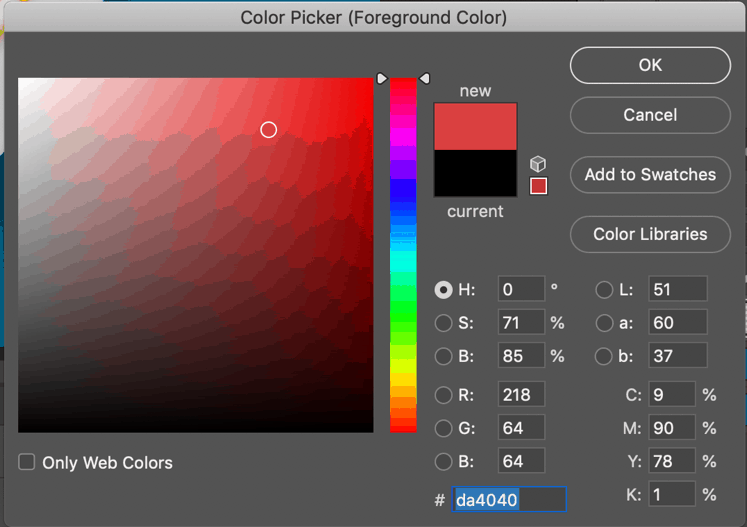
Click on the upper color swatch to reveal the Foreground Color Picker. We will use this to set the paint color.
I have chosen a red color for this background. Once you have chosen your color, go ahead and click OK. At this point, the Paint Bucket tool will still be selected. Use it to click anywhere in the image frame. Your image will now be red.
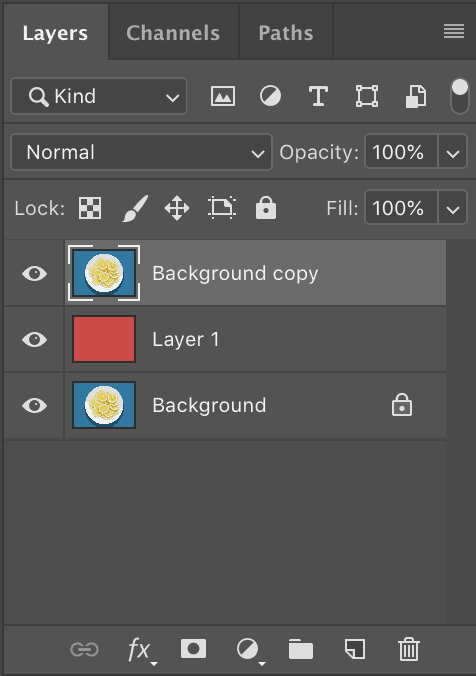
Now for the final part of this process, go back to the Layers Pane and drag the red layer underneath the Background copy layer.
Now we are ready to start working on the background.
Step 2: Removing the actual background
In the Layers Pane, click on the Background copy layer to make it active.
As we previously discussed, this is a simple image. Therefore, we can leverage some of the powerful tools built into Photoshop to intelligently distinguish background from foreground and minimize the work we have to do in the image.
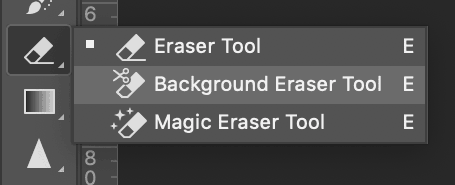
For this image, we will be using the Magic Eraser tool. This is built into the eraser menu in the Tools Palette. To access it, click and hold the Eraser tool icon, and the Eraser Menu will show up.
Go ahead and select the Magic Eraser tool. Now, use the tool to click on any background area in the image. I clicked outside the shadow, and this is what happened:
I then clicked on the remaining blue portion of the image, and this was the result:
As you can see, the background is virtually gone – all automatically as well.
Step 3: Cleanup
Upon close examination, some blue portions of the image are found to be remaining. To clean these up, select the regular Eraser tool, and using the square bracket keys [ and ] select an appropriate brush size.
Now, use the Eraser tool to clean up the rest of the image.
Finally, go to the Tools Palette and select the Quick Selection tool.
Use this tool to click on any point in the plate. It will select a small corresponding area.
Click and drag the tool around the rest of the plate. This will result in the eventual selection of the entire foreground.
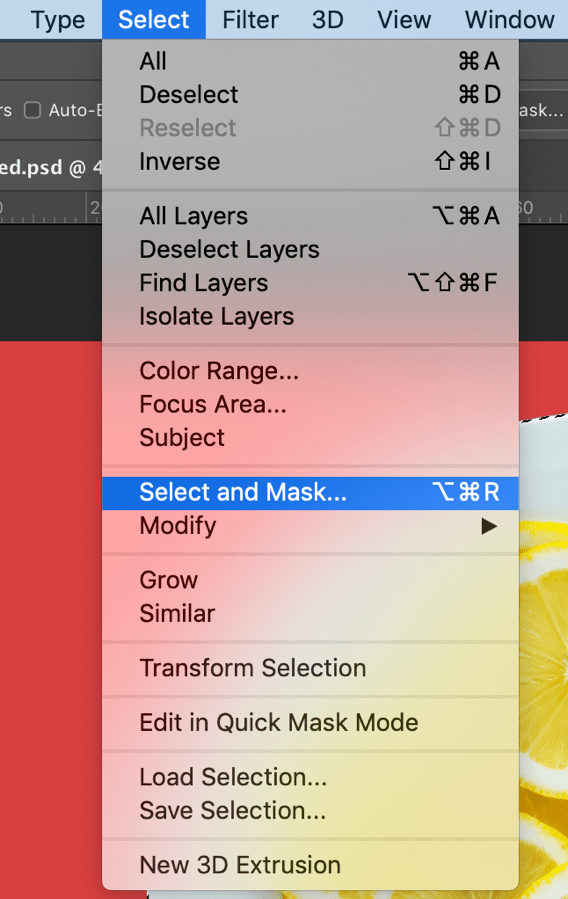
Now, while holding down the Shift key, go to the menu and navigate to Select > Select and Mask.
This will open up the Refine Edge menu. We will use this to clean up the selection.
In the Refine Edge menu, make sure Smart Radius is selected. Play with the values until you get a soft selection around your foreground and hit OK.
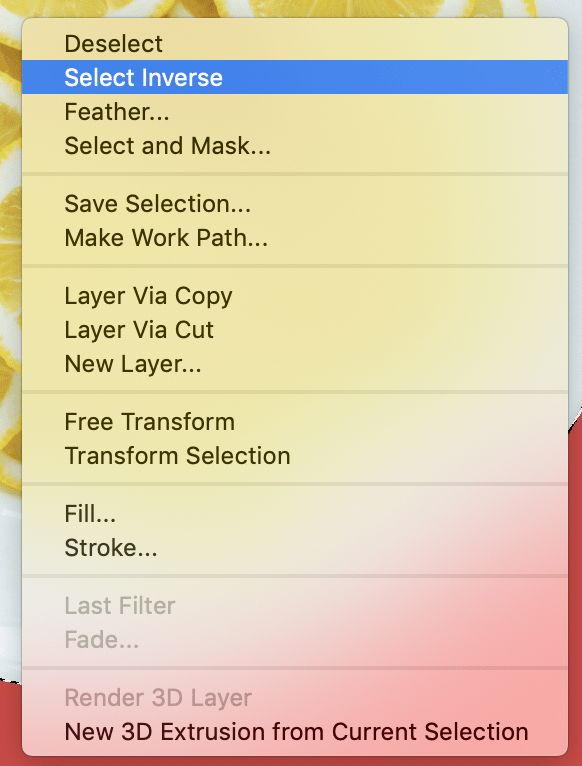
Now right click on your image and select Select Inverse.
It will invert the selection to everything outside the foreground.
Hit Backspace [Win] or Delete [Mac] to delete all the excess foreground contents.
Step 4: Finishing touches
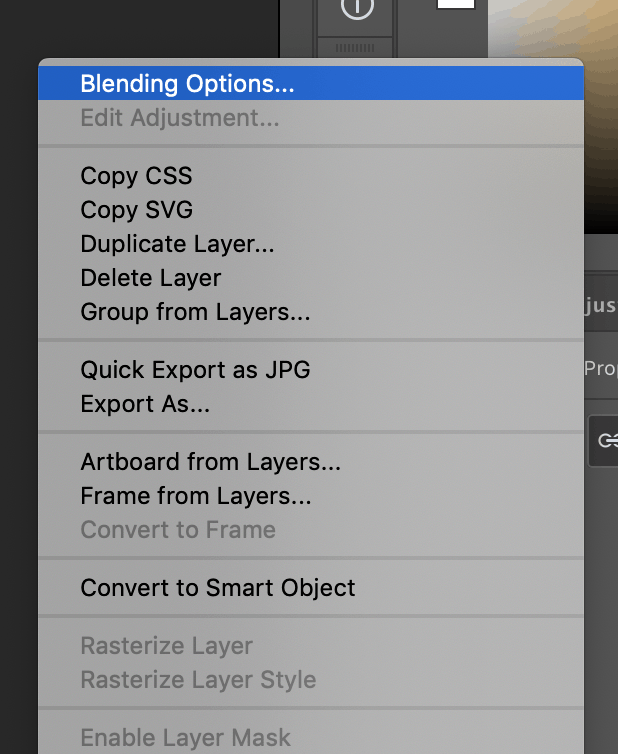
Right click on the foreground layer and select Blending Options.
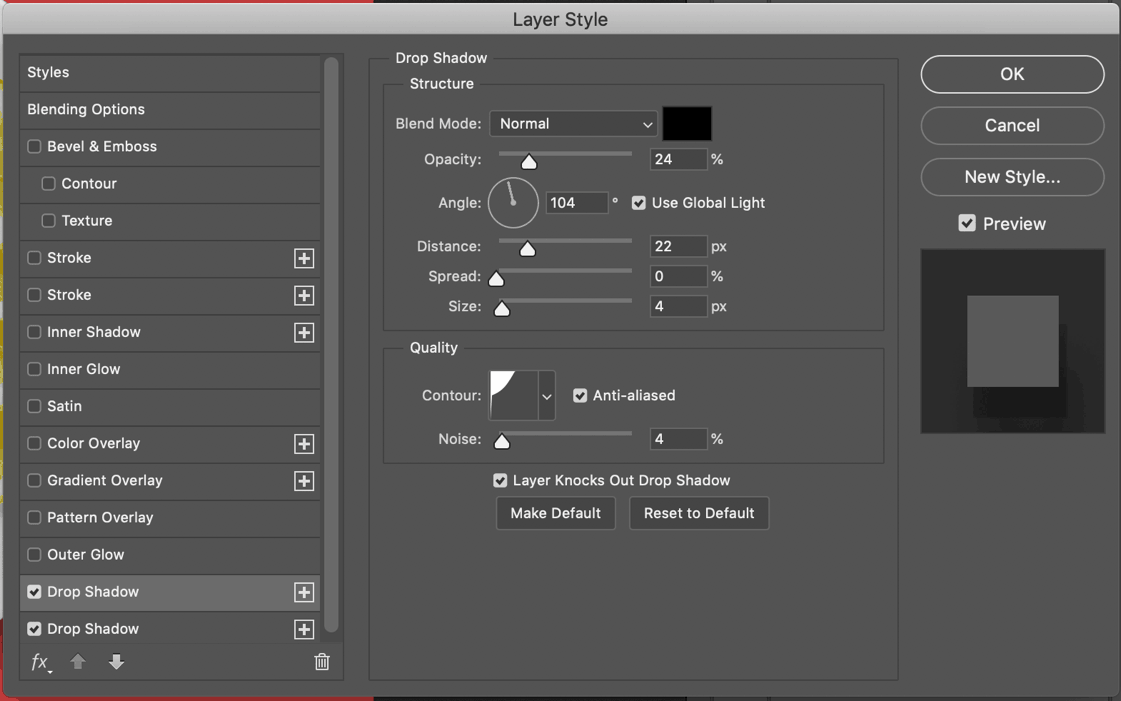
In the Blending menu, select Drop Shadow.
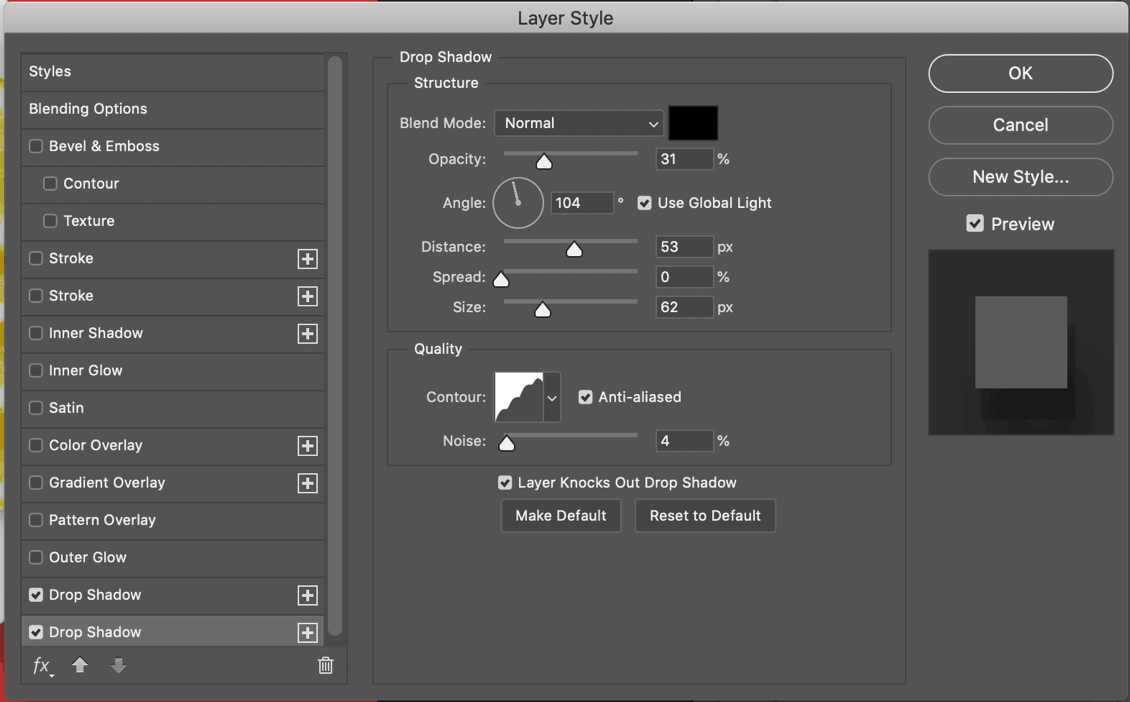
Create a shadow using the above settings. Now, click the + button next to Drop Shadow to create another drop shadow.
This second shadow needs to be a softer and lighter shadow than the previous one.
Once this is done, we are good to go. We have now successfully removed a background from an image using Photoshop’s automatic tools.
Example 2: Removing the background in a complex image
For this example, I am going to be using this image from Pexels:
As you can see, this image is more complicated. There are complex shapes in the foreground of the image and areas like the model’s hair present a challenge for automatic tools such as the Magic Eraser to fully comprehend.
Therefore, for this image we will use the Background Eraser tool.
Before we begin, perform Step 1 from above on the image.
Now to the actual stuff:
Step 1: Erasing the background
Go the Eraser Menu and select the Background Eraser tool. This tool senses a selected color, and erases all instances from that color under a brush while leaving out any other color.
Once selected, you will find the Background Eraser menu on the top of the screen. Set the options as follows:
These settings will ensure that the tool samples only one color at a time, and has a high enough tolerance to sense colors similar to the sampled color.
Now, mouse over to the model’s left cheek, and use Alt + Scroll to zoom into the image.
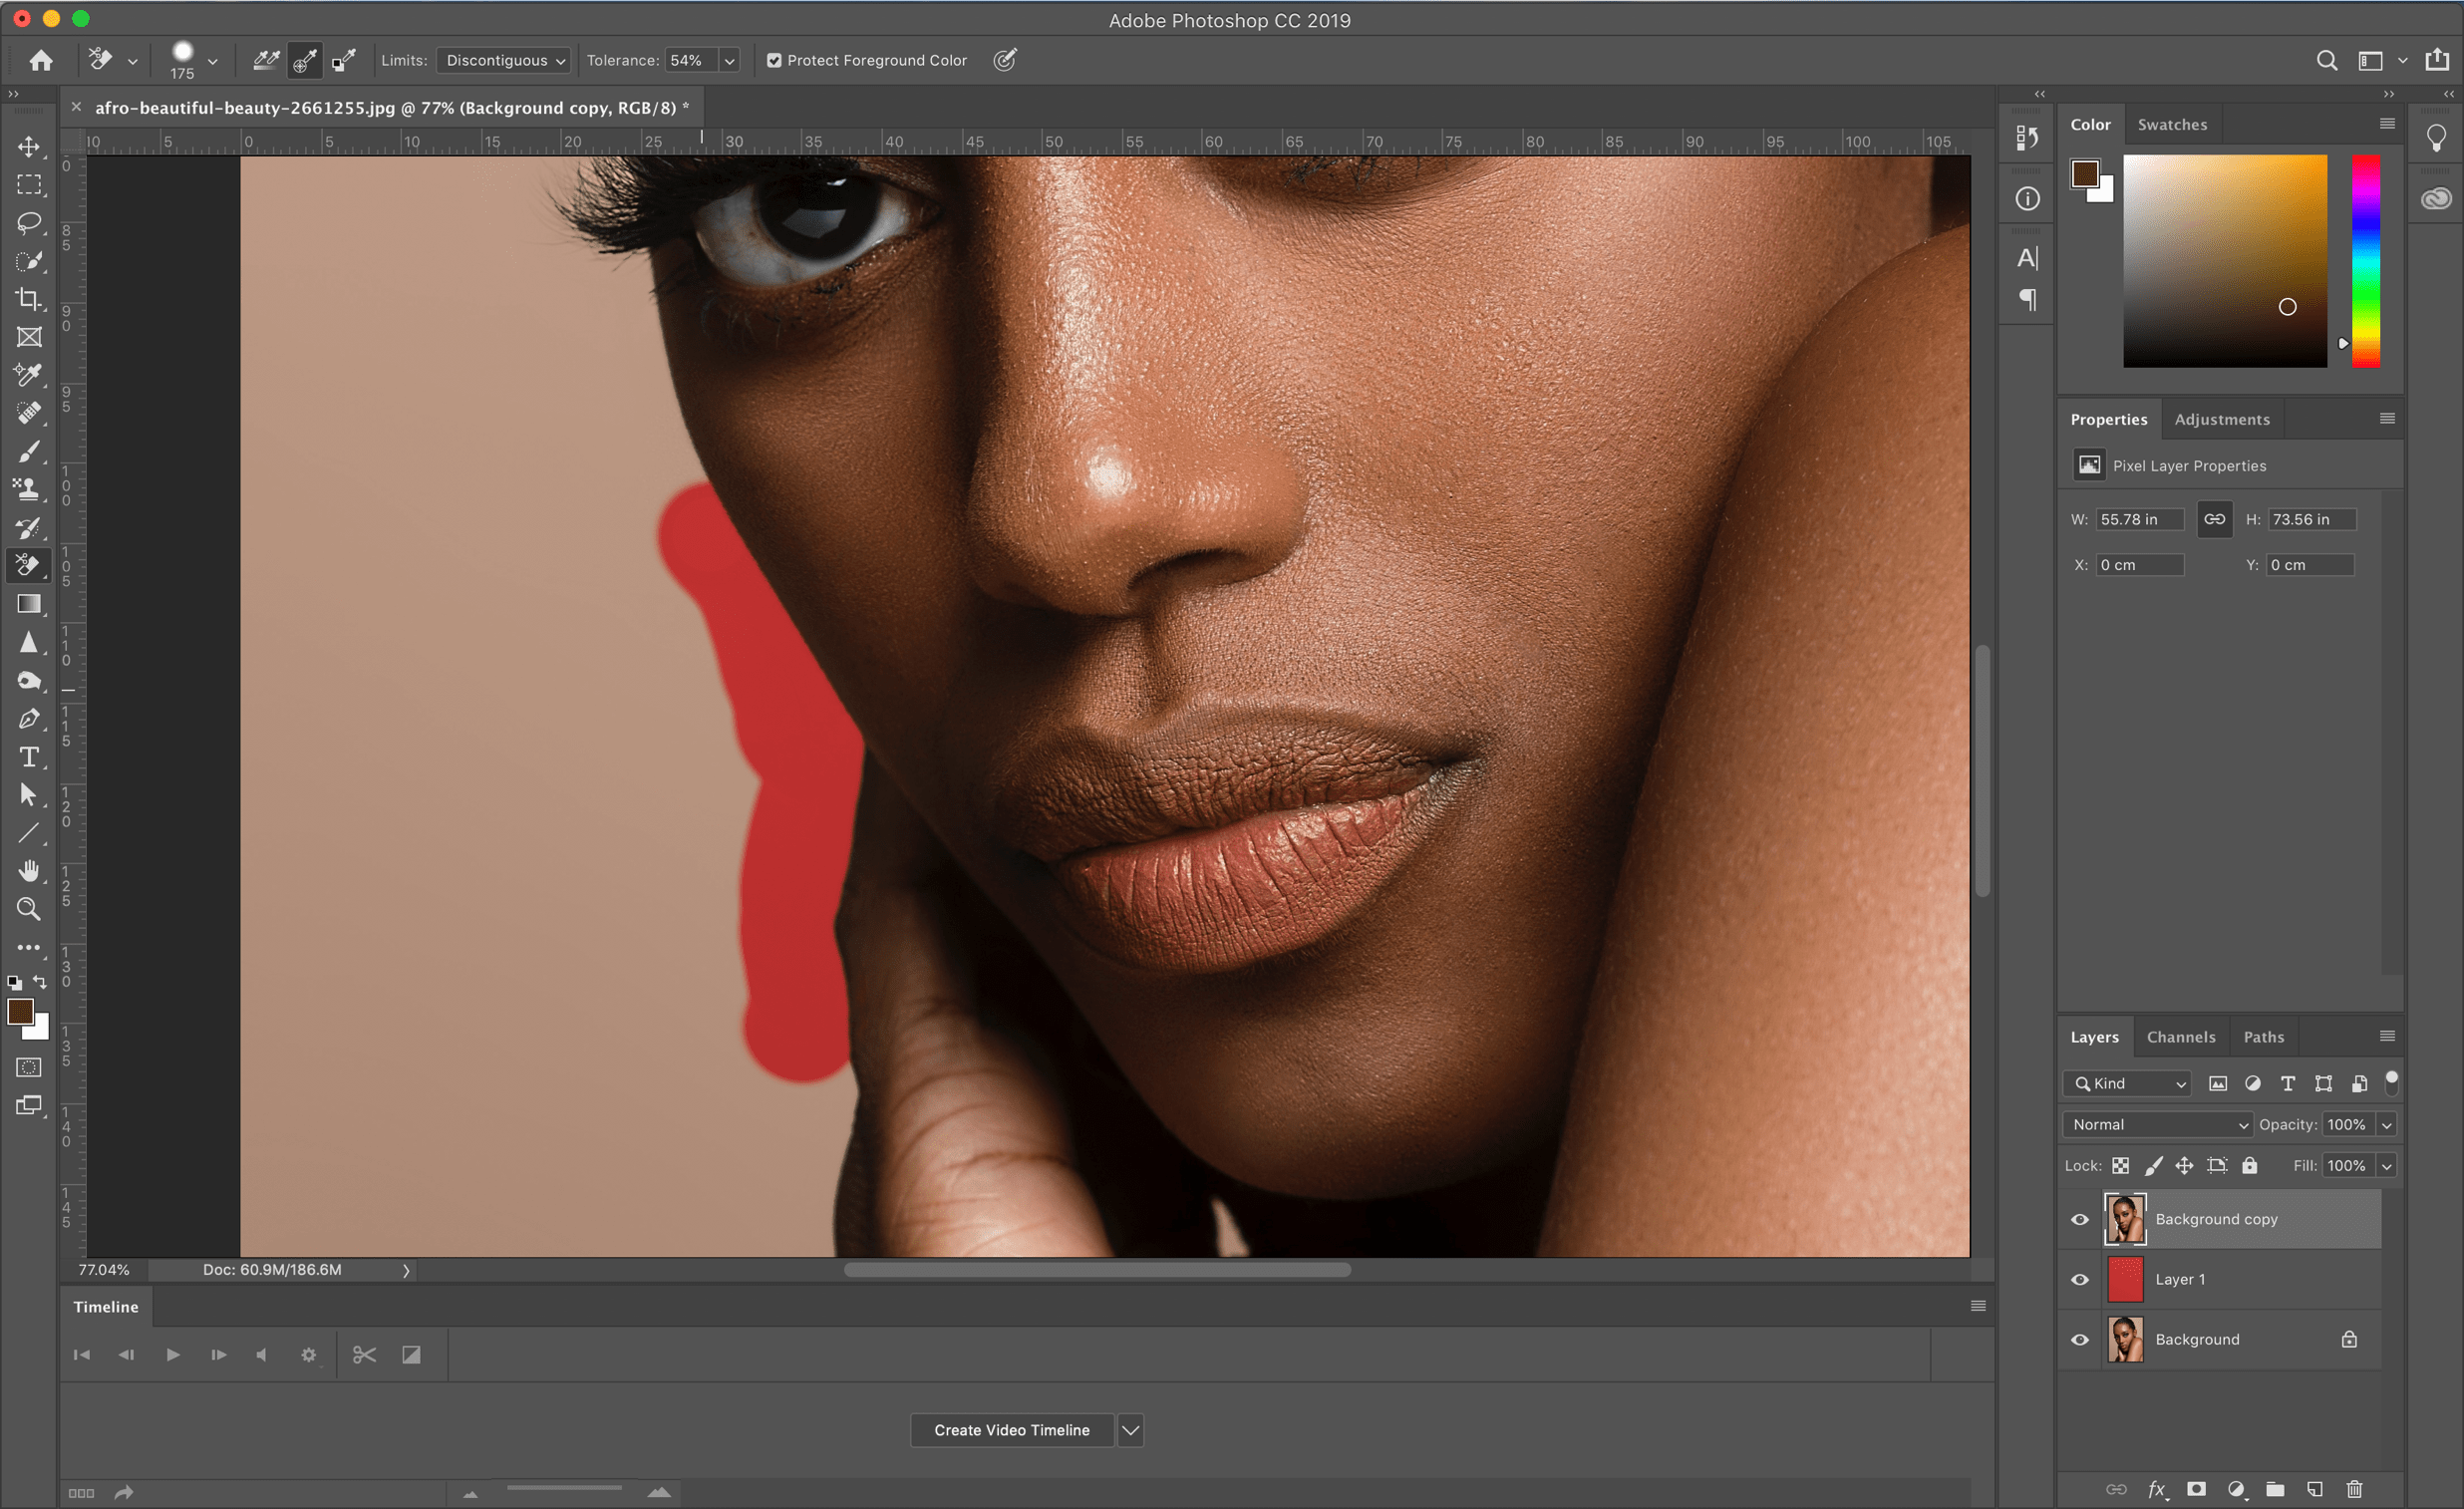
Using the Background Eraser, slowly start erasing the background from the model’s face. As you erase, the background color will begin to show.
Follow the contour of the model’s face all along the edge until it is all erased. You will note that the tool erases perfectly around the model’s hair. Also be sure to erase the gap between her hand and her face. Your image will now look like this.
We will now begin to the do the same thing starting from the model’s left shoulder.
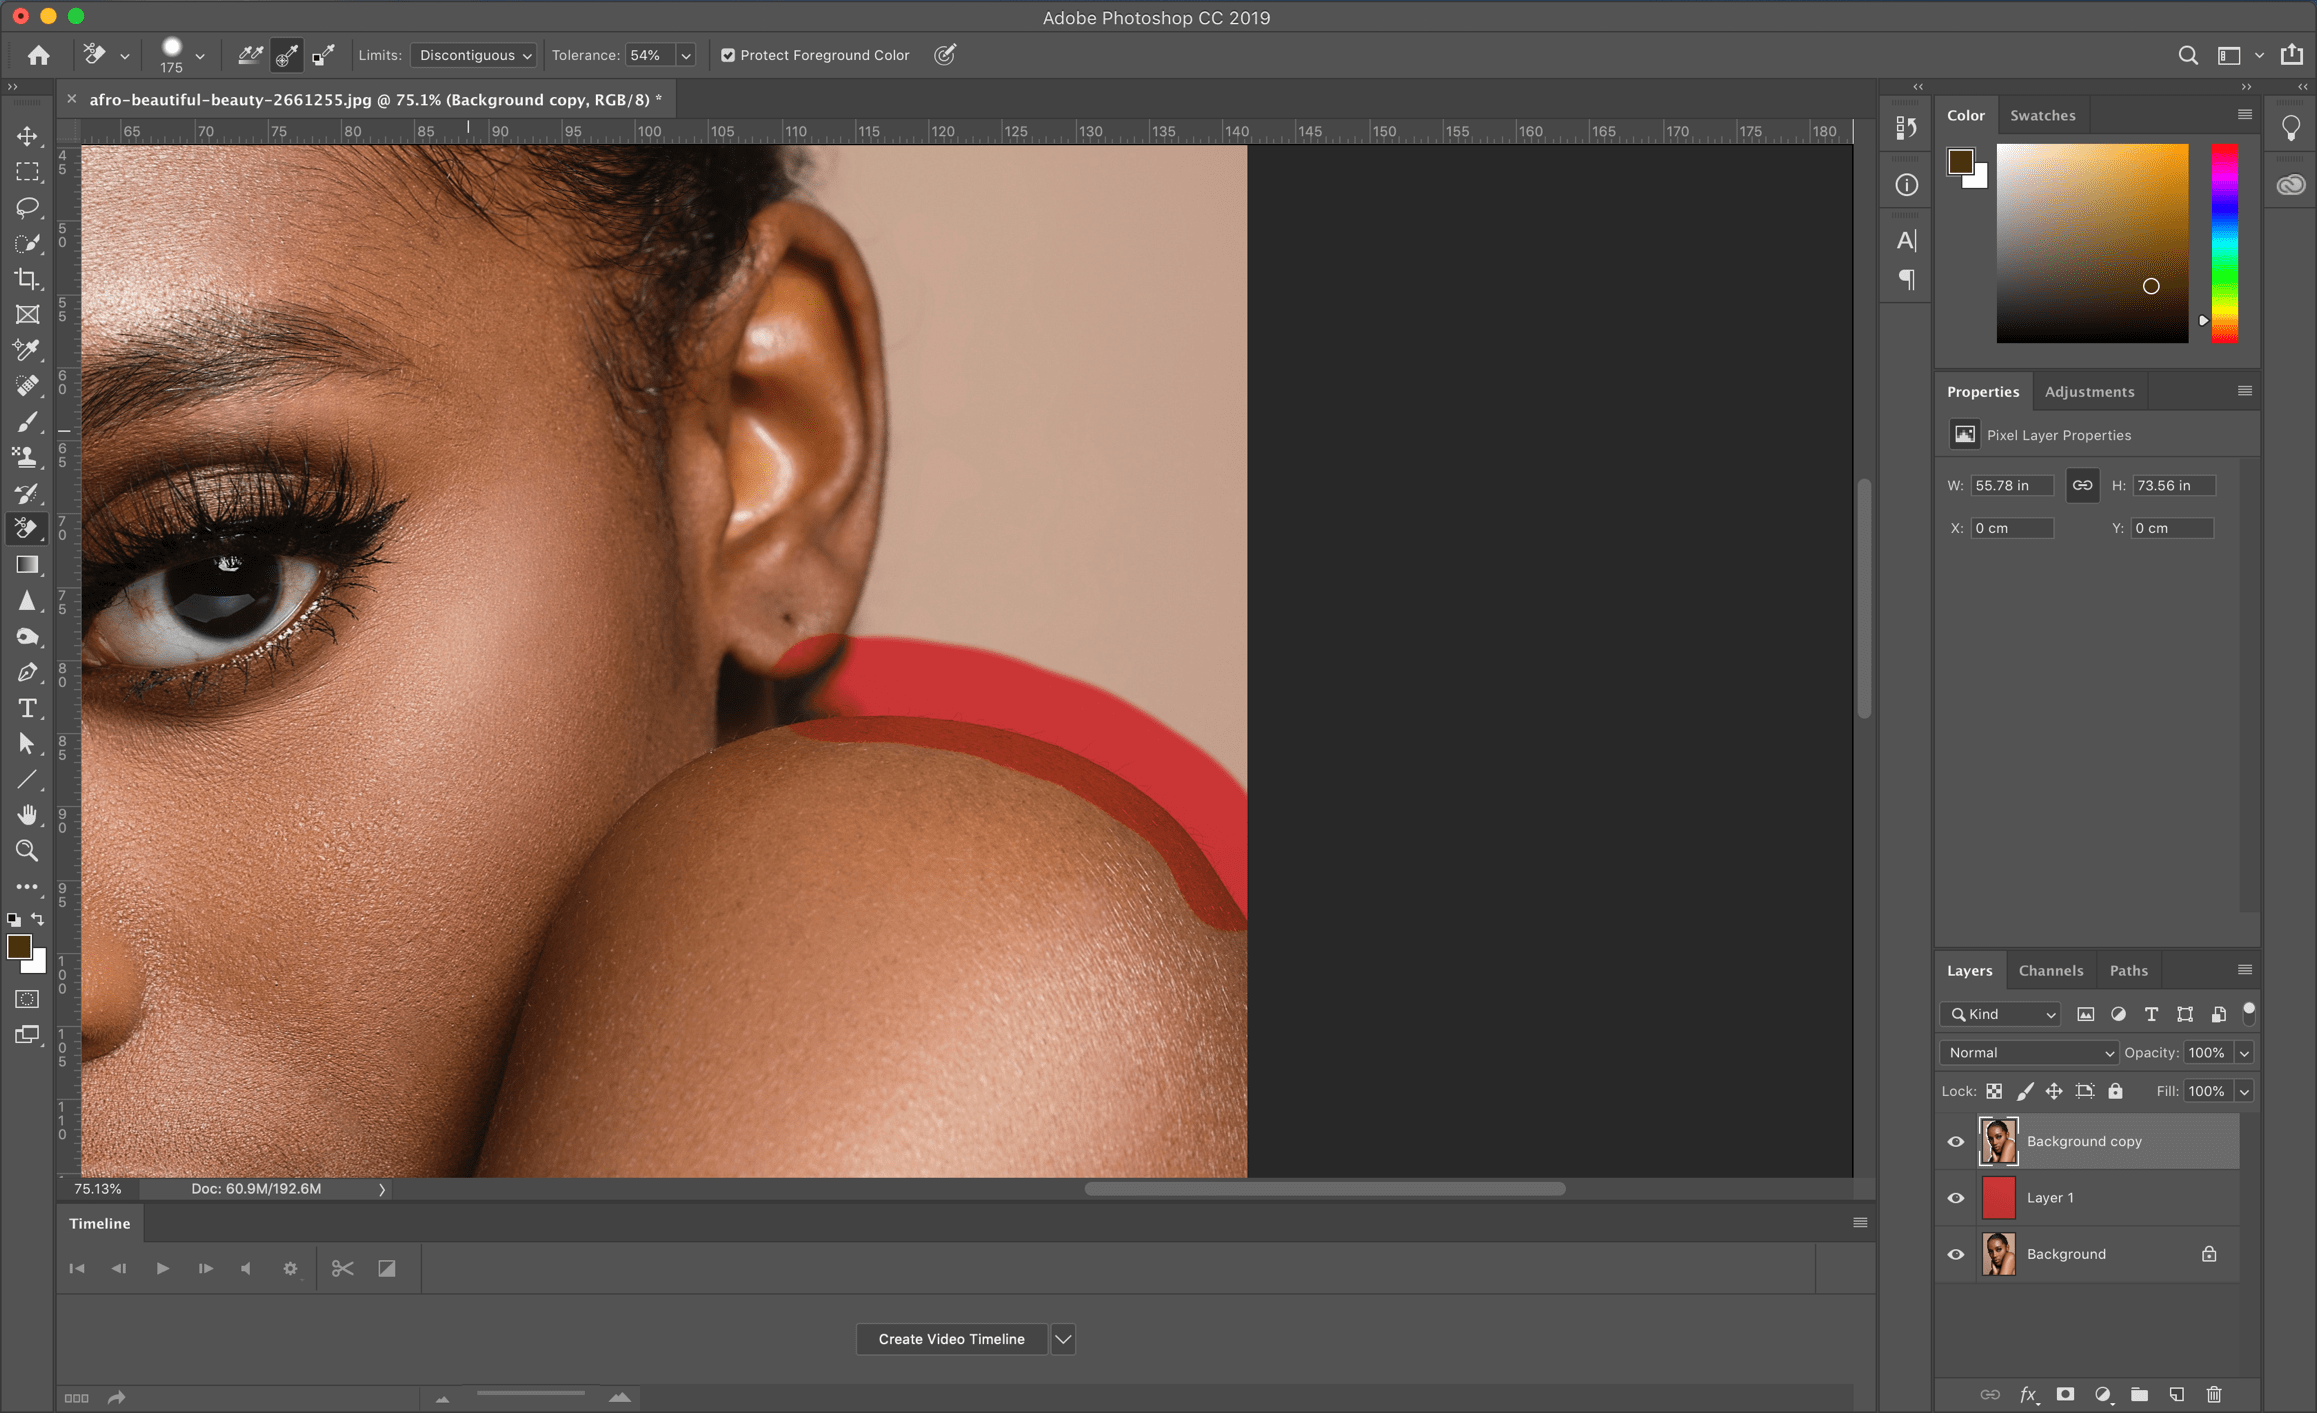
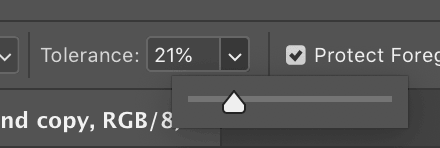
As you can see, if we try to do this then the color begins to bleed over the model’s shoulder. This is because the Tolerance setting is too high and the tones on the model’s shoulder are too similar to the background for the tool to be able to distinguish them. Therefore, we must reduce the tolerance in the menu above.
Now, press Ctrl + Z [Win] or Cmd + Z [Mac] to undo the last erase. With the new settings, continue to erase around the model. If you experience a color bleed, simply undo and change the tolerance settings before moving on.
This was the result I was left with:
No matter how hard I tried, I couldn’t properly erase around the model’s ear, and so that will have to be done manually. However, before we do that, let us remove the rest of the background.
Go back to the Eraser Menu and select Magic Eraser. As above, use it to get rid of the remainder of the background by clicking on the areas.
This is the result I have.
Step 2: Cleanup
Go the Eraser Menu and select the Background Eraser tool. This tool senses a selected color, and erases all instances from that color under a brush while leaving out any other color.
Now, begin to gently erase the white line from the model’s ear. Take your time in this step and be patient.
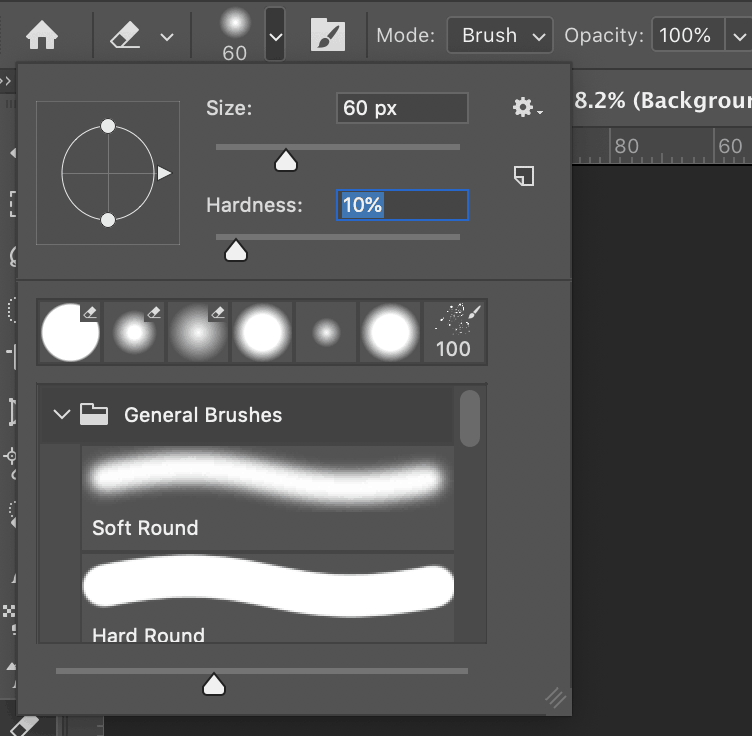
Don’t worry about the halos right now. Just clean up the outline of the model. Repeat this step for any other uneven edge that you may find in the image.
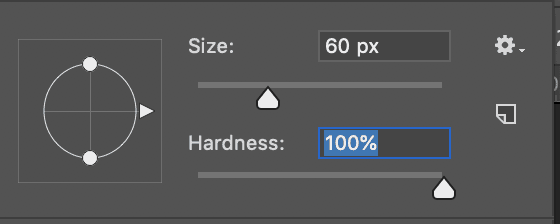
Now, go back to the Brush menu and increase the Hardness to 100%.
Use this hard brush to paint out all of the halos from the image.
There you go! A final image with the background beautifully cut out!
RECAP
- There is no one-size-fits-all approach to background removal
- Identify if your image is simple or complex
- If it is complex, break it down to a simple image with complex parts
- Use Photoshop’s automatic tools like the Magic Wand or the Magic Eraser for the simple areas
- Use tools like the Eraser and the Background Eraser manually for the complex parts
Hey, I'm a Professional Retoucher making $10k a month thanks to Photoshop.Register to my newsletter to get freelancing tips and a FREE Brush Pack in Bonus! My Newsletter


