How to Select and Change Colors in Photoshop

As one of the most useful elements in visual communication, color tends to be an exceedingly important aspect of the work that you produce as an artist. So, it is highly likely that there will be a time when you have to alter the original colors in a photograph in order to communicate something more effectively or make a more visually pleasing outcome.
Luckily, it couldn’t be easier to change colors using Photoshop. This tutorial will explore how to select and change colors in the program through three different methods. So, let’s get started!
Step 1: Open Your Image
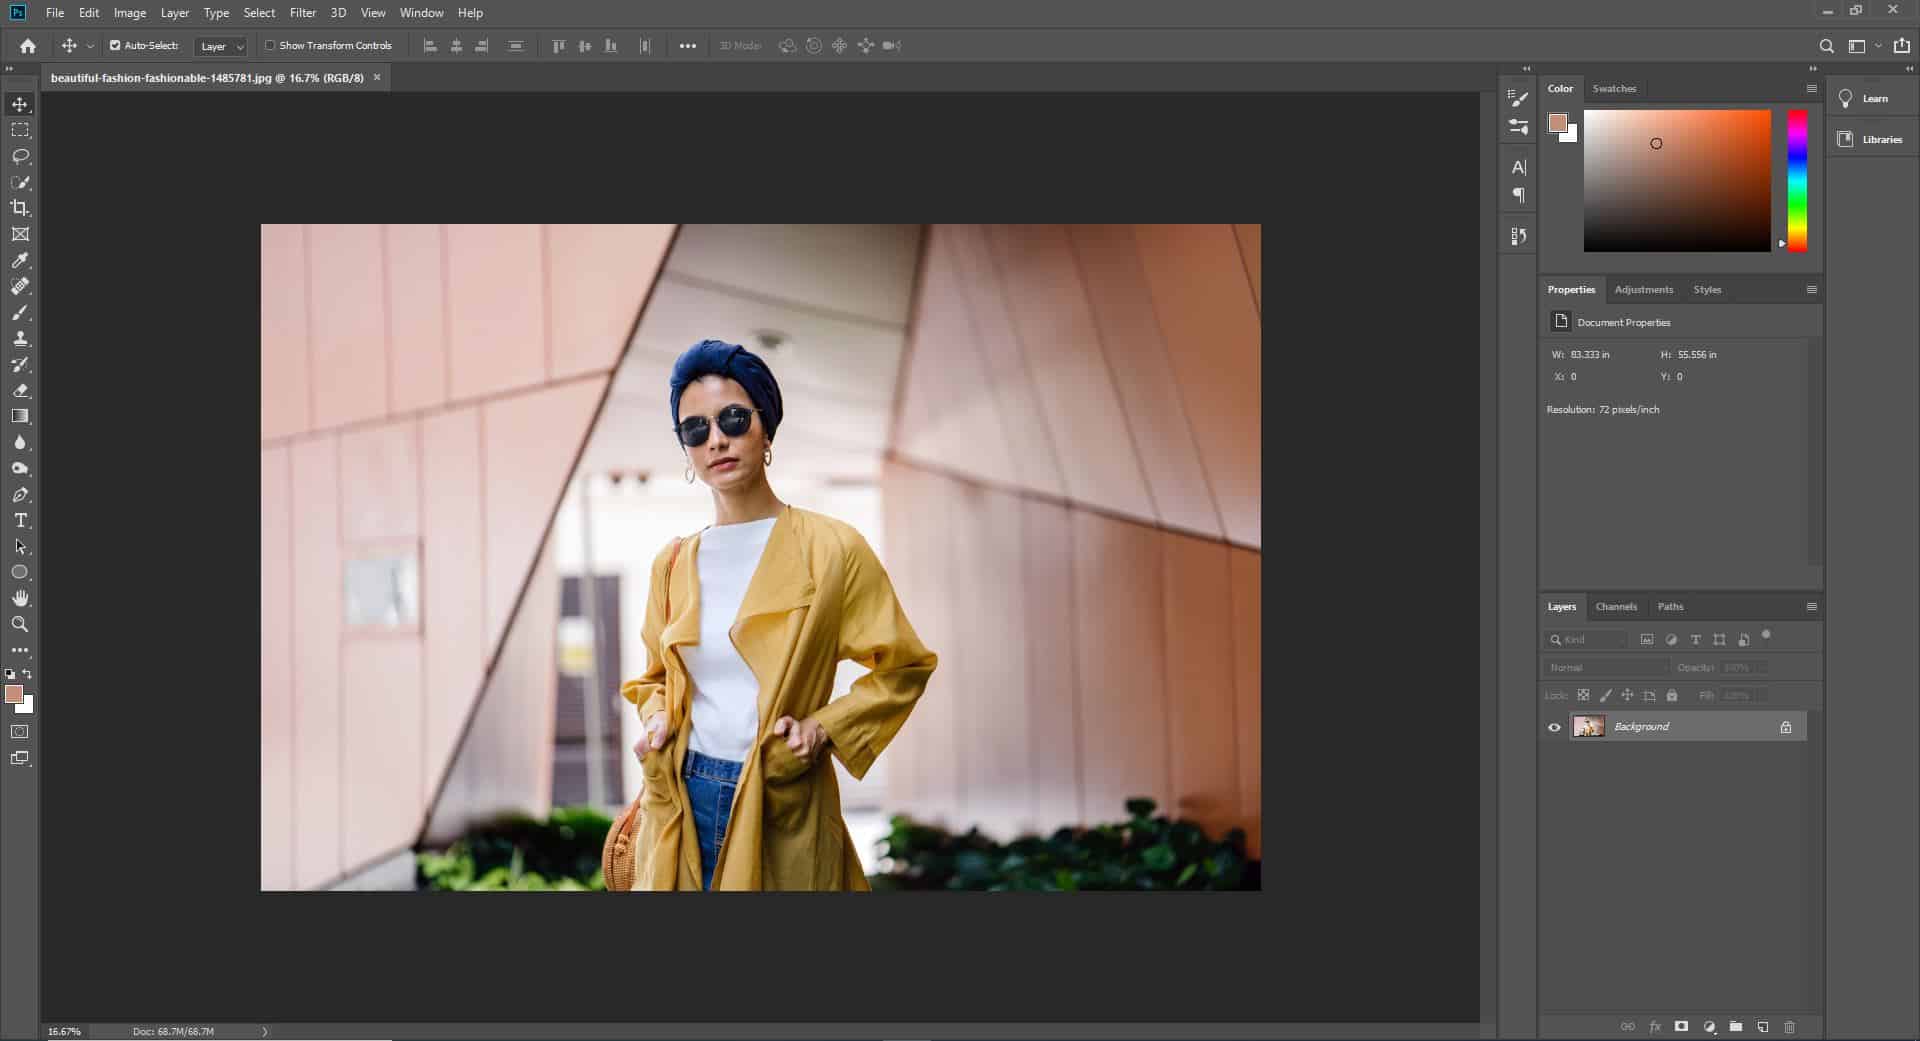
Of course, the first thing that we’ll have to do is open up the image in Photoshop. You can do this by loading the program, then heading to File > Open and selecting the relevant picture from your files.
For this tutorial, we used a photo by mentatdgt from Pexels
Your screen should now look something like this:
Method One – Color Replacement Tool
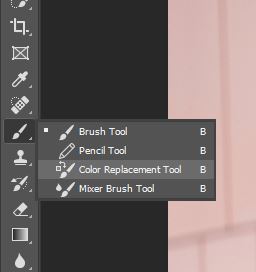
Nestled under the Brush Tool, the Color Replacement Tool allows us to easily change the color of any object.
Whilst it is very simple and quick to use, it may not be the most professional way to change a color. Another disadvantage is that it is a destructive tool, which means that every time you make an edit, Photoshop has to redraw the pixels, which causes the image to decrease in quality. Any edits are also not easy to undo, making it difficult to fix any mistakes you may have made during the process.
First, we’ll choose the tool from the toolbar down the left of the screen, by right clicking on the brush tool, and selecting the Color Replacement Tool.
To use the tool once you have selected it, you’ll need to begin by picking the color that you want to change the existing one to. To do this, click on the icon indicated below, then choose the relevant color.
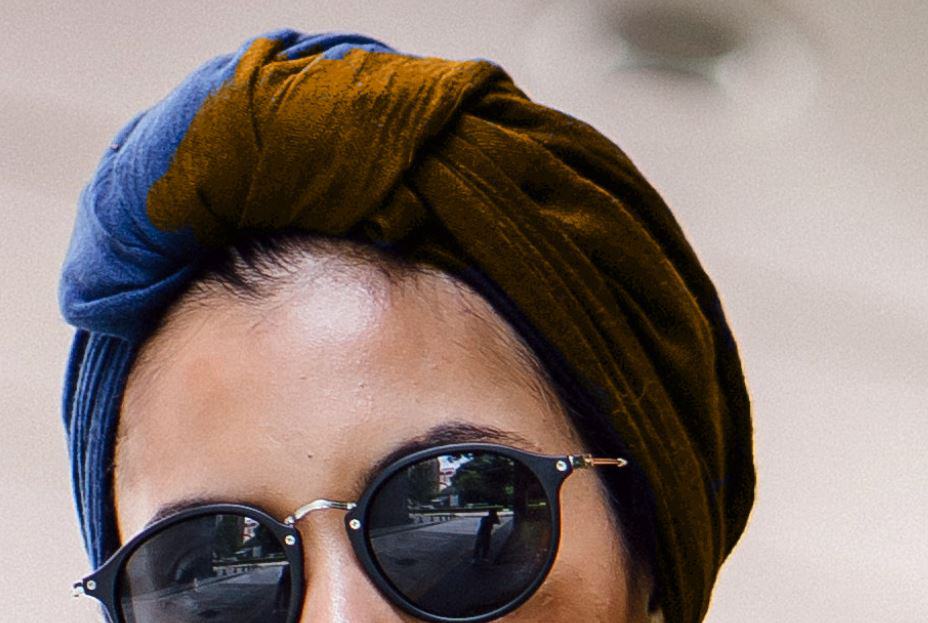
You can then use the tool by brushing over the area that you wish to recolor, using the square brackets ( [ and ] ) to make the brush smaller or bigger, respectively.
Once you have completed the process in one area, repeat it in others, until you have a result that you are happy with.
Method Two – Hue / Saturation Adjustment Layer
In contrast to the Color Replacement Tool, an Adjustment Layer allows for non-destructive editing, which can be easily undone, and has less detrimental effects on the quality of your image.
By creating a Hue / Saturation Adjustment layer, you will be able to edit the tint of the color, changing the color itself, or the saturation of the color (in other words, how much color there actually is in the image).
There are two ways that you can select an area to change the color of: selecting an object or selecting a color range.
Selecting an Object
The first thing you’ll want to do with this method is create a new Adjustment Layer.
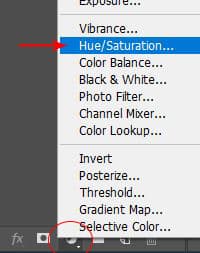
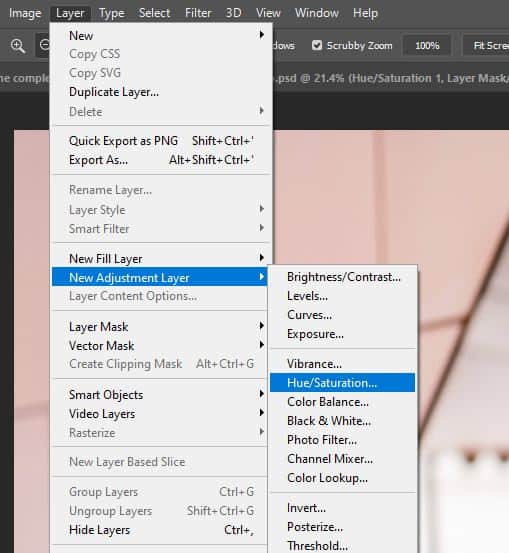
To do this, you can either go to the menu along the top of the screen and select Layer > New Adjustment Layer > Hue / Saturation, or click on the icon shown below (located at the bottom of the Layers Window) then choose Hue / Saturation from the menu that appears.
Once you have created an Adjustment Layer, you will need to apply a Layer Mask to it. This can be done by clicking on the icon shown below, which is again located at the bottom of the Layers Window.
We’ll next need to work on the Layer Mask to determine which areas of the image we will be adjusting. When working with a Layer Mask, we use two colors: black and white. Painting over an area with a black brush will mean that the adjustments won’t affect that area, whilst painting white over an area will mean that the effect of the adjustment layer will be visible there.
For this process, it will probably be easier to paint white onto a black layer mask, since you will likely only be adjusting small areas.
So let’s go ahead and fill the layer mask with black. To do this, select the Paint Bucket Tool from the toolbar down the left side of the screen.
With the layer mask selected, use the tool to click on the image. This will fill the layer mask black, making the effect of the adjustment layer invisible in all areas.
We can now select the Brush Tool from the toolbar down the left side of the screen, and use it with a white color to paint over the areas that we want to be affected by the adjustment layer.
In order to see which areas we are actually painting over with the brush tool, it is a good idea to make an extreme adjustment with the Hue / Saturation Adjustment Layer, so that you can see which areas the effect is acting on.
To do this, click on the adjustments icon next to the layer’s name, rather than the mask, and drag the sliders to change the values of the hue or saturation. It doesn’t matter what color you create at this stage, only that there is a visible change.
You can now click on the layer mask again, and paint over the object that you would like to change the color of with white.
Then, once you are happy with the area that is selected, click again on the adjustment layer itself and change the values of the hue and saturation until you get a new color that you are happy with.
You can then just repeat the process for each object that you want to change the color of.
Selecting a Color Range
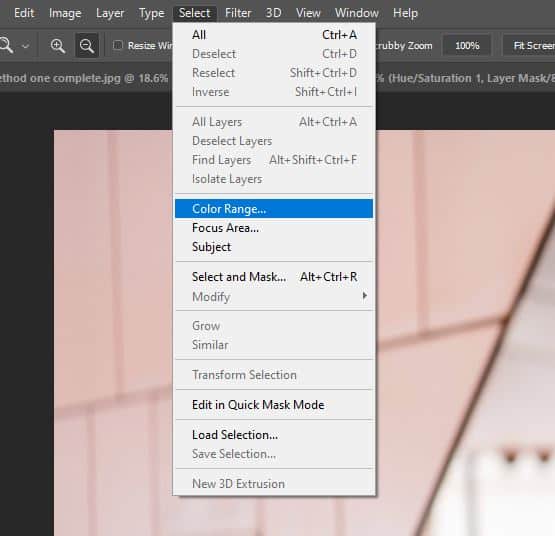
We’ll begin by heading along the top of the screen to Select > Color Range.
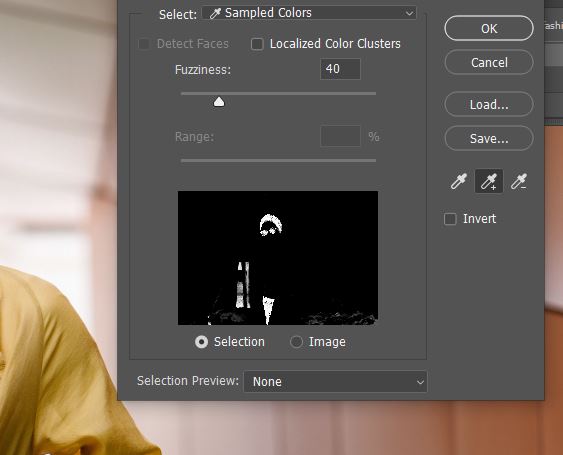
You can then click on the color that you want to change with the Eyedropper Tool. From here, you can then add to or subtract from the selection using the + and – eyedropper tools, which can be chosen from the side of the window.
Once you’re happy with the selection, press OK, then go to the bar along the top of the screen and select Layer > New Adjustment Layer > Hue / Saturation.
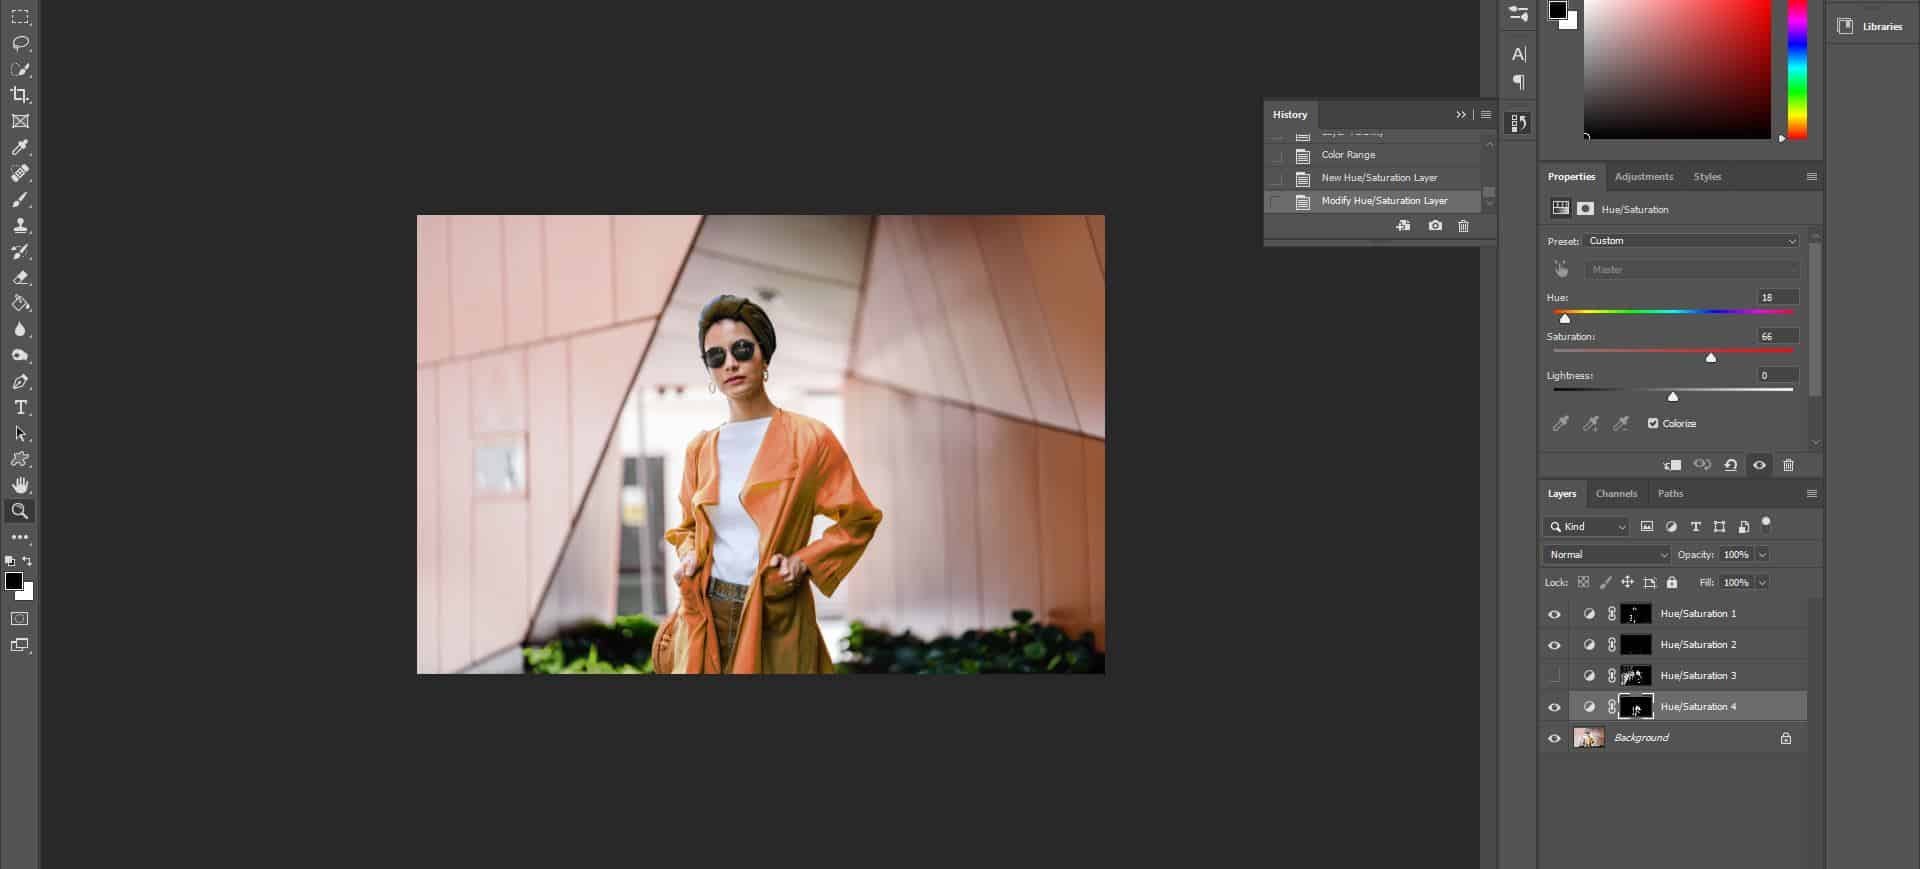
This will load the selection that you made of the color range directly into a new adjustment layer, meaning that you can adjust the hue and saturation only for the selected color range. You can do so by adjusting the values using the sliders for each adjustment.
Repeat this process for each color range that you want to change until you’re happy with the result. The method works better with subtle color adjustments, since it is difficult to select the full color range, meaning that larger adjustments would result in obvious outlines.
BONUS
Want to find out more about how to select and change colors in Photoshop? Check out this video by VerticDesigns on how to achieve a similar outcome.
Hey, I'm a Professional Retoucher making $10k a month thanks to Photoshop.Register to my newsletter to get freelancing tips and a FREE Brush Pack in Bonus! My Newsletter

