How to Remove Red Eyes in Photoshop
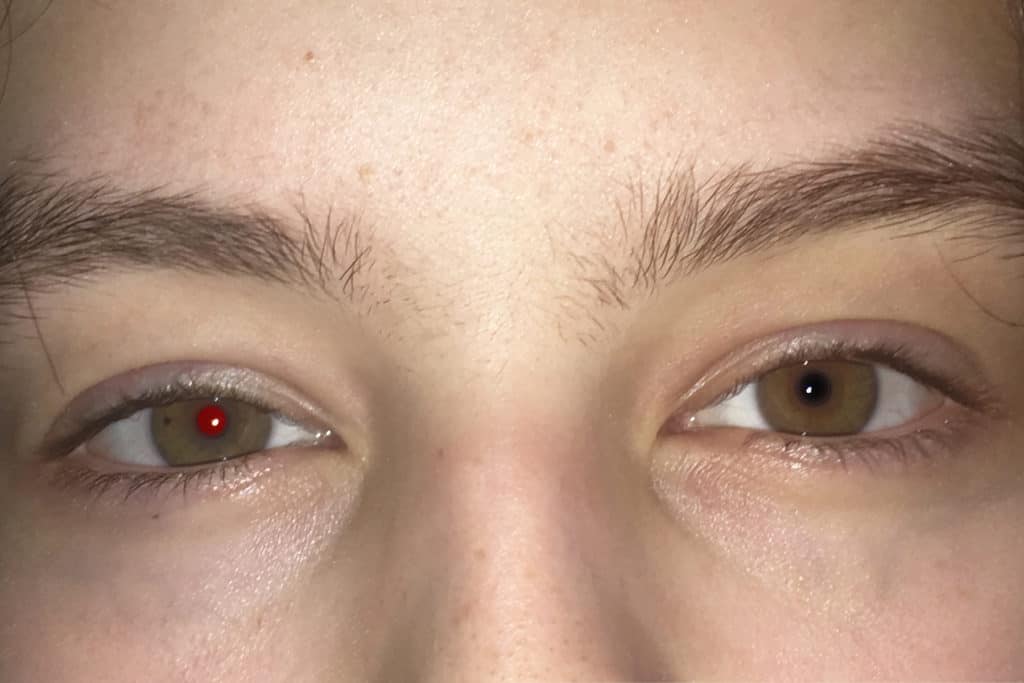
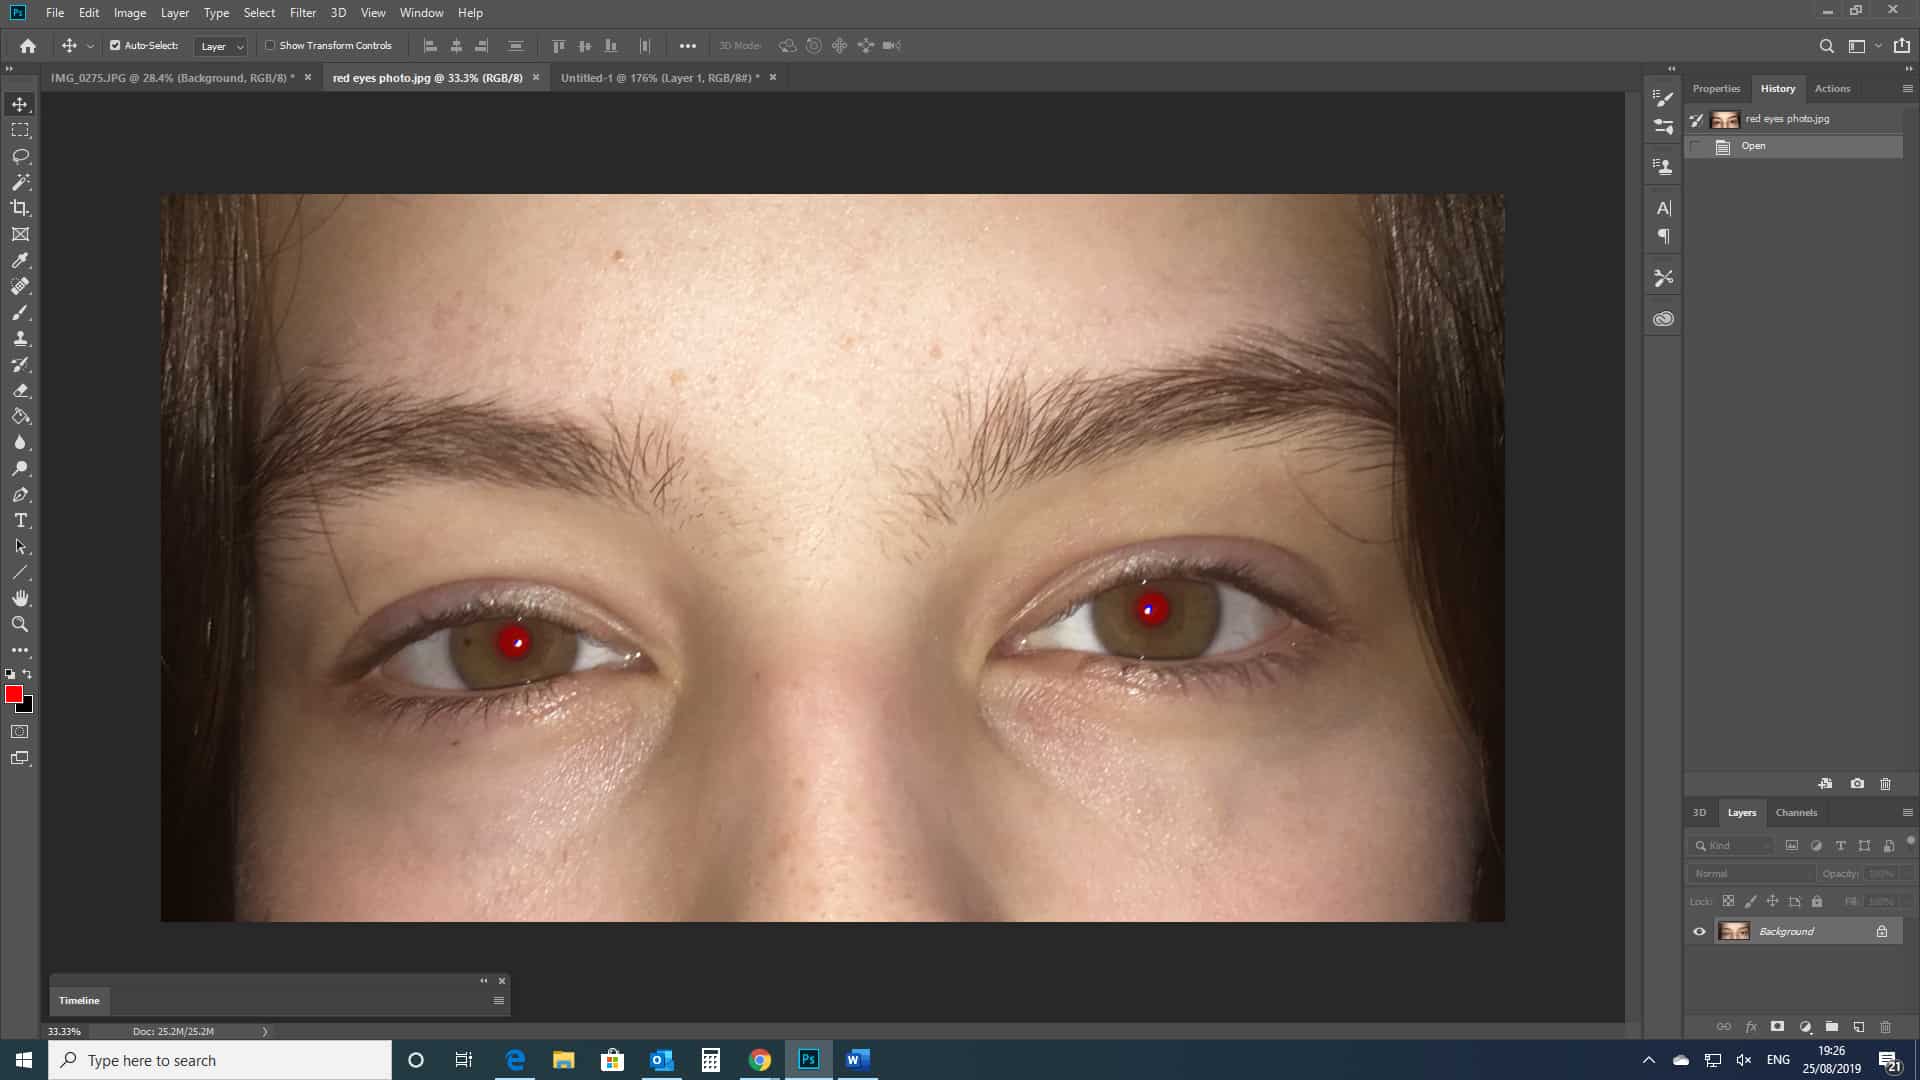
I’m sure everyone is all too familiar with that irritating moment when you take a portrait photograph in low light, and the eyes of the subject appear discolored and glowing red. Annoying, right?
In today’s tutorial, you will learn how to solve that problem (The Red-eye effect) whilst we discuss how to remove red eyes in Photoshop. With Photoshop’s handy red-eye tool it couldn’t be quicker and easier to get rid of the flash that appears in your subject’s eyes! So let’s get started.
We also made a tutorial on how to change the color of eyes in Photoshop have a look here.
Why do Eyes Turn Red in Photographs?
The ‘Red-eye Effect’ occurs when you take a photo with a flash that goes off too close to your subject or camera lens. This is why it often happens when you photograph somebody in a low-light situation, such as at night, without enough artificial light, or in a room in which the lights are off.
Now, when we take a photograph in a low light situation, we have two options of how to light the subject. We can either use a flash to light up the scene artificially, or we can change the settings of the camera. Opting for the first option (for example, by shooting on an automatic flash setting or similar) is when we achieve a red-eye effect.
This happens because when the light from the flash hits the subject’s eyes, it enters through the pupils and is reflected by the blood vessels at the very back of the retina. It is, in fact, this reflection that causes the subject to appear as having red eyes.
So, the cause of the effect may sound complicated, but you’ll be glad to hear that it’s not so complicated to counteract, or completely avoid in the first place. And it will only take you 5 minutes at the most.
This tutorial will first explore how to edit out the effect after the photo has been taken, and afterwards we’ll discuss some ways through which you can avoid ever taking a photograph in which the eyes of the subject appear red in the first place.
Step 1: Opening Your Image with Red Eyes in Photoshop
For getting rid of red eyes, Photoshop is the best place to head to. You’ll first need to begin by opening the program.
Once you’ve opened up Photoshop, you can go ahead and open the image that you plan to work on by clicking File > Open then selecting the relevant photograph from your files.
Step 2: Selecting the Red-Eye Tool
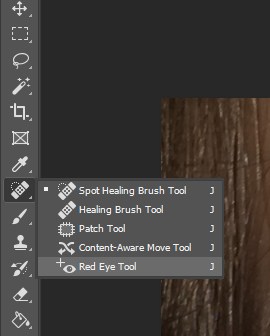
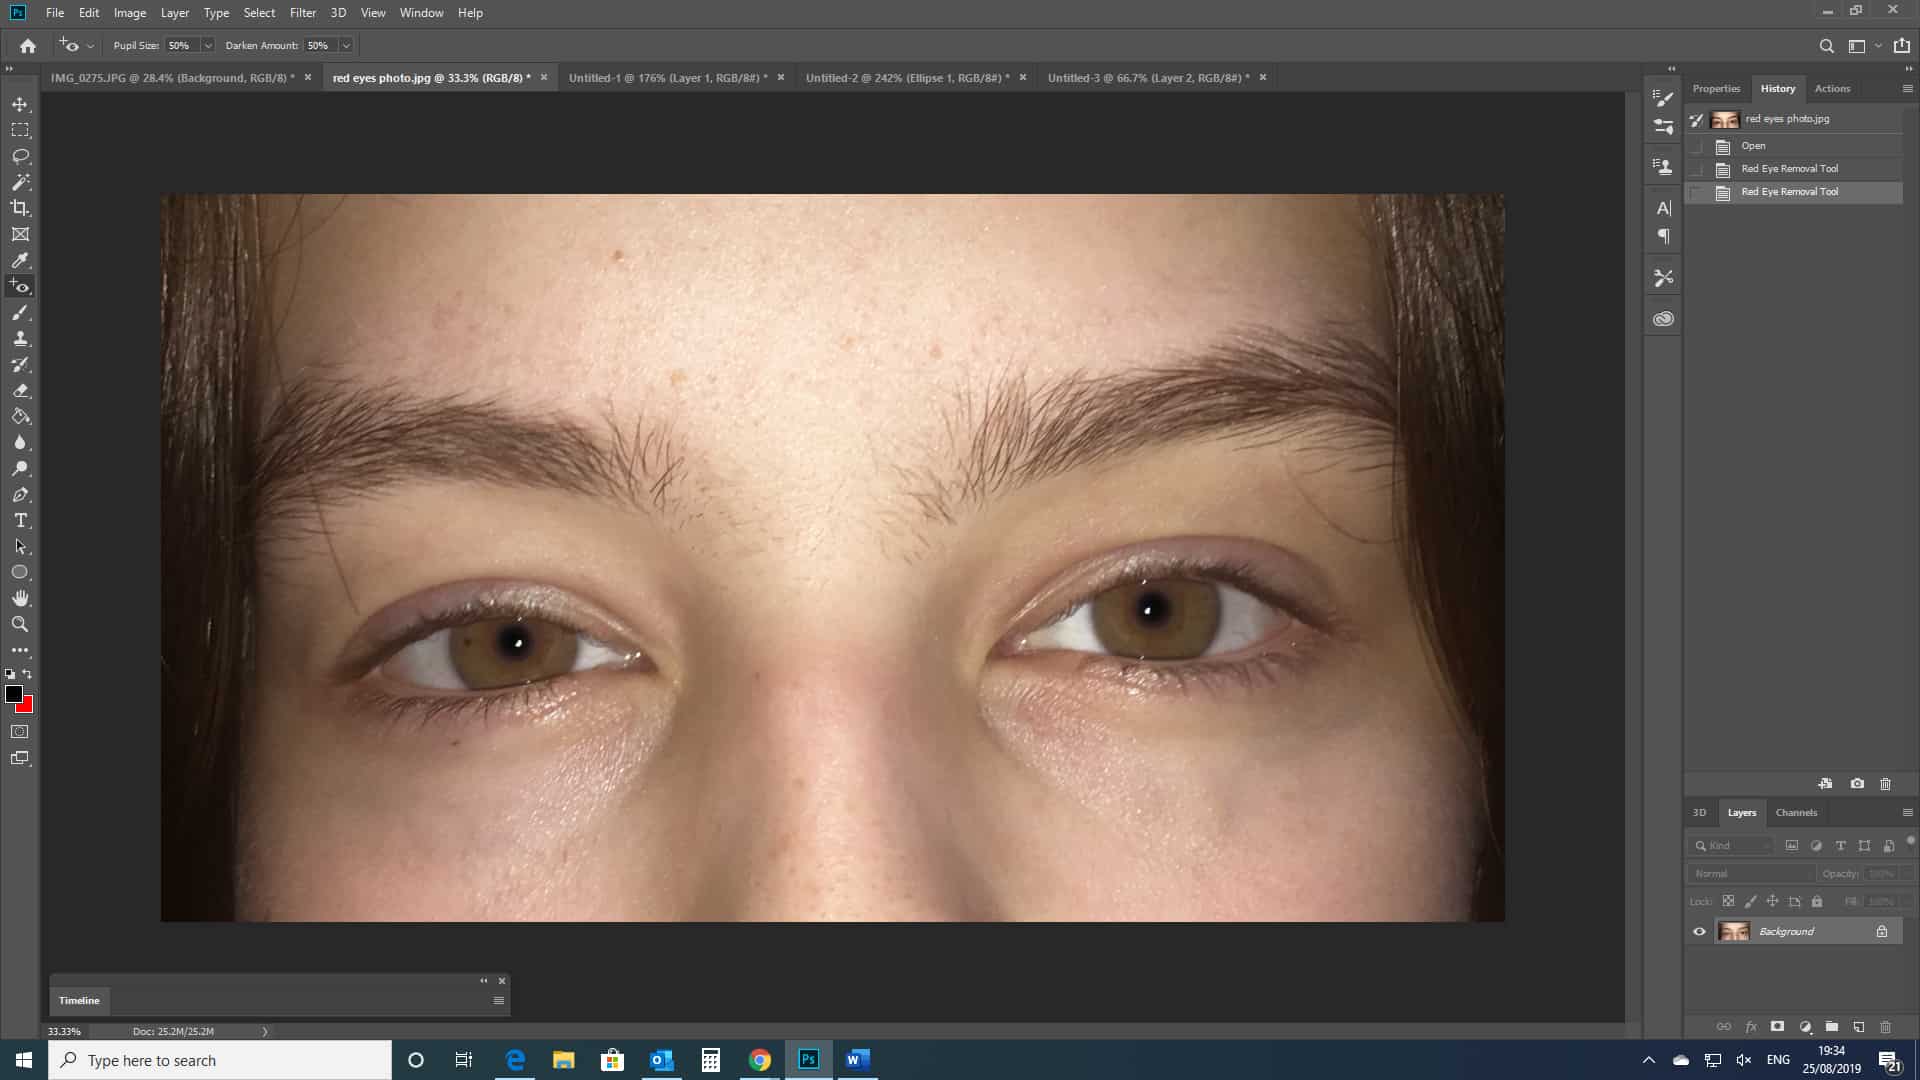
The Red-Eye Tool is located in the Toolbar, which should appear down the left side of your screen. From the toolbar, you will have to first click on the Spot-Healing Tool (as shown in the screenshot below).
Clicking on this will open up for you a menu, from which we’ll select the Red-Eye Tool. It should be located at the bottom of the list.
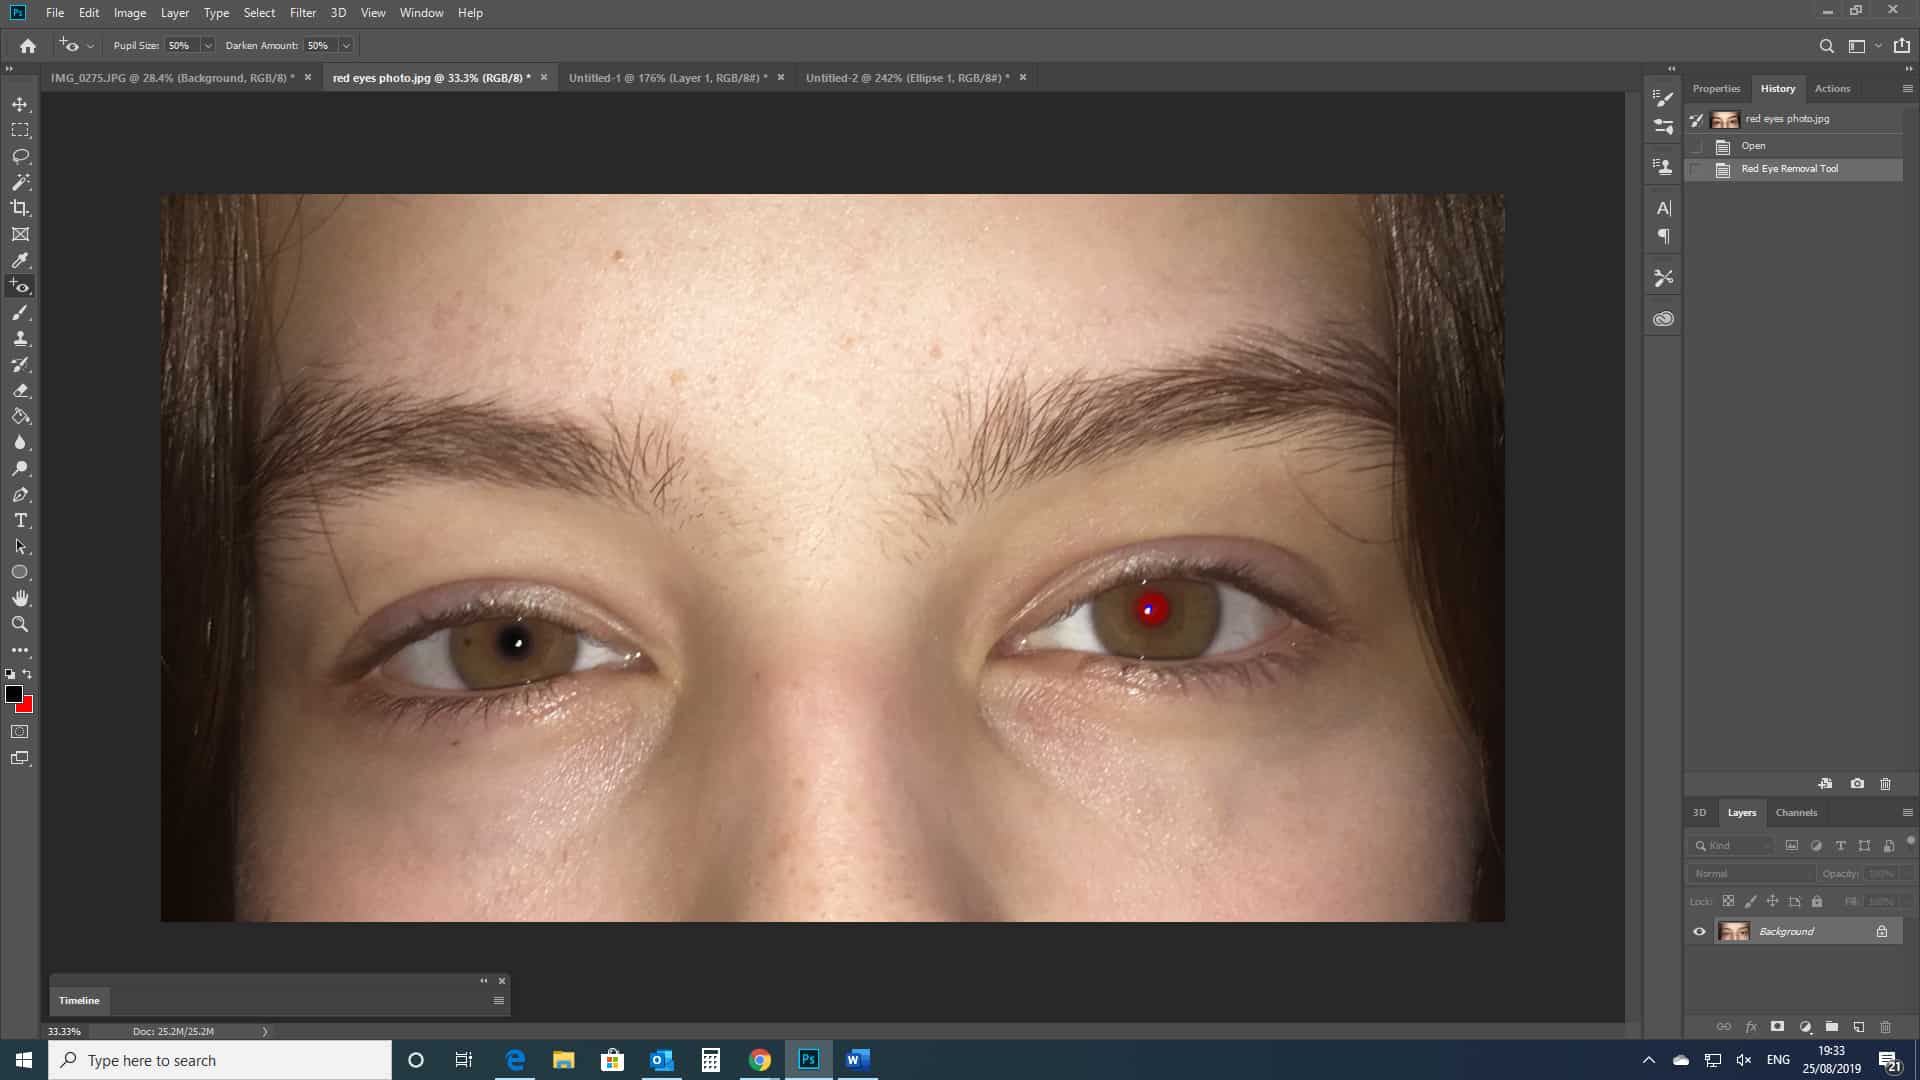
Selecting the tool will cause the opening of a new menu, which may appear along the top of your screen. From this, you can edit the properties of the tool via two different options – ‘Pupil Size’ and ‘Darken Amount’.
These can be altered to be of a value of any number from 0-100, since it works in percentages.
It is recommended that both of these settings are set to be 50%, as these values seem to work well for most images. However, you can play around by changing them up until you achieve a look that is as realistic as possible.
Step 3: Using the Red-Eye Tool
Now that we’ve got the right tool selected, we can use it to get rid of the subject’s red eyes.
There are two easy ways to do this.
Method 1
The easiest way to use this tool is to simply click once on the red circle covering the eyes.
If this doesn’t get rid of the whole thing, you may have to keep doing it until the whole red area of the eye has been replaced.
Method 2
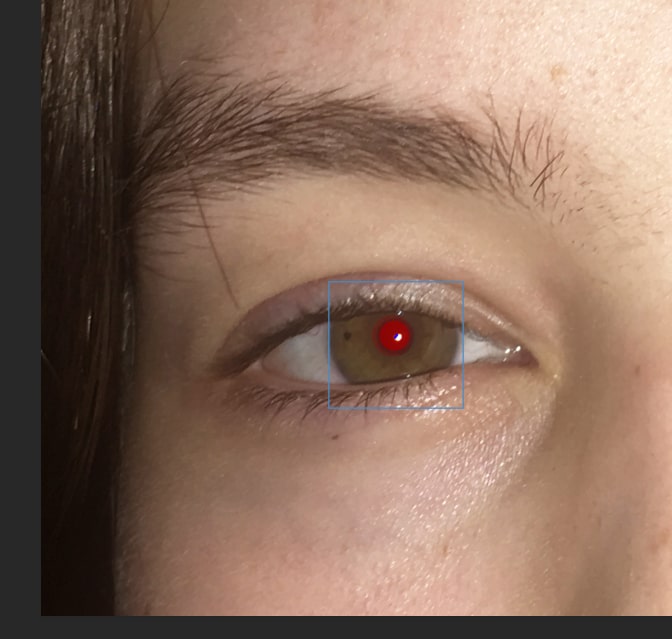
Another just as simple, but slightly more time-consuming (only by a few seconds) method is one that can be done by clicking and dragging to create a square over the eye. Position this square so that the pupil is at its centre.
You can release the mouse once you have created the square, and Photoshop will automatically get rid of the red section of the eye.
Repeat the process for the other eye, until you’re satisfied with the outcome. And now your photo should be free of the red-eye effect!
Avoiding the Red-Eye Effect in Photography
Now that we’ve covered how to edit out red eyes in images, we’ll explore a few ways in which you can avoid even taking a photo in which the subject’s eyes are red in the first place.
Although editing the red out is easy enough, it would make everything a whole lot simpler if there was initially no red present in the natural, unedited photo.
There are two main categories under which we can split the techniques that you can adopt during photography to help avoid red eyes, notably: changing the settings on your camera, and changing the environment.
To change the lighting of the environment that you are shooting in, simply add in lights such as a fill light, to light up your subject. Alternatively, move outdoors, shoot in daylight, or move into a room that is better-lit.
Avoiding Red Eyes by Changing your Camera Settings
As we discussed earlier on in the article, the primary reason that we get red eyes in images is the use of the flash. And the primary reason that we use the flash is to try and light up the image.
Luckily, there are other techniques that you can use to make a photograph lighter, and counteract the effects of a low-light environment. Your camera is likely to have options that you can change the values of to adapt to the lighting in your scene.
You can change the three factors of exposure to make relevant adaptations to your camera settings until your photo appears to be more visible, meaning that you can change your settings to light up the photo as an alternative to using the flash to do so.
ISO: On your camera, the ISO indicates the light sensitivity of the film or imaging sensor. Changing the ISO on a digital camera therefore causes your sensor to be more or less sensitive to light- with a higher value making it more sensitive, and a lower value making it less sensitive.
ISO settings on today’s digital cameras tend to range from 100 at the lowest all the way to around 12,800 or higher.
Clearly, increasing the ISO value when capturing a poorly lit image will hopefully make the sensor more sensitive to the light that is present, giving you a clearer, better-lit image. This makes it a fair competitor for the flash.
However, increasing the ISO will decrease the image quality, resulting in a grainy image, meaning that you will have to decide between having a well-lit noisy photo, or a less well-lit high quality one.
APERTURE: The aperture value on your camera determines how much light enters the lens. The aperture itself is an opening within a lens, through which light enters.
The value that you set your aperture to on a digital camera will decide how widely this ‘hole’ in the lens opens.
Changing the value of this allows you to manually choose how much light reaches the sensor in your camera. So, whilst the ISO determines the light sensitivity of the sensor, the aperture decides how much light actually reaches it.
A lower value, such as F/4 serves as a larger aperture, which causes a wider opening, letting in more light. So, if you’re photographing a subject within a scene which lacks light, then a low aperture can let in as much of the present light as possible, making it a good alternative to the flash when you don’t want your subject to appear as having red eyes.
SHUTTER SPEED: Shutter speed can be defined most simply as the time for which the shutter is open. In other words, its value determines for how long your sensor will be exposed to the scene that you are capturing.
It is measured in seconds, and normally you will be using a value which is a fraction of a second (for example, 1/100). The larger the fraction of the second, the faster the shutter speed will be- this means that, for instance, a value of 1/1600 will open and close the shutter more quickly than a shutter speed of 1/5 will.
When shooting in low light, it is tempting, and often necessary, to go for a very slower shutter speed, since this is what will let in the most light. However, it’s important to note that with a shutter speed of over around 1/50, you will probably require a tripod, or something else on which to balance and stabilise the camera.
Without a tripod, the long exposure will mean that your sensor picks up movement as well as light. So unless you (the photographer) and the subjects in your image can stay completely still for the time that your shutter is open for, you will need to balance your camera on a tripod to ensure that there is no movement that could cause blur within your photograph.
To summarise, to counteract the absence of light without using a flash, a slow / long shutter speed will often do the trick (when used with a tripod to reduce motion blur).
To Conclude…
So, whether you decide to change your camera settings and the lighting in your environment, or rather to edit out any red eyes in post-production, you will now know how to get rid of the Red-Eye Effect once and for all!
BONUS
Are you a frequent Photoshop user and would you like to earn some money with it? Check our 7 Proven Ways to Make Money with Photoshop.
For more information on what you have learned in this tutorial, check out this video by PHLEARN on how to complete the same process.
Hey, I'm a Professional Retoucher making $10k a month thanks to Photoshop.Register to my newsletter to get freelancing tips and a FREE Brush Pack in Bonus! My Newsletter

