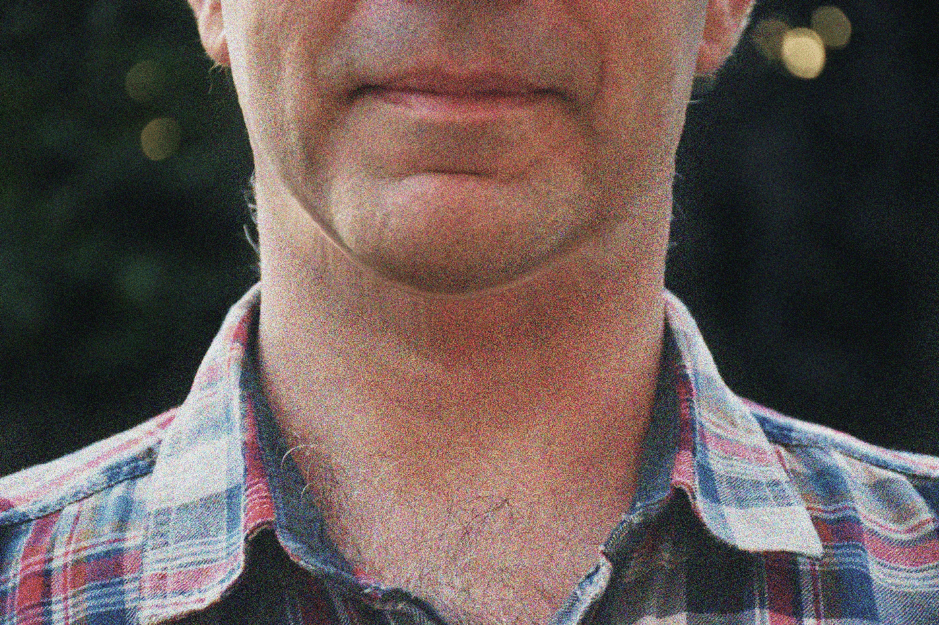
How to Remove a Double Chin in Photoshop
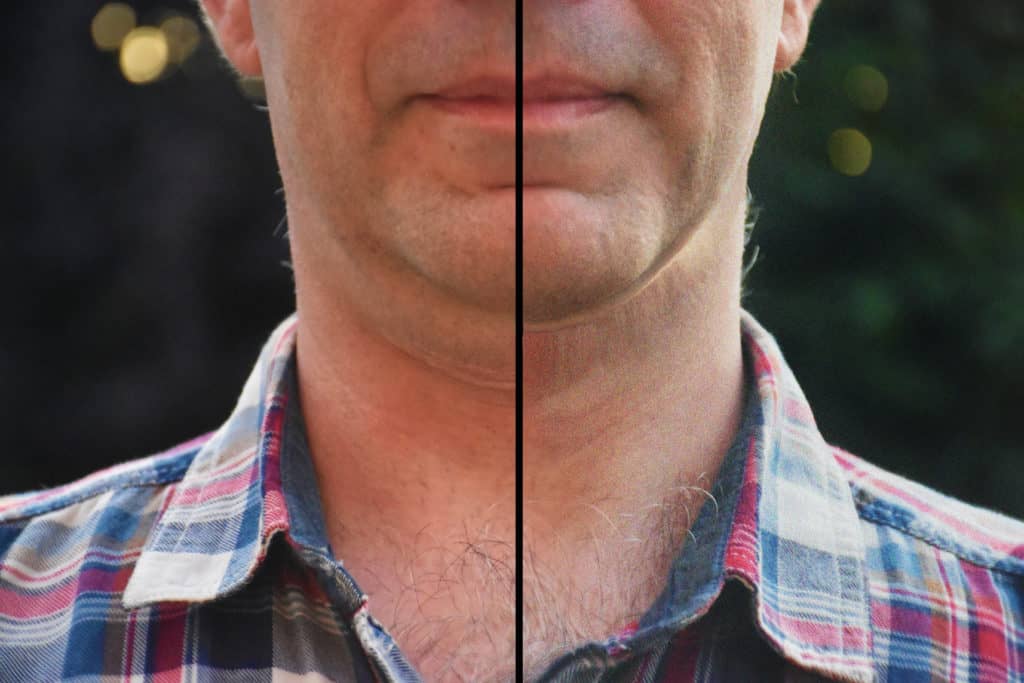
I’m sure it’ll happen to all of us at some point. We’ll take a great photo, but the angle will mean that we appear to have a double chin. So, how can we get rid of it?
Of course it’s pretty easy to avoid taking the photograph from a bad angle in the first place. But if it’s already too late to avoid that, then you can edit out any unwanted features using Photoshop.
This tutorial will teach you how to remove a double chin in Photoshop by using the Forward Warp Tool, within just over 10 simple steps. So, let’s get started!
Step 1: Opening and Duplicating the Image
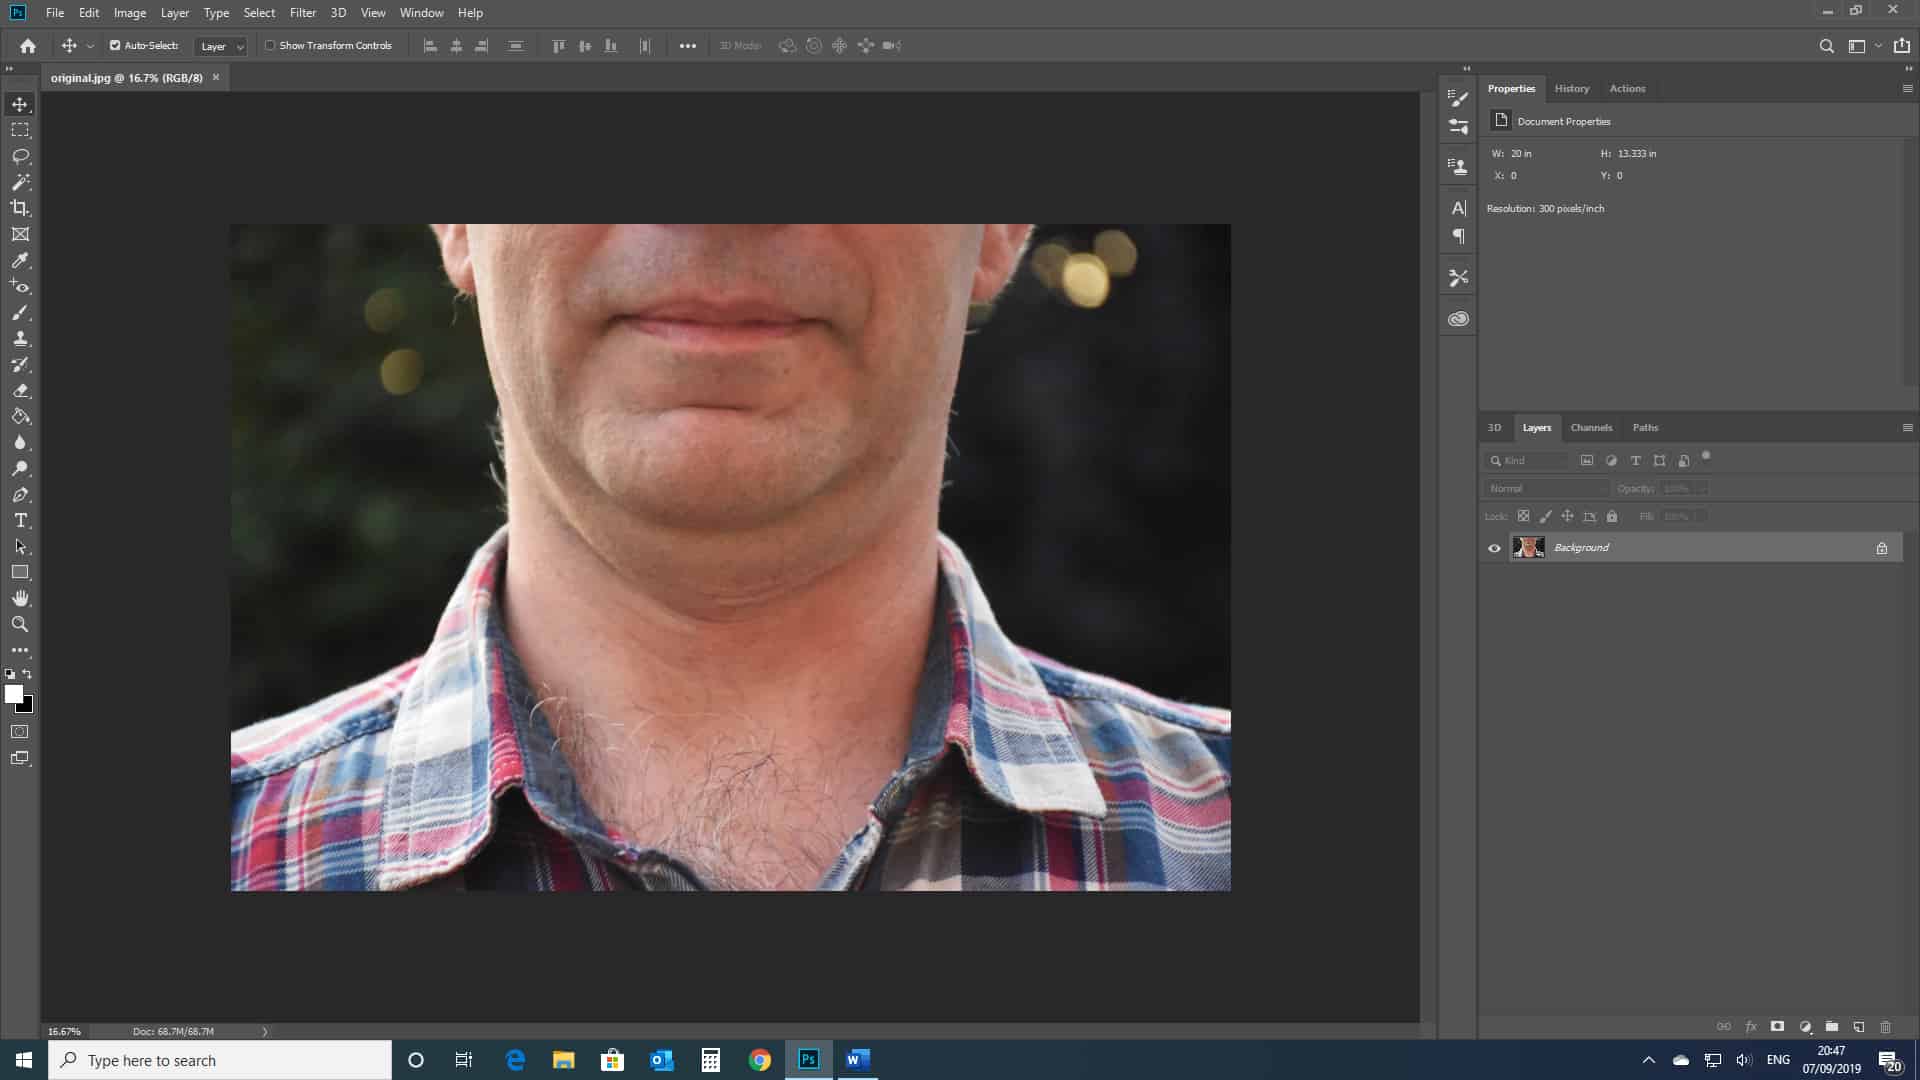
If you haven’t already done so, we’ll need to begin by opening our portrait in Photoshop. To do this, once you’ve opened up the program, you’ll need to head to File > Open and simply select the relevant image from your documents.
Your screen should look something like the one pictured above.
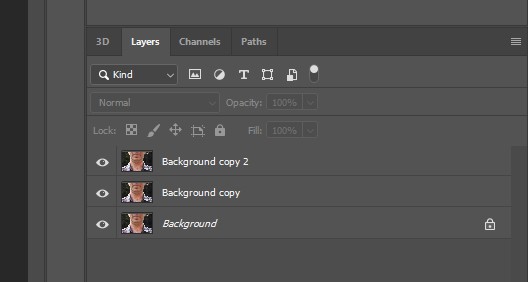
So now that you’ve got the photo open in Photoshop, the next step is to make copies of the layer. This will ensure that any changes that you make won’t affect the original image. You can do this by right clicking on the layer and selecting Duplicate Layer.
You’ll probably want to use this process twice, to create two copies of the layer. This stage won’t affect the appearance of the outcome, but it’s just in place to ensure that you don’t lose your original image.
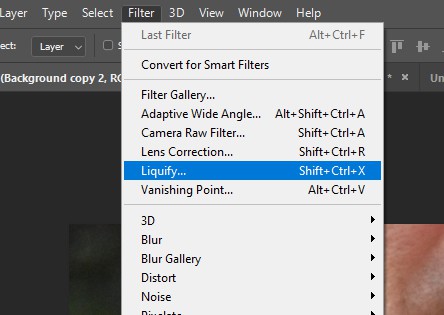
Step 3: Using the Forward Warp Tool
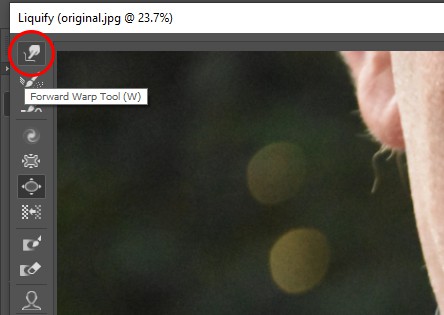
From the menu that appears after selecting the liquify tool, you’ll need to now select the Forward Warp Tool. This can be done by clicking on the icon from the top of the list at the left of the window, or through hitting the shortcut key W.
This tool is the best for editing facial features, making it ideal for removing a double chin.
Step 4: Adjusting the Properties of the Tool
Just before we jump into actually applying any edits to the portrait, we’ll probably need to alter the properties of the tool that we’ve selected.
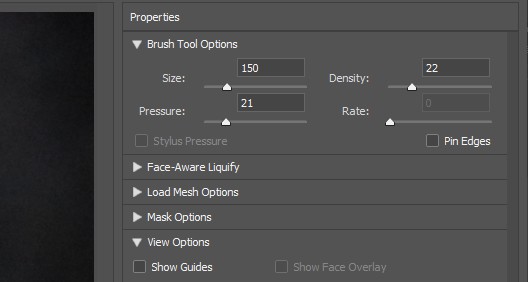
To tailor the effects of the tool so that they apply the perfect edits to your image, you can change the values of the variables listed in the tool’s window. Photoshop allows you to alter the Size, Density, Pressure and Rate of the tool.
The most suitable values will change depending on your image, so have a play around with the settings until you’re happy with how it’s working. The settings that I used are shown below for guidance.
Step 5: Using the Forward Warp Tool
We’re now ready to use the tool to edit out the double chin. Go ahead and start clicking and dragging with your mouse over the areas that you want to edit.
Just play around with this, and it will become easier to use as you get the hang of how the tool works.
Make sure to not take the edits too far. It is important that you don’t get carried away and end up exaggerating the effect- keep it as realistic as possible.
Step 6: Creating a New Layer
Next, we can move on to adding noise to the photo to give it some subtle texture. But first, let’s set up a new layer that we can add the noise onto.
To do this, create a new layer by clicking on the icon second from the right at the bottom of the layers window (Shift + Ctrl + N [Win] / Shift + Cmd + N [Mac]).
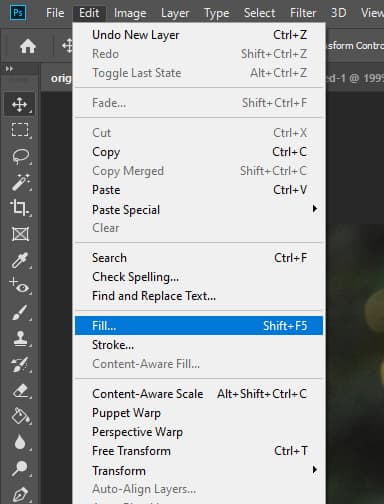
Fill this layer gray by heading to Edit > Fill.
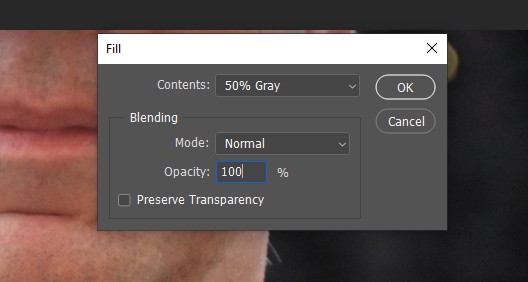
Clicking on this will cause a new window to pop up, in which you can edit the fill settings. Set them as follows:
Contents: 50% Gray
Mode: Normal
Opacity: 100%
Step 7: Adding Noise to the Photo
Now that we’ve got the new gray layer set up, the next step is to add noise to the layer.
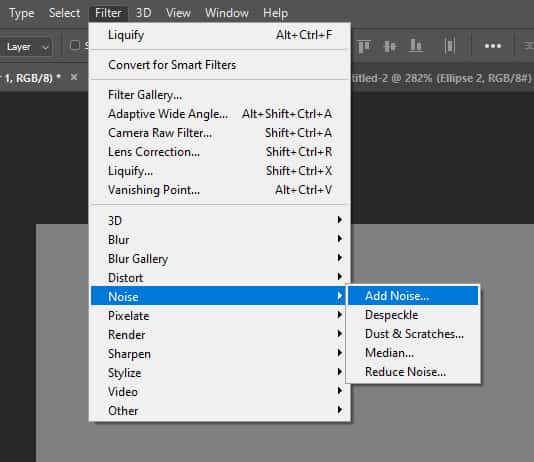
Head to Filter > Noise > Add Noise.
A new window will open, where you can set the intensity of the noise. I set this to about 4%, however this value may change depending on your image, notably the size of it. Play around with this until you achieve a good effect.
Step 8: Blurring the Noise
To make this effect a little less overwhelming, the trick is to blur the layer that the noise is on. This will mean that the effect is still present, but appears less harsh.
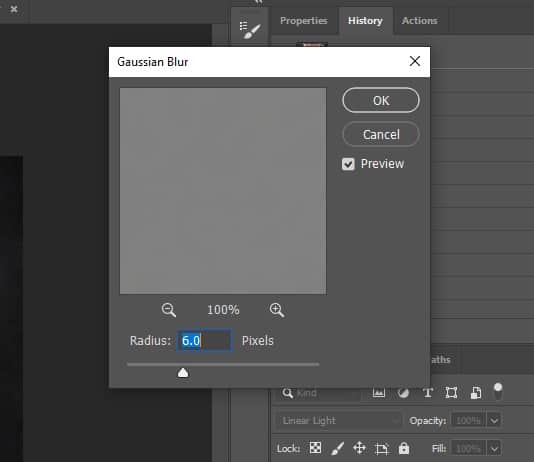
From the bar along the top of your screen, select Filter > Blur > Gaussian Blur.
Doing so will cause a new window to appear, in which you can choose a value to set as the radius of the blur.
The appropriate value will again vary depending on the size of your image.
The larger the radius, the more blurry the layer will become. And the blurrier the layer, the less prominent the effect will be. Feel free to experiment with this setting until you are left with an appearance that you’re happy with.
Finally, change the blend mode to Linear Light, to make the noise mimic the texture that you want on your photo.
Step 9: Creating a Clipping Mask
Next, add a clipping mask to the layer by right clicking on the layer and selecting Create Clipping Mask.
Step 10: Creating Shadows
So, by now you have pretty much edited out the double chin, but there are still a few more adjustments that can be made in order to make the outcome appear a lot more realistic.
The first, and perhaps the most important, way in which you can make your edit even better is by creating shadows under the newly positioned chin, and on the neck area.
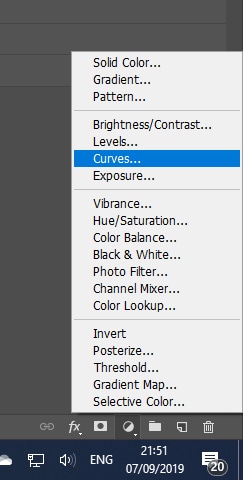
To do this, let’s go ahead and create a Curves Adjustment Layer, by clicking on the fourth icon along the bottom of the layers window (indicated below), and then selecting Curves.
We’ll use this adjustment layer to create a version of the image that is darker, to mimic the tones that would be existent in an area of shadow.
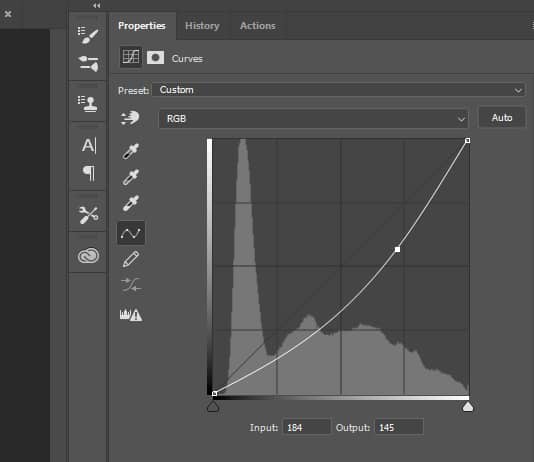
Creating a Curves Adjustment Layer should prompt a window to open, in which you are able to edit the image through making changes to the brightness and contrast.
If you are new to this tool, feel absolutely free to now have a play around with the shape of the curve by dragging it and observing what effect it has on the visual properties of the piece.
To darken the whole image, drag a point on your curve until it appears to have a similar shape to the one displayed in the screenshot above, or until the image has turned dark enough for it to mimic tones that would normally be present in an area of shadow.
Now of course you don’t want the entirety of your photo to be composed of shadow tones. Instead, we want the adjustments that were just made to be applied to only a few relevant areas of the image.
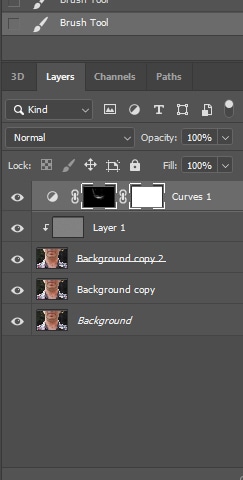
When working with Photoshop, there is an easy way to make sure that an effect is only applied to some sections of a photo. By adding a Layer Mask to the Adjustment Layer, you can choose which areas will appear darker, and which are going to be unaffected.
To do this, make sure that you are clicked on the adjustment layer, and select the third icon along the bottom of the Layers Window.
Doing this will add a layer mask to the adjustment layer, which you can fill black with the paint bucket tool (shortcut key G).
With layer masks, areas that are painted black become invisible, and areas that are painted white will correspond with areas where the effect is visible.
So by filling the layer mask on the adjustment layer with black, we have made the darkened effect invisible. To bring the effect back in areas of shadow, use a white brush where the shadows would be cast by the chin or other facial features- focus on the chin and neck.
You can use a black brush to undo this if you make a mistake.
Step 11: Intensifying Highlights
As we’ve just added in shadows, we can create more of a balance between tones by now adding in areas of highlight to make the edited outcome appear more realistic.
To do this, complete the exact same process as shown in step 10, but with a curve that makes the image brighter.
And now the process should be complete! You should now have a portrait that you’re happy with, and the skills needed to alter a variety of facial features in the future, should you need to do so.
BONUS
For more information on the skills discussed in this article, check out this video by The Photography Learning Lounge, which will teach you the easiest way to remove a double chin in Photoshop.
Last but not least, we share with you 7 Proven Ways to Make Money with Photoshop and their respective potential earnings.
Hey, I'm a Professional Retoucher making $10k a month thanks to Photoshop.Register to my newsletter to get freelancing tips and a FREE Brush Pack in Bonus! My Newsletter

