Accurate White Balance Adjustments In Photoshop
What is White Balance?
White balance is a term that is frequently used in Photography. However, what does it actually mean?
White and black, technically speaking, are misnomers. Black is an absence of light whereas white is the presence of all colors of light within a specific range.
Human vision is uniquely adapted to recognizing white in nature, as we see color in the context of other colors. However, a camera cannot make this judgment (yes, the AUTO white balance feature on your camera is lying to you, but more on that later).
As a result, images produced by cameras may exhibit a color cast that does not look quite right when viewed. There is nothing technically wrong with it, but sometimes it can cause the image to appear unnatural or different from the way we perceive the scene in real life. In order to correct this artifact, we must perform a white balance adjustment.
This tutorial is going to outline some useful methods to find the “correct” white balance for a scene, but ultimately you must ALWAYS use your own judgment when performing a white balance correction because there is no supreme law that governs color: it is always subjective.
So without further ado, let’s dive right in.
The Principles of White Balance
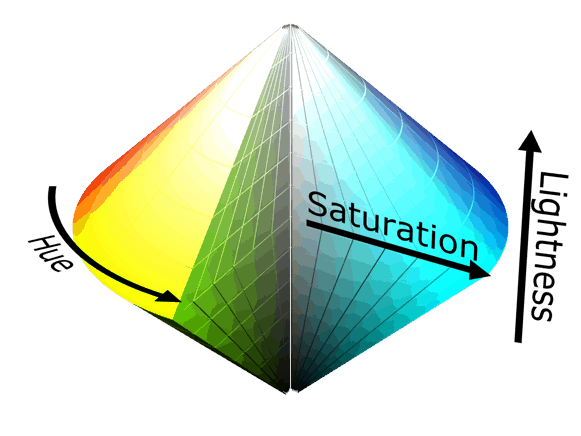
Humans and cameras can only see colors within a certain brightness range. If the brightness is too low in the range, the colors lose saturation and end up as black. Conversely, with a brightness too high, the colors lose saturation and look white.
This property can be represented in a 3-dimensional graph using what is known as the HSL model: Hue, Saturation, Lightness.
Image Courtesy Wikimedia Commons
From this property, we can learn two things:
- The brightest and darkest points of an image contain NO color
- The absolute middle of the brightness zone is where maximum saturation is possible.
Therefore, in order to accurately white balance an image all we need to do is find the black, white, and gray points of an image and make sure they contain no color information.
Now that we know this, let’s open up an image in Photoshop.
If you don’t know how to do that, you can learn that here. I am using this image of a friend (click here for free stock images best websites). As you can see, every part of the image has a strong green tint.
Step 1: Duplicate Your Background Layer
Before we begin, we must convert out image to 16 bit. To do this, go to the main menu and navigate to Image > Mode > 16 Bits/Channel.
Now, go to Layers Pane on the bottom right of your screen, and right click on the Background layer. In the menu that pops up, select Duplicate layer.
You will now see a new layer called “Background copy”.
Step 2: Finding the black point of the image
We will now use a tool called Threshold to find the black point of the image.
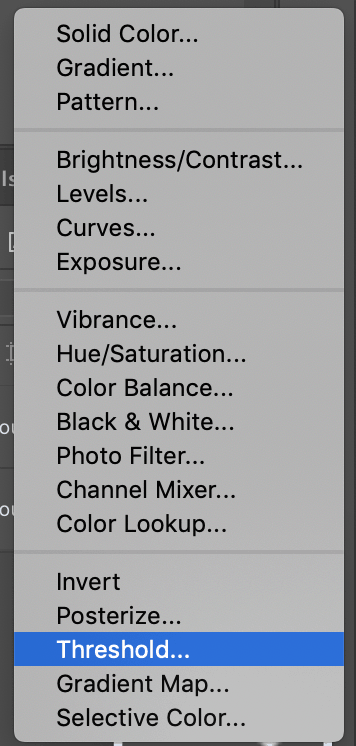
On the bottom right underneath the Layers Panel is the Adjustments icon. Click it.
In the Adjustments menu that pops up, select Threshold.
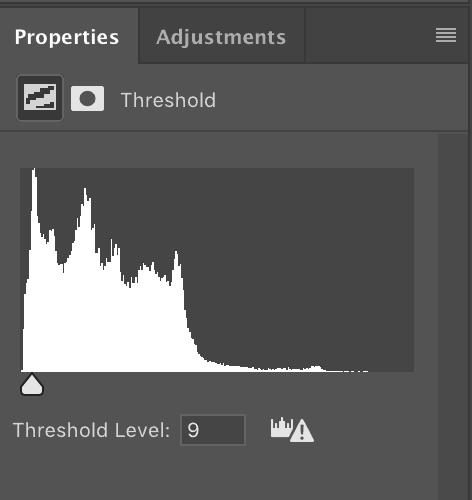
Your image will now be in black and white. In the Threshold menu, drag the slider all the way to the left. The value will be zero and your image will be complete white. Now, slowly begin to drag the slider to the right until a small amount of black detail begins to show. My value was at 9.
This is what your image will look like.
Thanks to the Threshold tool, we can now clearly see the black areas of the image. We now need to select and save this value using the Color Sampler tool.
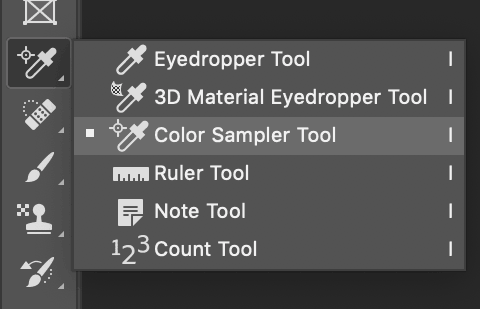
This can be found in the Tools Palette. Click and hold the Eyedropper tool to display the tool menu and select the Color Sampler tool.
Now, use the Color Sampler tool to click on a dark spot in the black region of the image. The tool will leave behind a marker which we will use later.
Now, go into the Layers Pane and delete the Threshold layer by clicking on it and hitting Backspace [Win] or Delete [Mac].
Step 3: Finding the white point of the image
We are going to perform the same process as in Step 2, with only minor changes.
Go to the Adjustments and select Threshold.
Now, in the Threshold menu, move the slider all the way to the right, then slowly start moving it leftward until just a hint of white detail is visible.
This is what your image should look like. The white areas on the image represent the white point of the image.
Just as in the previous step, use the Color Sampler tool and click on an unbroken white region within the image. The tool will leave behind a marker that shows the point of selection.
Now go ahead and delete the Threshold layer.
You will now have two markers, one with the black point and one with the white point.
Step 4: Finding the gray point of the image
This step is a little more complicated, since the image has many colors and may not necessarily contain any grays.
Therefore, to find the gray point we will use a subtraction method. We will create a gray layer, and then subtract the image pixel-by-pixel from that layer. Wherever the image consists of gray values, the output will be the darkest.
To do this, create a new layer by pressing Ctrl + Shift + N [Win] or Cmd + Shift + N [Mac].
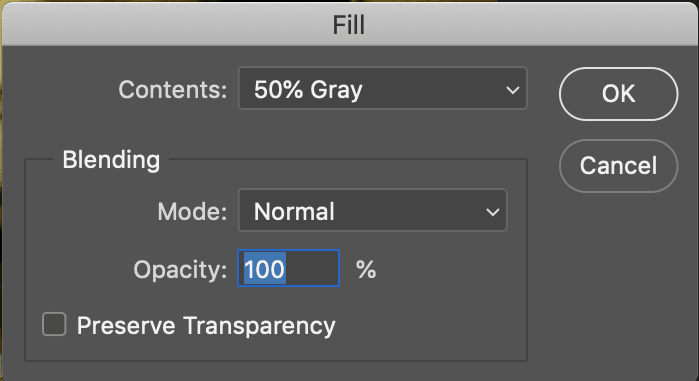
Now, go to the main menu, and navigate to Edit > Fill. The following menu will pop up.
Ensure that the settings are exactly the same as above and hit OK. Your image will now be completely gray.
Now, go to the Layers Pane on the right, and click on Blend Mode. By default, it is set to Normal.
In the menu that pops up, select Difference.
Your image will now look like this.
Within this image, the darkest portions are the ones that are closest to gray. Feel free to zoom in and find any particularly dark spot within the image. Again, use the Color Sampler tool to mark this dark spot.
Now, go ahead and delete the gray layer from the image.
Step 5: White Balancing the image
Now that you have your black, white, and gray points selected, it is time to perform the actual white balance of the image.
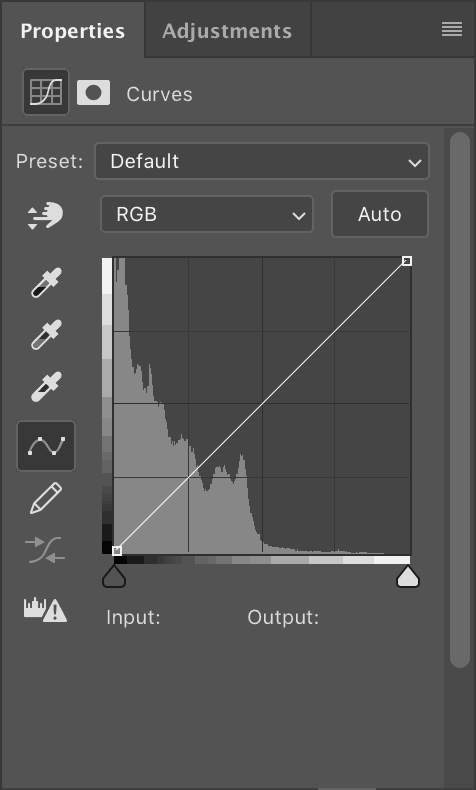
Go to the Adjustments menu and select Curves.
In the Curves panel, you will see three eyedroppers on the left. These correspond to Black, Gray, and White respectively.
To balance the image, first select the Black eyedropper and use it to click on the Black marker left by the Color Sampler tool. In my case this was Marker #1.
Then, use the Gray eyedropper to click on the Gray marker (Marker #3), and finally use the White marker to select Marker #2.
Voila! You will now have a White Balanced picture!
Step 6: Finishing touches
The image may now be balanced, but it is a lot harsher in comparison to the original image and is a little heavily saturated. To fix this, I will add some more adjustments.
- Lower brightness using Brightness/Contrast
- Lower saturation using Hue/Saturation
- Increase exposure using Exposure
- Increase gamma correction using Exposure
Hey, I'm a Professional Retoucher making $10k a month thanks to Photoshop.Register to my newsletter to get freelancing tips and a FREE Brush Pack in Bonus! My Newsletter

